In this tutorial you will learn how to turn your images into something more like a real photograph by simply adding a white frame to them. What’s more, the tutorial is easy enough for those new to Photoshop to be able to create something impressive, and create it quickly.
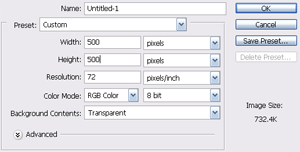
First things first though, in Photoshop click file>new to create a new image. This should have a transparent background and be 500*500px.
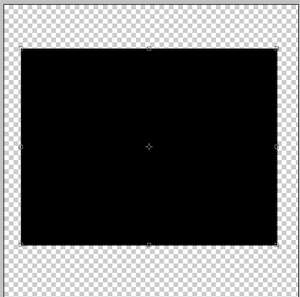
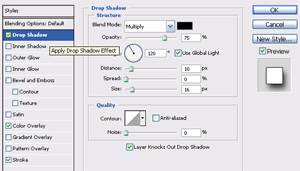
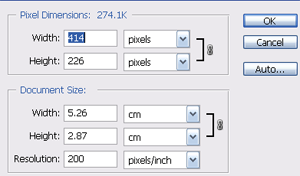
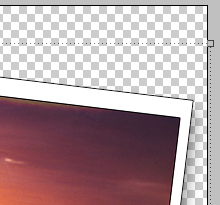
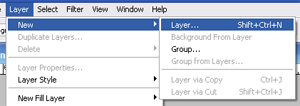
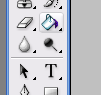
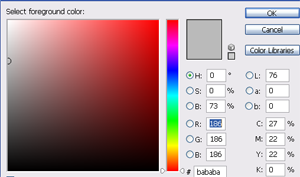
Select the rectangle tool (u) and drag out a rectangle on the canvas, it doesn’t matter at this point what color it is but do make sure the rectangle doesn’t fill the whole canvas. You need to convert this layer to a raster layer, and do this by right clicking on the layer and selecting ‘Rasterize Layer.’ Then right click on the layer and select ‘Blending Options’ after which you should select the following Shadow setting: distance= 10px, Spread= 0%, Size= 16px. Leave the rest as per the default settings. For the Color Overlay setting select #FFFFFF from the color picker and make sure it has 100% opacity, meanwhile the Stroke setting should be 1px wide on the outside, select #000000 from the color picker and then click OK. You should now have what looks like the back of an old photo on your canvas, so quite obviously you need to place a photo into it. Open your image and make sure it is the right size by clicking image>image size and setting this to 414px*226px before clicking OK. Now drag your image layer from the layer pallet to the canvas of the frame image. You will need to use the move tool (m) to move the image into place, and it is recommended that you leave a piece of frame at the bottom. Merge the two layers together so that you can move them together later on, and to do this select the move tool (m) and move the mouse to just above one of the corners of the transform box. The cursor should change to a curved line with an arrow at each end which allows you to drag the image until it is at a good angle of about +7°. You now have the final frame and photo, but to finish things off how about adding a background? Do this by first adding a new layer by clicking layer>new>layer and then clicking OK when the dialog box pops up. Drag this layer under the other layer on your layers pallet, and select the paint bucket tool (g). Change the foreground color to the color with which you wish to fill the background, a light color is recommended because this allows the shadow of the frame to show nicely. Click anywhere on your canvas and the color will fill automatically. You should now have the final outcome on your screen. Obviously the photo will be different, but the effect should look something like this: