Raspberry Pi LED control (Python)

Updated vegaseat 0 Tallied Votes 655 Views Share

Well I done it! Got bored after the holidays and bought a Raspberry Pi credit card sized computer ($35), the least expensive LED TV and a Logitech wireless Keyboard/Mouse combo. The way I ordered the kit it cost almost twice as much, but it came with a good 2.5A powersupply, a pinout strip, a solderless breadboard, parts to play with and a wireless dongle. Brings back memories of process automation in my past.

My first Raspberry project was to get introduced to Linux again, actually a very good OS. It came with Python27, Python32, C, C++, Ruby and Java preinstalled. I used IDLE and Python27 to control some of the many Raspberry pins to exercise 4 LEDs (red, yellow, blue and green). You can't draw too much current, savely about 15 mA, but that can be remedied with an inexpensive power MOSFET that can drive a motor and also isolates the Raspberry Pi from damaging voltages.

See the MOSFET video at: https://www.youtube.com/watch?v=I1h-HZmIJ4E

#!/usr/bin/python
''' rp_output_test104.py

Turn 4 different LEDs on and off

The black terminal strip is located on the upper side of the Raspberry B+ board
there a two rows of 20 physical pins each
the upper row starts with the even pins 2 (upper left corner, ulc) to 40
the lower row starts with the odd pins 1 (lower left corner, llc) to 39

We will be using the following pins:
GND (pin 9)
GPIO17 (pin 11)
GPIO27 (pin 13)
GPIO22 (pin 15)
GPIO23 (pin 16)
17, 22, 23, 27 are the internal Broadcom (BCM) numbers

For this experiment I used the LED colors red, yellow, blue, green

Each of the LEDs is in series with a 220 ohm current limiting resistor
connect the LED cathode (has flat spot, shorter lead) toward GND and
the free end of the resistor to the proper GPIO
GPIO HIGH will be about +3 volt (each LED draws about 5 mA)
GPIO LOW will be 0 volt

220 ohm --> red(2) red(2) brown(1) gold(5%) bands
(you can use a 200 to 500 ohm resistor to limit the current)

Note:
each GPIO is limited to no more than 15mA current draw
the sum of all currents flowing through GPIOs is limited to 50mA

To execute this code from the idle IDE start idle as root (super user)
via terminal command:  sudo idle

To run from the LXTerminal (needs shebang line) -->
(assume that the code is in directory rpi_python)
cd rpi_python
sudo python rp_output_test104.py

picture at: prntscr.com/5kbm3s
code stored at: http://pastebin.com/riezGXTE

for parts used see ...
http://www.canakit.com/raspberry-pi-starter-ultimate-kit.html

pastebin ...
http://pastebin.com/N5mxYfVA

tested with a $35 Raspberry PI B+, Linux/Rasbian OS, Python27
by  vegaseat   23jan2015
'''

import RPi.GPIO as gpio
import time

def output_on(nn):
    # GPIOnn will go to +3.3 volt
    # you can use gpio.HIGH, True, or 1
    gpio.output(nn, gpio.HIGH)

def output_off(nn):
    # GPIOnn goes to 0 volt
    # you can use gpio.LOW, False, or 0
    gpio.output(nn, gpio.LOW)
    

def output_blink(nn, blinks, delay=1):
    for k in range(blinks):
        print("Blink {}".format(k+1))
        output_on(nn)
        time.sleep(delay)
        output_off(nn)
        time.sleep(delay)

# use Broadcom GPIO 00..nn numbers (recommended)
gpio.setmode(gpio.BCM)

led_list = ['red', 'yellow', 'blue', 'green']
# these are the BCM GPIO numbers we are using
# the red LED is connected to GPIO17 and so on
gpio_list = [17, 22, 23, 27]
# set them all to output
for nn in gpio_list:
    gpio.setup(nn, gpio.OUT)

delay = 3
for color, nn in enumerate(gpio_list):
    sf = "LED {} on for {} seconds ..."
    print(sf.format(led_list[color], delay))
    output_on(nn)
    # keep LED on for delay seconds
    time.sleep(delay)
    output_off(nn)
    # wait 1 second
    time.sleep(1)


# let's do some blinking
nn = 17
blinks = 5
delay = 0.5
sf = "LED {} blinking {} times with {} second delay"
for color, nn in enumerate(gpio_list):
    print(sf.format(led_list[color], blinks, delay))
    output_blink(nn, blinks, delay)

print("Real quick action ...")
for k in range(20):
    for nn in gpio_list:
        output_on(nn)
        time.sleep(0.1)
        output_off(nn)
        time.sleep(0.05)
        
print("Turn all LEDs on for 1 minute ...")
for nn in gpio_list:
    output_on(nn)

time.sleep(60)

# reset all GPIO channels used by this program 
gpio.cleanup()

#help(gpio)
Lardmeister 461 Posting Virtuoso

Sounds interesting!
Can the Raspberry produce sounds?

Another good video on MOSFETs:
https://www.youtube.com/watch?v=Te5YYVZiOKs

vegaseat 1,735 DaniWeb's Hypocrite Team Colleague

The new model Rapberry Pi 2 has just come out. It is now a quad core 900 Mhz CPU with 1 GB RAM running about 6 times faster than the Raspberry Pi B+ model.
The size and connections have been kept the same as has the price of $35.

Can barely wait to get my hands on one.

Member Avatar for iamthwee
iamthwee

Nice snippet. Don't forget the arduino does this out of the box. It is meant to directly interface with things like leds, or other hardware protocls.

vegaseat 1,735 DaniWeb's Hypocrite Team Colleague

Not sure if the arduino allows Python as conrol language.

Member Avatar for iamthwee
iamthwee

Not sure if the arduino allows Python as conrol language.

I'm unsure too as I've never needed to use anything but the standard arduino language which is a mix of c and java. The IDE unfortunately runs on java.

With the arduino you wouldn't need a mosfet either, just attach a suitable resistor, although pins 12, 13 has one built into the board.

Member Avatar for iamthwee
iamthwee

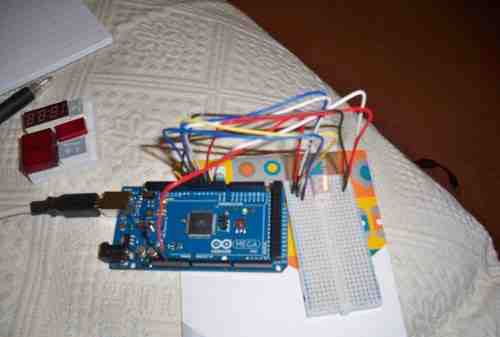
Below is a picture of a test with a seven segment led, the same principal is used for standard leds you just send a digital 'high' to the pin out.

ar.jpg

You could probably use reduce the number of wires needed by multiplexing a TPIC6x595 shift register.

vegaseat 1,735 DaniWeb's Hypocrite Team Colleague

People have connected the Arduino with a Raspberry Pi via a USB cable and get the best of both worlds since the Raspberry Pi lacks analog IO and the Arduino's computing power is rather limited.

See ...
http://www.linuxuser.co.uk/tutorials/program-your-arduino-with-raspberry-pi

Slavi 94 Master Poster Featured Poster

I actually had to make a line follower robot few years ago and for the design I made a circuit board which is 'literally' what andruino is except that the microcontroller I used was ATmega32 instead of ATmega(not even sure what they use on Andruino now xD)
but then I used c to program it and it was pretty cool to play around with. Indeed having Andruino and their own language and IDE is faster way to develop embedded software and yea #Vega, I think you are required to use their language but it has barely any difference compared to C and their tutorials are pretty easy to understand as in how to control the board. It literally comes down to setting pins as either input/output and playing with the values on them, lots of inbuilt functions etc

I am not very familiar with raspberry PI but it seems like it has a high potential, hopefully I'll get my hands on one of these later on

vegaseat 1,735 DaniWeb's Hypocrite Team Colleague

I am using my Raspberry Pi (RBP) as my Linux machine too. Some innovative folks have stacked a number of RBPs to successfully model an inexpensive super computer.

Sounds:
I have used Python module PyGame to play sounds and have send the sound to my TV monitor via the HDMI cable. The RBP does have an extra audio connector that probably can go to an amplified speaker, but i haven't used it yet. You can also use Python to create a squarewave and apply that to one of the general purpose output pins to drive a small piezoelectric speaker directly.

vegaseat 1,735 DaniWeb's Hypocrite Team Colleague

The Raspberry Pi has 2 connectors that can be used with an inexpensive video camera element. There seem to be a lot of folks that use the RBP as a small programmable camera.

Add a motion sensor and you have a good system for wildlife pictures/videos.

DragonMastur 23 Light Poster

I have a raspberry pi(Using it right now) and an arduino.Ill see if I can use them together. Iam useing the arduino for a science expiriment and know both python and sketch(I think that is the language that arduino runs on.) Thank vegaseat.

DragonMastur 23 Light Poster

I tried copy and pasting the program at the top and it gave me a bunch of syntax errors. Whats up with that. (Im on my raspberry 3.1415926358589793628(pi). Ans yes I have that much memoriesed, not much.

vegaseat 1,735 DaniWeb's Hypocrite Team Colleague

Please list your traceback error message, so somebody can help you!

DragonMastur 23 Light Poster

I think I figuered it out. When I copy and paste on my raspberry pi it doesn't like the tabs. I have to retype the entire program. vegaseat you said you used a raspberry pi. Try copy and pasting the program.

vegaseat 1,735 DaniWeb's Hypocrite Team Colleague

Hmmm, highligting the code by double clicking works, but I have no luck with copy and paste to an editor on Debian Linux (Windows works fine).

I left a copy of the code on pastebin
http://pastebin.com/N5mxYfVA

vegaseat 1,735 DaniWeb's Hypocrite Team Colleague

I did some detective work using Python looking at some of the ordinal values. I found pairs of ascii values of 160 and 194 that seem to sneak in from the Linux clipboard during copy and paste. These characters are not visible in the editor, but gives a Python syntax error (plenty of those errors).

So I wrote a small Python program that takes the whole offending code as one string, loops through it character by character. It skips the offending characters and builds up a corrected code string that is then saved to a .py file. The new code file works like a charm in the Idle IDE.

See ...
http://pastebin.com/YHt5mu2H

Be a part of the DaniWeb community

We're a friendly, industry-focused community of developers, IT pros, digital marketers, and technology enthusiasts meeting, networking, learning, and sharing knowledge.