Are you a developer looking to improve your WordPress skill set by including WordPress and Bootstrap development together? Well, you’re in the right place.
The following is a guide that helps you integrate Bootstrap, a powerful front-end development framework with the world’s most popular CMS, WordPress. For this article, we will be using the latest Bootstrap version, which is v4.4.1, and integrating it with a WordPress theme.
In the developer sphere, both WordPress and Bootstrap hold immense value. If the former dominates the CMS industry with a market share of 63.1%, then the latter occupies the coveted position of being the most popular framework for JavaScript development out there, with sites like CNN, Netflix, ESPN, and Intuit using the framework to power up their site.
Building a theme with an open-source platform has its fair share of benefits which we will discuss below. For developers, it provides an opportunity to hone their skills, since open-source development experience is a major selling point when applying for a job.
Now, let’s take an in-depth look at why you might need WordPress to develop your site.
Why WordPress?
What we want to talk about here is the ease of use at which you can develop websites with WordPress. From a basic website to a powerful blog, or even developing an app, with WordPress, you can easily perform all of those actions regardless of whether you’re an experienced developer or webmaster with no experience of coding at all.
With just a few clicks, individuals from all walks of life can select the theme that suits their business model best by going to Users > Appearance > Themes. At the same time, if they have a few theme files on their WordPress, they can even do so by going to wp-content > themes. While there are themes that are free, there are plenty of paid themes that can power up your store even further with their own set of premium features.
But being developers ourselves, we will create our own theme and customize it the way we want. To do that, we will combine Bootstrap with WordPress.
Why Bootstrap?
If you want to build a highly responsive, mobile-friendly website, then you’re going to want to have to use Bootstrap as your best choice. As we’ve mentioned before, as a framework, it stands heads and shoulders above the competition, even ousting jQuery, a once-powerful but now obsolete framework for front-end JavaScript development.
.
With all of that said and done, I believe it's time we start to integrate WordPress with Bootstrap.
Mapping the Basic Structure of a WordPress Theme
At its core, a WordPress theme consists of two files. The first is the style.css file, and the second is the index.php file.
While the former is a styling document that gives the theme its color and aesthetic, the latter is the actual skeleton of the theme, and which contains the fallback template WordPress relies on if there is no prevalent styling available.
There are plenty of other files that we can use but for now, we will add theheader.php, footer.php, and functions.php to our WordPress – Bootstrap integration.
So, let’s start with the very first step.
Step 1: Create the Theme Folder
From your WordPress installation directory, go to wp-content -> themes. Here we will create a folder titled bs-theme.
Step 2: Add style.css
Let’s add our CSS file now. This is also the place where we will be placing our custom CSS code.
Without leaving any blank space at the top, you add the meta-information about your theme in between the CSS comments. Whenever you do this, it is important that you place the following parameters with your own information: <THEME_URI <AUTHOR_NAME> <AUTHOR_URI>
Now the code snipet will look like this.
/*
Theme Name: BS 4 Theme
Theme URI: <THEME_URI>
Description: A Theme for WordPress with Bootstrap for styling.
Author: <AUTHOR_NAME>*Emphasized Text Here*
Author URI: <AUTHOR_URI>
Version: 1.0
*/
Now you add the custom CSS styles in the meta section. For example, let’s add the following rules within the <body> tag:
@import url(https://fonts.googleapis.com/css?family=Montserrat:700);

body {
  padding-top: 4.5rem;
  font-family: 'Montserrat','Helvetica Neue',Arial,sans-serif;
  color: #001A33;
}
Step 3: Creating the Header Section
Let us now create the header.php inside the theme. For that, we will be adding the following:
<!DOCTYPE html>
<!--[if lt IE 7]><html class="no-js lt-ie9 lt-ie8 lt-ie7"> <![endif]-->
<!--[if IE 7]><html class="no-js lt-ie9 lt-ie8"> <![endif]-->
<!--[if IE 8]><html class="no-js lt-ie9"> <![endif]-->
<!--[if gt IE 8]><!--> <html class="no-js"> <!--<![endif]-->
  <head>
    <meta charset="utf-8">
    <meta http-equiv="X-UA-Compatible" content="IE=edge,chrome=1">

    <title><?php wp_title('«', true, 'right'); ?> <?php bloginfo('name'); ?></title>

    <meta name="description" content="">
    <meta name="author" content="">

    <meta name="viewport" content="width=device-width">
    <link rel="pingback" href="<?php bloginfo('pingback_url'); ?>" />

    <?php wp_head(); ?>
</head>
<body <?php body_class(); ?>>
  <nav class="navbar navbar-expand-md navbar-dark fixed-top bg-dark">
    <a class="navbar-brand" href="#">
      <?php bloginfo('name'); ?>
    </a>
    <button class="navbar-toggler" type="button" data-toggle="collapse" data-target="#navbarCollapse" aria-controls="navbarCollapse" aria-expanded="false" aria-label="Toggle navigation">
      <span class="navbar-toggler-icon"></span>
    </button>
    <div class="collapse navbar-collapse" id="navbarCollapse">
      <ul class="navbar-nav mr-auto">
        <li class="nav-item active">
          <a class="nav-link" href="/">
            Home <span class="sr-only">(current)</span>
          </a>
        </li>
      </ul>
    </div>
  </nav>
In the HTML head section, you will notice that we’ve added WordPress for the meta information. Using tags like bloginfo(‘name’) for the site’s name, wp_title() for the title, andwp_head() to start up the wp_head hook that’s used to add multiple functionalities to WordPress.
To create mobile-responsiveness, we have added several classes provided by Bootstrap that helps create a navigation bar. But these classes do not give our WordPress navigation a dynamic display.
Our next step would be to make the Bootstrap navigation bar dynamic with the help of WordPress.
Step 4: Bootstrap Navigation on WordPress
For this step, we will be using the walker navigation class provided by WordPress. Essentially, it allows web developers to bypass data structures so that it can render the HTML on your site. There are several Bootstrap walker classes available on the internet. For the sake of convenience, we will be using the following GitHub classes.
We take the bs4navwalker.php file and place it in our root WordPress folder (remember the one that was titled bs-theme in step one.
After, you have to create the functions.php file (be sure to name it as such since it is a requirement by WordPress) within the root directory. Next, write the following code:
require_once('bs4navwalker.php');Now let’s integrate the walker class in our theme files by placing it in the nav element in the code above:
This code runs under the assumption that we’ve already a menu bar in WordPress and have pages created and stored in the database.
<nav class="navbar navbar-expand-md navbar-dark fixed-top bg-dark">
  <a class="navbar-brand" href="#">
    <?php bloginfo('name'); ?>
  </a>
  <button class="navbar-toggler" type="button" data-toggle="collapse" data-target="#navbarCollapse" aria-controls="navbarCollapse" aria-expanded="false" aria-label="Toggle navigation">
    <span class="navbar-toggler-icon"></span>
  </button>
  <?php
    wp_nav_menu([
      'menu'            => 'primary',
      'theme_location'  => 'menu-1',
      'container'       => 'div',
      'container_id'    => 'navbarCollapse',
      'container_class' => 'collapse navbar-collapse',
      'menu_id'         => false,
      'menu_class'      => 'navbar-nav mr-auto',
      'depth'           => 0,
      'fallback_cb'     => 'bs4navwalker::fallback',
      'walker'          => new bs4navwalker()
    ]);
  ?>
</nav>
For our navigation, we are using the wp_nav_menu(). This also includes classes taken from both Bootstrap as well as the WordPress settings. For more in-depth information on these classes, you can visit the official WordPress.org documentation.
Step 5: Create the Footer Section
Now, let’s create the footer section footer.php, and add the following content:
  <footer>
    </footer>
    < ?php wp_footer(); ?>
  </body>
</html>
WordPress uses the wp_footer() class for adding links to CSS stylesheets and JavaScript files.
Step 6: Adding the index.php Template File
Now we will be adding the index.php file for our WordPress theme by adding the following code:
<?php get_header(); ?>
  <!-- Other Content here -->
<?php get_footer(); ?>
Step 7: Add the WordPress Loop
Next, we will be installing a loop with the help of the WordPress loop.
Within theindex.php file, and in the middle of our header and footer tags, let’s add the following content:
<div>
  <?php if ( have_posts() ) : while ( have_posts() ) :   the_post(); ?>
    <h2>
      <a href="<?php the_permalink() ?>">
        <?php the_title(); ?>
      </a>
    </h2>
    <?php the_content(); ?>
  <?php endwhile; else: ?>
    <p>There no posts to show</p>
  <?php endif; ?>
</div>
This is what’s happening inside the code:
- We will see whether or not there are any created posts through the
have_posts() function. - With a
whileloop, we go through each post. - For each post, we will now be going through the title and content. Additionally, we can also extract more information such as date, time, and when it’s published.
Step 8: Now Add Bootstrap
Even with all of what we’ve done above, we will see a site that looks bare-bones and looks something like this:
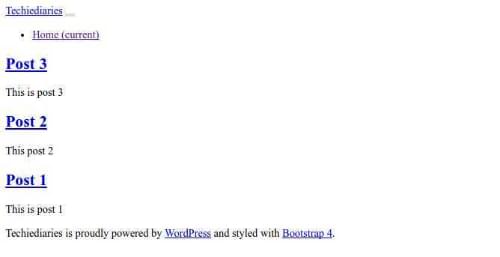
To add some color and aesthetics, go to getbootsrap.com, and add the associated files in the project. The structure of our folders, now, would look something close to this:
- bs-theme
  - style.css
  - footer.php
  - functions.php
  -  header.php
  - index.php
  - single.php
  - css
      - bootstrap.min.css
  - js
    - vendor
      - bootstrap.bundle.min.css
Now, we will enqueue the Bootstrap and JavaScript files while using the WordPress hooks to insert Bootstrap into our web page.
Open the functions.php file and insert the following code:
<?php

function themebs_enqueue_styles() {

  wp_enqueue_style( 'bootstrap', get_template_directory_uri() . '/css/bootstrap.min.css' );
  wp_enqueue_style( 'core', get_template_directory_uri() . '/style.css' );

}
add_action( 'wp_enqueue_scripts', 'themebs_enqueue_styles');

function themebs_enqueue_scripts() {
  wp_enqueue_script( 'bootstrap', get_template_directory_uri() . '/js/vendor/bootstrap.bundle.min.js', array( 'jquery' ) );
}
add_action( 'wp_enqueue_scripts', 'themebs_enqueue_scripts');
For more information about the classes used in this code, visit the WordPress theme docs.
Now, our theme looks like this. Though not that aesthetic, it's packed with functionality nonetheless.

Conclusion
This tutorial talked about creating a simple WP theme that uses the latest version of the Bootstrap framework. Armed with the knowledge of creating your own theme, you will now have more developer points under your skills belt. Just keep practicing, and you will be a master at it one day.