Introduction
Taking what we already learned from the previous tutorials about drawing custom shapes and animating along elements along a Path. In this tutorial, we will combine what we learned about animation so far to create an alternating Yin Yang symbol.
To those unfamiliar with the Yin Yang symbol, let us quickly visit the anatomy of the Yin Yang symbol itself.
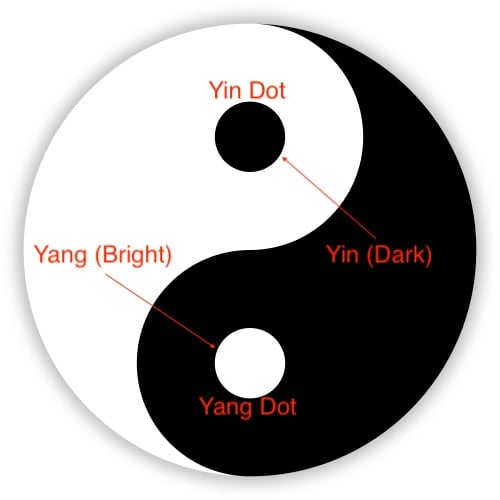
Based on the information from Wikipedia, in the Yin Yang symbol, Yin refers to the dark side, while Yang refers to the brightside.
For the rest of the tutorial, the following terms will be used:
Yin: the dark side.
Yang: the bright side.
Yin Dot: the black dot contained in the Yang side.
Yang Dot: the white dot contained in the Yin side.
Yin Yang Curve: the S-shaped curve that separates the Yin and the Yang.
Goals
At the end of the tutorial, you would have learned:
- How to animate an alternating Yin Yang symbol.
Tools Required
- Android Studio. The version used in this tutorial is Android Studio Dolphin | 2021.3.1.
Prerequisite Knowledge
- Intermedia Android.
- Basic Android animation.
- Custom Drawable.
- Custom Path.
Project Setup
To follow along with the tutorial, perform the steps below:
-
Create a new Android project with the default Empty Activity.
-
Replace the code inside activity_main.xml with the code below.
 <?xml version="1.0" encoding="utf-8"?>
 <androidx.constraintlayout.widget.ConstraintLayout xmlns:android="http://schemas.android.com/apk/res/android"
    xmlns:app="http://schemas.android.com/apk/res-auto"
    xmlns:tools="http://schemas.android.com/tools"
    android:background="@color/teal_200"
    android:layout_width="match_parent"
    android:layout_height="match_parent"
    tools:context=".MainActivity">

    <ImageView
        android:id="@+id/yin_yang_background"
        android:layout_width="match_parent"
        android:layout_height="0dp"
        app:layout_constraintDimensionRatio="1:1"
        app:layout_constraintBottom_toBottomOf="parent"
        app:layout_constraintEnd_toEndOf="parent"
        app:layout_constraintStart_toStartOf="parent"
        app:layout_constraintTop_toTopOf="parent"
        tools:srcCompat="@tools:sample/backgrounds/scenic" />

 </androidx.constraintlayout.widget.ConstraintLayout>
The attributes
android:layout_width="match_parent"
android:layout_height="0dp"
app:layout_constraintDimensionRatio="1:1"
on the ImageView will constraint its height equal to its width.
The Plan
Normally, we can draw both the Yin and the Yang manually, but we can actually take a shortcut and skip drawing the complex teardrop-shape for the Yang entirely. To save time, we paint the entire background with Color.WHITE to make it the Yang. For the Yin, we can simply draw it with Color.Black.
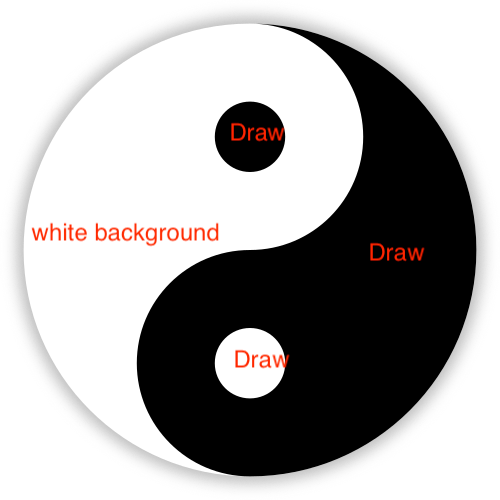
Because we only have to draw the Yin, we also only have to animate the Yin side later on.
Draw The Yang (Bright)
Because the Yang side is simply a circular background with one solid color, we will start with it first.
-
Replace your
onCreate()with the method below.override fun onCreate(savedInstanceState: Bundle?) { super.onCreate(savedInstanceState) setContentView(R.layout.activity_main) val yinYang = findViewById<ImageView>(R.id.yin_yang).apply { setImageDrawable(YinYang()) } } -
Create your custom Drawable called YinYang with the code below.
class YinYang: Drawable() { private val yangPaint = Paint().apply { color = Color.WHITE } override fun draw(canvas: Canvas) { drawYang(canvas) drawYin(canvas) drawYangDot(canvas) drawYinDot(canvas) } private fun drawYang(canvas: Canvas){ } private fun drawYin(canvas: Canvas){ } private fun drawYangDot(canvas: Canvas){ } private fun drawYinDot(canvas: Canvas){ } override fun setAlpha(alpha: Int) { // no op } override fun setColorFilter(colorFilter: ColorFilter?) { // no op } @Deprecated("Deprecated in Superclass") override fun getOpacity() = PixelFormat.OPAQUE } -
Because the drawing for the Yang, Yin, Yin Dot, and Yang Dot can get pretty complex, I have separated each part into its own private functions. We will work on them one by one.
-
Notice the
yangPaintinstance variable at the top of the class definition. We will use it to draw both the Yang and the Yang Dot. -
The Yang must be a perfect circle with the radius as wide as half the width of its container. To draw the Yang, we use the implementation below.
 private fun drawYang(canvas: Canvas){
    canvas.drawCircle(
        bounds.exactCenterX(),
        bounds.exactCenterY(),
        bounds.exactCenterX(),
        yangPaint
    )
 }
- Inside each Drawable implementation, the
boundsare available viagetBounds()(Java) or just the property syntaxbounds(Kotlin). Thisboundsproperty contains the coordinates of the Drawable’s container, such as the center or the top, left, right, bottom coordinates. Using the coordinates of the exact center of the container bounds, we were able to calculate the circle radius, and (x,y) center, which were provided to thedrawCircle()method.
Summary
We are completed with the first part of the tutorial, please continue on part two here.