Introduction
In Android development, UseCases are classes that encapsulate business logic that are often used in ViewModel classes. UseCases belong to the optional Domain layer in Android apps, so they are not required, but can reduce your ViewModel’s complexity and make your application easier to test.
In this tutorial, we will learn how to add UseCases into an Android app.
Goals
At the end of the tutorial, you would have learned:
- How to add UseCases.
- How to use the special
invoke()operator with a UseCase.
Tools Required
- Android Studio. The version used in this tutorial is Bumblebee 2021.1.1 Patch 3.
Prerequisite Knowledge
- Intermediate Android.
- Basic MVVM architecture.
- StateFlow.
Project Setup
To follow along with the tutorial, perform the steps below:
-
Create a new Android project with the default Empty Activity.
-
Replace the content of
activitiy_main.xmlwith the code below. This simply adds three new TextViews and a Button in a vertical chain.<?xml version="1.0" encoding="utf-8"?> <androidx.constraintlayout.widget.ConstraintLayout xmlns:android="http://schemas.android.com/apk/res/android" xmlns:app="http://schemas.android.com/apk/res-auto" xmlns:tools="http://schemas.android.com/tools" android:layout_width="match_parent" android:layout_height="match_parent" tools:context=".MainActivity"> <Button android:id="@+id/button_loadNext" android:layout_width="wrap_content" android:layout_height="wrap_content" android:text="@string/load_next_item" app:layout_constraintBottom_toTopOf="@+id/textView_item1" app:layout_constraintEnd_toEndOf="parent" app:layout_constraintHorizontal_bias="0.5" app:layout_constraintStart_toStartOf="parent" app:layout_constraintTop_toTopOf="parent" /> <TextView android:id="@+id/textView_item1" android:layout_width="wrap_content" android:layout_height="wrap_content" app:layout_constraintBottom_toTopOf="@+id/textView_item2" app:layout_constraintEnd_toEndOf="parent" app:layout_constraintHorizontal_bias="0.5" app:layout_constraintStart_toStartOf="parent" app:layout_constraintTop_toBottomOf="@+id/button_loadNext" tools:text="Item 1" /> <TextView android:id="@+id/textView_item2" android:layout_width="wrap_content" android:layout_height="wrap_content" app:layout_constraintBottom_toTopOf="@+id/textView_item3" app:layout_constraintEnd_toEndOf="parent" app:layout_constraintHorizontal_bias="0.5" app:layout_constraintStart_toStartOf="parent" app:layout_constraintTop_toBottomOf="@+id/textView_item1" tools:text="Item 2" /> <TextView android:id="@+id/textView_item3" android:layout_width="wrap_content" android:layout_height="wrap_content" app:layout_constraintBottom_toBottomOf="parent" app:layout_constraintEnd_toEndOf="parent" app:layout_constraintHorizontal_bias="0.5" app:layout_constraintStart_toStartOf="parent" app:layout_constraintTop_toBottomOf="@+id/textView_item2" tools:text="Item 3" /> </androidx.constraintlayout.widget.ConstraintLayout> -
Add the
<string>resource below into your strings.xml file.<string name="load_next_item">Load Next Item</string> -
Add the dependency to Lifecycle and Activity KTX below into your project.
//Lifecycle implementation 'androidx.lifecycle:lifecycle-runtime-ktx:2.4.1' //For convenient viewModels() extension function implementation "androidx.activity:activity-ktx:1.4.0" -
Create a new data class called MainActivitiyUiState to hold the UI state for the MainActivity.
data class MainActivityUiState( val item1: String, val item2: String, val item3: String ) -
Create a new class called MainActivityViewModel using the code below. This ViewModel exposes the UI state as an immutable Flow. The function
loadNext()is used to ask the ViewModel to load the next source of data. To reduce complexity, the ViewModel will just return another MainActivityUiState object with randomized values. In the real world, you would most likely retrieve this data from a repository (or a UseCase, which we will learn soon).class MainActivityViewModel : ViewModel() { //Private mutable flow private val _stateFlow = MutableStateFlow( getUiState() ) //Exposes mutable flow as immutable flow val stateFlow: StateFlow<MainActivityUiState> = _stateFlow //MainActivity will call this function on button click fun loadNext(){ _stateFlow.value = getUiState() } //Convenient function to remove code duplication private fun getUiState() = MainActivityUiState( item1 = "${Random.nextInt()}", item2 = "${Random.nextInt()}", item3 = "${Random.nextInt()}" ) } -
Replace the content of MainActivity with the code below. Our MainActivity class now contains a reference to the MainActivityViewModel created in the previous step. We are also consuming the
Flow<MainActivityUiState>and use that to populate the Views.class MainActivity : AppCompatActivity() { private val mainActivityViewModel: MainActivityViewModel by viewModels() override fun onCreate(savedInstanceState: Bundle?) { super.onCreate(savedInstanceState) setContentView(R.layout.activity_main) //Gets the button reference val button = findViewById<Button>(R.id.button_loadNext) button.setOnClickListener { //Calls ViewModel function after button click mainActivityViewModel.loadNext() } //Gets reference to the three TextView Views val item1 = findViewById<TextView>(R.id.textView_item1) val item2 = findViewById<TextView>(R.id.textView_item2) val item3 = findViewById<TextView>(R.id.textView_item3) lifecycleScope.launch { repeatOnLifecycle(Lifecycle.State.STARTED){ mainActivityViewModel.stateFlow.collect { item1.text = it.item1 item2.text = it.item2 item3.text = it.item3 } } } } }
Project Overview
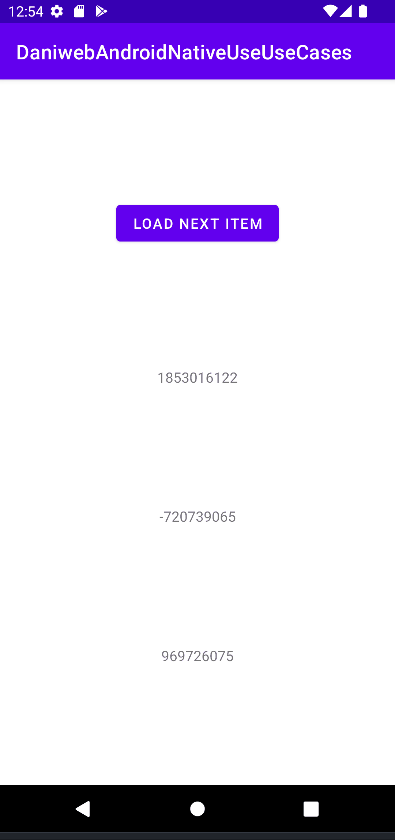
Our app is a simple app with a single Button that triggers the ViewModel to serve new UI data. Every button click should update the TextView Views with new random integer values. Refer to the GIF below for its behavior.
Right now, we are just faking data retrieval directly in the ViewModel, because we are not using any UseCase yet, this is similar to the ViewModel calling the repository directly. While this approach is not wrong, as your ViewModel grows, it would be better to move this logic into something else. This is where UseCases come in.
Create a UseCase
UseCase classes are not specific to Android, and sometimes they are also called Interactors. There is no pre-made Android-specific interface for your UseCase class to implement. There is no need to implement an interface unless you need to swap UseCase implementations in your ViewModel.
Each UseCase should only perform one business logic. The Google naming convention for UseCase classes is described below.
verb in present tense + noun/what (optional) + UseCaseBased on my experience, Android developers DO follow the convention above, so we will follow this convention as well in our tutorial.
Follow the steps below to create a UseCase.
-
Create a class called GetNextFakeBusinessDataUseCase from the code below.
class GetNextFakeBusinessDataUseCase { fun getNextFakeBusinessData(): FakeBusinessData { return FakeBusinessData( item1 = "${Random.nextInt()}", item2 = "${Random.nextInt()}", item3 = "${Random.nextInt()}" ) } } -
FakeBusinessData does not exist, so you will see compile errors. Create another data class called FakeBusinessData from the code below.
data class FakeBusinessData( val item1: String, val item2: String, val item3: String ) -
You might have noticed that FakeBusinessData looks identical to MainActivityUiState, so why can’t the UseCase simply return MainActivityUiState instead? This is because the UseCase belongs to the Domain layer, and should not be aware of the UI data at all. It is the ViewModel’s job to transform the business data into UI data. In this simple tutorial, we can also replace MainActivityUiState with FakeBusinessData so the ViewModel will not have to do any transformation, but we will not skip that step here to emphasize the distinction between business data and UI data.
-
Back in the ViewModel, add a new instance of
GetNextFakeBusinessDataUseCaselike below. You can also inject an instance using Hilt if you prefer.private val getNextFakeBusinessDataUseCase = GetNextFakeBusinessDataUseCase() -
Modifies the convenient
getUiState()function to get and then transforms the business data into UI data.private fun getUiState(): MainActivityUiState { val next = getNextFakeBusinessDataUseCase.getNextFakeBusinessData() return MainActivityUiState( item1 = next.item1, item2 = next.item2, item3 = next.item3 ) } -
Run the app now to make sure that everything is still working as before.
The special invoke() function
In our ViewModel right now, the UseCase function call below seems long and unwieldy.
getNextFakeBusinessDataUseCase.getNextFakeBusinessData()Fortunately, we can use the special operator function invoke() to improve readability a little bit more. Modify the UseCase class to the code below.
class GetNextFakeBusinessDataUseCase {
operator fun invoke(): FakeBusinessData{
return FakeBusinessData (
item1 = "${Random.nextInt()}",
item2 = "${Random.nextInt()}",
item3 = "${Random.nextInt()}"
)
}
}With this special syntax we can use any instance of our UseCase like a function call. In the ViewModel, we can now replace
val next = getNextFakeBusinessDataUseCase.getNextFakeBusinessData()with
val next = getNextFakeBusinessDataUseCase()Note that we also allowed to overload and return any type from invoke() as well.
Solution Code
MainActivity.kt
class MainActivity : AppCompatActivity() {
private val mainActivityViewModel: MainActivityViewModel by viewModels()
override fun onCreate(savedInstanceState: Bundle?) {
super.onCreate(savedInstanceState)
setContentView(R.layout.activity_main)
//Gets the button reference
val button = findViewById<Button>(R.id.button_loadNext)
button.setOnClickListener {
//Calls ViewModel function after button click
mainActivityViewModel.loadNext()
}
//Gets reference to the three TextView Views
val item1 = findViewById<TextView>(R.id.textView_item1)
val item2 = findViewById<TextView>(R.id.textView_item2)
val item3 = findViewById<TextView>(R.id.textView_item3)
lifecycleScope.launch {
repeatOnLifecycle(Lifecycle.State.STARTED){
mainActivityViewModel.stateFlow.collect {
item1.text = it.item1
item2.text = it.item2
item3.text = it.item3
}
}
}
}
}MainActivityViewModel.kt
class MainActivityViewModel : ViewModel() {
private val getNextFakeBusinessDataUseCase = GetNextFakeBusinessDataUseCase()
//Private mutable flow
private val _stateFlow = MutableStateFlow(
getUiState()
)
//Exposes mutable flow as immutable flow
val stateFlow: StateFlow<MainActivityUiState> = _stateFlow
//MainActivity will call this function on button click
fun loadNext(){
_stateFlow.value = getUiState()
}
private fun getUiState(): MainActivityUiState {
//val next = getNextFakeBusinessDataUseCase.getNextFakeBusinessData()
val next = getNextFakeBusinessDataUseCase()
return MainActivityUiState(
item1 = next.item1,
item2 = next.item2,
item3 = next.item3
)
}
}
/*
class MainActivityViewModel : ViewModel() {
//Private mutable flow
private val _stateFlow = MutableStateFlow(
getUiState()
)
//Exposes mutable flow as immutable flow
val stateFlow: StateFlow<MainActivityUiState> = _stateFlow
//MainActivity will call this function on button click
fun loadNext(){
_stateFlow.value = getUiState()
}
//Convenient function to remove code duplication
private fun getUiState() = MainActivityUiState(
item1 = "${Random.nextInt()}",
item2 = "${Random.nextInt()}",
item3 = "${Random.nextInt()}"
)
}*/GetNextFakeBusinessData.kt
class GetNextFakeBusinessDataUseCase {
operator fun invoke(): FakeBusinessData{
return FakeBusinessData (
item1 = "${Random.nextInt()}",
item2 = "${Random.nextInt()}",
item3 = "${Random.nextInt()}"
)
}
}
/*
class GetNextFakeBusinessDataUseCase {
fun getNextFakeBusinessData(): FakeBusinessData {
return FakeBusinessData(
item1 = "${Random.nextInt()}",
item2 = "${Random.nextInt()}",
item3 = "${Random.nextInt()}"
)
}
}*/FakeBusinessData.kt
data class FakeBusinessData(
val item1: String,
val item2: String,
val item3: String
)MainActivityUiState.kt
data class MainActivityUiState(
val item1: String,
val item2: String,
val item3: String
)activity_main.xml
 <?xml version="1.0" encoding="utf-8"?>
 <androidx.constraintlayout.widget.ConstraintLayout xmlns:android="http://schemas.android.com/apk/res/android"
    xmlns:app="http://schemas.android.com/apk/res-auto"
    xmlns:tools="http://schemas.android.com/tools"
    android:layout_width="match_parent"
    android:layout_height="match_parent"
    tools:context=".MainActivity">

    <Button
        android:id="@+id/button_loadNext"
        android:layout_width="wrap_content"
        android:layout_height="wrap_content"
        android:text="@string/load_next_item"
        app:layout_constraintBottom_toTopOf="@+id/textView_item1"
        app:layout_constraintEnd_toEndOf="parent"
        app:layout_constraintHorizontal_bias="0.5"
        app:layout_constraintStart_toStartOf="parent"
        app:layout_constraintTop_toTopOf="parent" />

    <TextView
        android:id="@+id/textView_item1"
        android:layout_width="wrap_content"
        android:layout_height="wrap_content"
        app:layout_constraintBottom_toTopOf="@+id/textView_item2"
        app:layout_constraintEnd_toEndOf="parent"
        app:layout_constraintHorizontal_bias="0.5"
        app:layout_constraintStart_toStartOf="parent"
        app:layout_constraintTop_toBottomOf="@+id/button_loadNext"
        tools:text="Item 1" />

    <TextView
        android:id="@+id/textView_item2"
        android:layout_width="wrap_content"
        android:layout_height="wrap_content"
        app:layout_constraintBottom_toTopOf="@+id/textView_item3"
        app:layout_constraintEnd_toEndOf="parent"
        app:layout_constraintHorizontal_bias="0.5"
        app:layout_constraintStart_toStartOf="parent"
        app:layout_constraintTop_toBottomOf="@+id/textView_item1"
        tools:text="Item 2" />

    <TextView
        android:id="@+id/textView_item3"
        android:layout_width="wrap_content"
        android:layout_height="wrap_content"
        app:layout_constraintBottom_toBottomOf="parent"
        app:layout_constraintEnd_toEndOf="parent"
        app:layout_constraintHorizontal_bias="0.5"
        app:layout_constraintStart_toStartOf="parent"
        app:layout_constraintTop_toBottomOf="@+id/textView_item2"
        tools:text="Item 3" />

</androidx.constraintlayout.widget.ConstraintLayout>string.xml
<resources>
<string name="app_name">DaniwebAndroidNativeUseUseCases</string>
<string name="load_next_item">Load Next Item</string>
</resources>Module build.gradle
plugins {
id 'com.android.application'
id 'org.jetbrains.kotlin.android'
}
android {
compileSdk 32
defaultConfig {
applicationId "com.example.daniwebandroidnativeuseusecases"
minSdk 21
targetSdk 32
versionCode 1
versionName "1.0"
testInstrumentationRunner "androidx.test.runner.AndroidJUnitRunner"
}
buildTypes {
release {
minifyEnabled false
proguardFiles getDefaultProguardFile('proguard-android-optimize.txt'), 'proguard-rules.pro'
}
}
compileOptions {
sourceCompatibility JavaVersion.VERSION_1_8
targetCompatibility JavaVersion.VERSION_1_8
}
kotlinOptions {
jvmTarget = '1.8'
}
}
dependencies {
 //Lifecycle
 implementation 'androidx.lifecycle:lifecycle-runtime-ktx:2.4.1'

 //For convenient viewModels() extension function
 implementation "androidx.activity:activity-ktx:1.4.0"
implementation 'androidx.core:core-ktx:1.7.0'
implementation 'androidx.appcompat:appcompat:1.4.1'
implementation 'com.google.android.material:material:1.5.0'
implementation 'androidx.constraintlayout:constraintlayout:2.1.3'
testImplementation 'junit:junit:4.13.2'
androidTestImplementation 'androidx.test.ext:junit:1.1.3'
androidTestImplementation 'androidx.test.espresso:espresso-core:3.4.0'
}Summary
We have learned how to add UseCase class into our App. Note that, in the real world, the UseCase should call a repository to generate the fake business data instead of doing it by itself. The full project code can be found at https://github.com/dmitrilc/DaniwebAndroidNativeUseUseCases