Introduction
In this tutorial, we will learn how to create an instrumented test for Navigation Components.
Goals
At the end of the tutorial, you would have learned:
- How to test Navigation Components.
Tools Required
- Android Studio. The version used in this tutorial is Android Studio Chipmunk 2021.2.1 Patch 1.
Prerequisite Knowledge
- Intermediate Android.
- Basic Navigation Components.
- Basic Espresso.
Project Setup
To follow along with the tutorial, perform the steps below:
-
Create a new Android project with the default Empty Activity.
-
Add the dependencies below into your module build.gradle file.
def nav_version = "2.4.2" // Kotlin implementation "androidx.navigation:navigation-fragment-ktx:$nav_version" implementation "androidx.navigation:navigation-ui-ktx:$nav_version" // Testing Navigation androidTestImplementation "androidx.navigation:navigation-testing:$nav_version" def fragment_version = "1.4.1" debugImplementation "androidx.fragment:fragment-testing:$fragment_version" -
Replace the code in activity_main.xml with the code below. This adds a FragmentViewContainer.
<?xml version="1.0" encoding="utf-8"?> <androidx.constraintlayout.widget.ConstraintLayout xmlns:android="http://schemas.android.com/apk/res/android" xmlns:app="http://schemas.android.com/apk/res-auto" xmlns:tools="http://schemas.android.com/tools" android:layout_width="match_parent" android:layout_height="match_parent" tools:context=".MainActivity"> <androidx.fragment.app.FragmentContainerView android:id="@+id/nav_host_fragment" android:name="androidx.navigation.fragment.NavHostFragment" android:layout_width="0dp" android:layout_height="0dp" app:layout_constraintLeft_toLeftOf="parent" app:layout_constraintRight_toRightOf="parent" app:layout_constraintTop_toTopOf="parent" app:layout_constraintBottom_toBottomOf="parent" app:defaultNavHost="true" app:navGraph="@navigation/nav_graph" /> </androidx.constraintlayout.widget.ConstraintLayout> -
Add the navigation graph below into res/navigation. This navigation graph contains two destinations and one action.
<?xml version="1.0" encoding="utf-8"?> <navigation xmlns:android="http://schemas.android.com/apk/res/android" xmlns:app="http://schemas.android.com/apk/res-auto" xmlns:tools="http://schemas.android.com/tools" android:id="@+id/nav_graph" app:startDestination="@id/homeFragment"> <fragment android:id="@+id/homeFragment" android:name="com.example.daniwebandroidnavigationtest.HomeFragment" android:label="fragment_home" tools:layout="@layout/fragment_home" > <action android:id="@+id/action_homeFragment_to_destination1Fragment" app:destination="@id/destination1Fragment" /> </fragment> <fragment android:id="@+id/destination1Fragment" android:name="com.example.daniwebandroidnavigationtest.Destination1Fragment" android:label="fragment_destination1" tools:layout="@layout/fragment_destination1" /> </navigation> -
Create a Fragment called HomeFragment using the code below.
class HomeFragment : Fragment() { override fun onCreateView( inflater: LayoutInflater, container: ViewGroup?, savedInstanceState: Bundle? ): View? { val layout = inflater.inflate(R.layout.fragment_home, container, false) val button = layout.findViewById<Button>(R.id.button) button.setOnClickListener { findNavController().navigate(R.id.action_homeFragment_to_destination1Fragment) } // Inflate the layout for this fragment return layout } } -
Create another Fragment called Destination1Fragment using the code below.
class Destination1Fragment : Fragment() { override fun onCreateView( inflater: LayoutInflater, container: ViewGroup?, savedInstanceState: Bundle? ): View? { // Inflate the layout for this fragment return inflater.inflate(R.layout.fragment_destination1, container, false) } } -
Add the layout resource called fragment_home.xml using the code below.
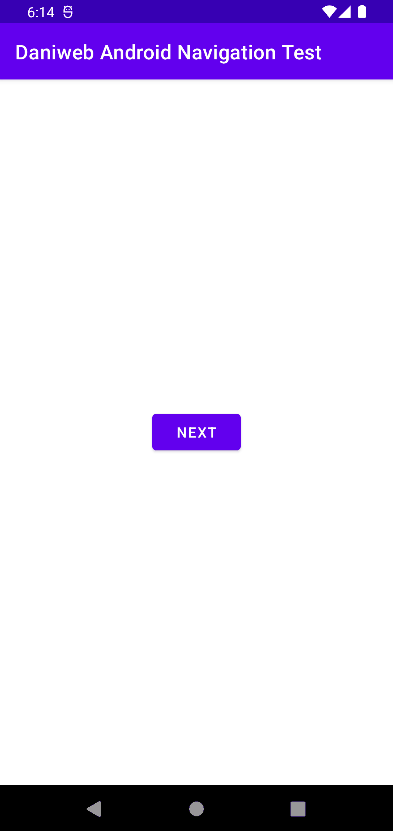
<?xml version="1.0" encoding="utf-8"?> <androidx.constraintlayout.widget.ConstraintLayout xmlns:android="http://schemas.android.com/apk/res/android" xmlns:app="http://schemas.android.com/apk/res-auto" xmlns:tools="http://schemas.android.com/tools" android:layout_width="match_parent" android:layout_height="match_parent" tools:context=".HomeFragment"> <Button android:id="@+id/button" android:layout_width="wrap_content" android:layout_height="wrap_content" android:text="@string/next" app:layout_constraintBottom_toBottomOf="parent" app:layout_constraintEnd_toEndOf="parent" app:layout_constraintStart_toStartOf="parent" app:layout_constraintTop_toTopOf="parent" /> </androidx.constraintlayout.widget.ConstraintLayout> -
Add the fragment_destination1.xml layout using the code below.
<?xml version="1.0" encoding="utf-8"?> <FrameLayout xmlns:android="http://schemas.android.com/apk/res/android" xmlns:tools="http://schemas.android.com/tools" android:layout_width="match_parent" android:layout_height="match_parent" tools:context=".Destination1Fragment"> <TextView android:layout_width="match_parent" android:layout_height="match_parent" android:text="@string/hello_blank_fragment" /> </FrameLayout> -
Add the
<string>resources below into strings.xml.<string name="hello_blank_fragment">Hello blank fragment</string> <string name="next">Next</string>
Project Overview
Our app is super simple. It contains a navigation graph and two destinations, one of which is the home destination. After clicking on the Button Next, it will navigate to the next destination.
Our goal is to create an instrumented test for this interaction and verify whether the navigation is working correctly.
Creating the Instrument Test
Before creating any test, we will create the test class first. Create the class NavTest in the androidTest source set using the code below.
@RunWith(AndroidJUnit4::class)
class NavTest {

   @Test
   fun testNav() {

   }
}
Follow the steps below to add code for testing navigation.
-
The first thing that we need to do in this test is to retrieve an instance of TestNavHostController.
//Getting the NavController for test val navController = TestNavHostController( ApplicationProvider.getApplicationContext() ) -
We will use FragmentScenario to start the home destination HomeFragment in isolation. Here we used the convenient method
launchFragmentInContainer()from the androidx.fragment.app.testing package to create a FragmentScenario object. We immediately calledonFragment()on it to perform further setup.//Launches the Fragment in isolation launchFragmentInContainer<HomeFragment>().onFragment { fragment -> } -
Inside the body of the lambda, set the navigation graph for the navController created in step 1.
//Launches the Fragment in isolation launchFragmentInContainer<HomeFragment>().onFragment { fragment -> //Setting the navigation graph for the NavController navController.setGraph(R.navigation.nav_graph) } -
Because the Fragment launched started in isolation does not have any NavController associated with it, we need to associate the navController created in step 1 to the Fragment, so that its
findNavController()call will work correctly.//Launches the Fragment in isolation launchFragmentInContainer<HomeFragment>().onFragment { fragment -> //Setting the navigation graph for the NavController navController.setGraph(R.navigation.nav_graph) //Sets the NavigationController for the specified View Navigation.setViewNavController(fragment.requireView(), navController) } -
The next step is using Espresso to find the Button and perform a
click()on it, triggering the navigation to the next destination.// Verify that performing a click changes the NavController’s state onView(ViewMatchers.withId(R.id.button)) .perform(ViewActions.click()) -
Finally, we verify whether the navigation happened successfully by comparing the current destination’s ID with the target destination ID.
assertEquals( navController.currentDestination?.id, R.id.destination1Fragment )
Solution Code
NavTest.kt
@RunWith(AndroidJUnit4::class)
class NavTest {
@Test
fun testNav() {
//Getting the NavController for test
val navController = TestNavHostController(
ApplicationProvider.getApplicationContext()
)
 //Launches the Fragment in isolation
 launchFragmentInContainer<HomeFragment>().onFragment { fragment ->
    //Setting the navigation graph for the NavController
    navController.setGraph(R.navigation.nav_graph)

    //Sets the NavigationController for the specified View
    Navigation.setViewNavController(fragment.requireView(), navController)
 }
 // Verify that performing a click changes the NavController’s state
 onView(ViewMatchers.withId(R.id.button))
    .perform(ViewActions.click())
 assertEquals(
    navController.currentDestination?.id,
    R.id.destination1Fragment
 )
}
}Summary
We have learned how to test Navigation Components in this tutorial. The full tutorial code can be found at https://github.com/dmitrilc/DaniwebAndroidNavigationTest.