Introduction
While creating Selenium tests, you might have found that inspecting elements manually using the web browser’s inspector could be tedious. Even after you have found the element, you still have to go through the pain of looking up the correct xpath syntax for this specific element.
To solve this problem, you can employ the use of a tool called the Selenium IDE. This program can run inside your Chrome, FireFox, and Edge browsers as a plugin.
Goals
At the end of the tutorial, you would have learned:
- How to use Selenium IDE to generate test code.
Tools Required
- One of the following web browsers: Chrome, FireFox, Edge.
- A Java IDE such as IntelliJ IDEA version 2022.2 (Community Edition).
Prerequisite Knowledge
Project Setup
To follow along with the tutorial, perform the steps below:
- If you have FireFox, download the IDE as a plugin from the official extensions page.
- If you have Chrome or Edge, install the IDE from the official web store.
- This tutorial is a continuation of the basic Selenium tutorial, so go ahead and clone this repository, switching to the
setup_maven_itbranch. - After you are finished cloning the repo, start the server by running the SeleniumApplication class. You should see the Pricing Example home page at this point.
Start The Selenium IDE
After you have installed the Selenium IDE, it should show up on your browser’s plugins section, usually at the top right. To start the Selenium IDE,
-
Click on the plugin’s icon.
-
Select Record a new test in a new project.
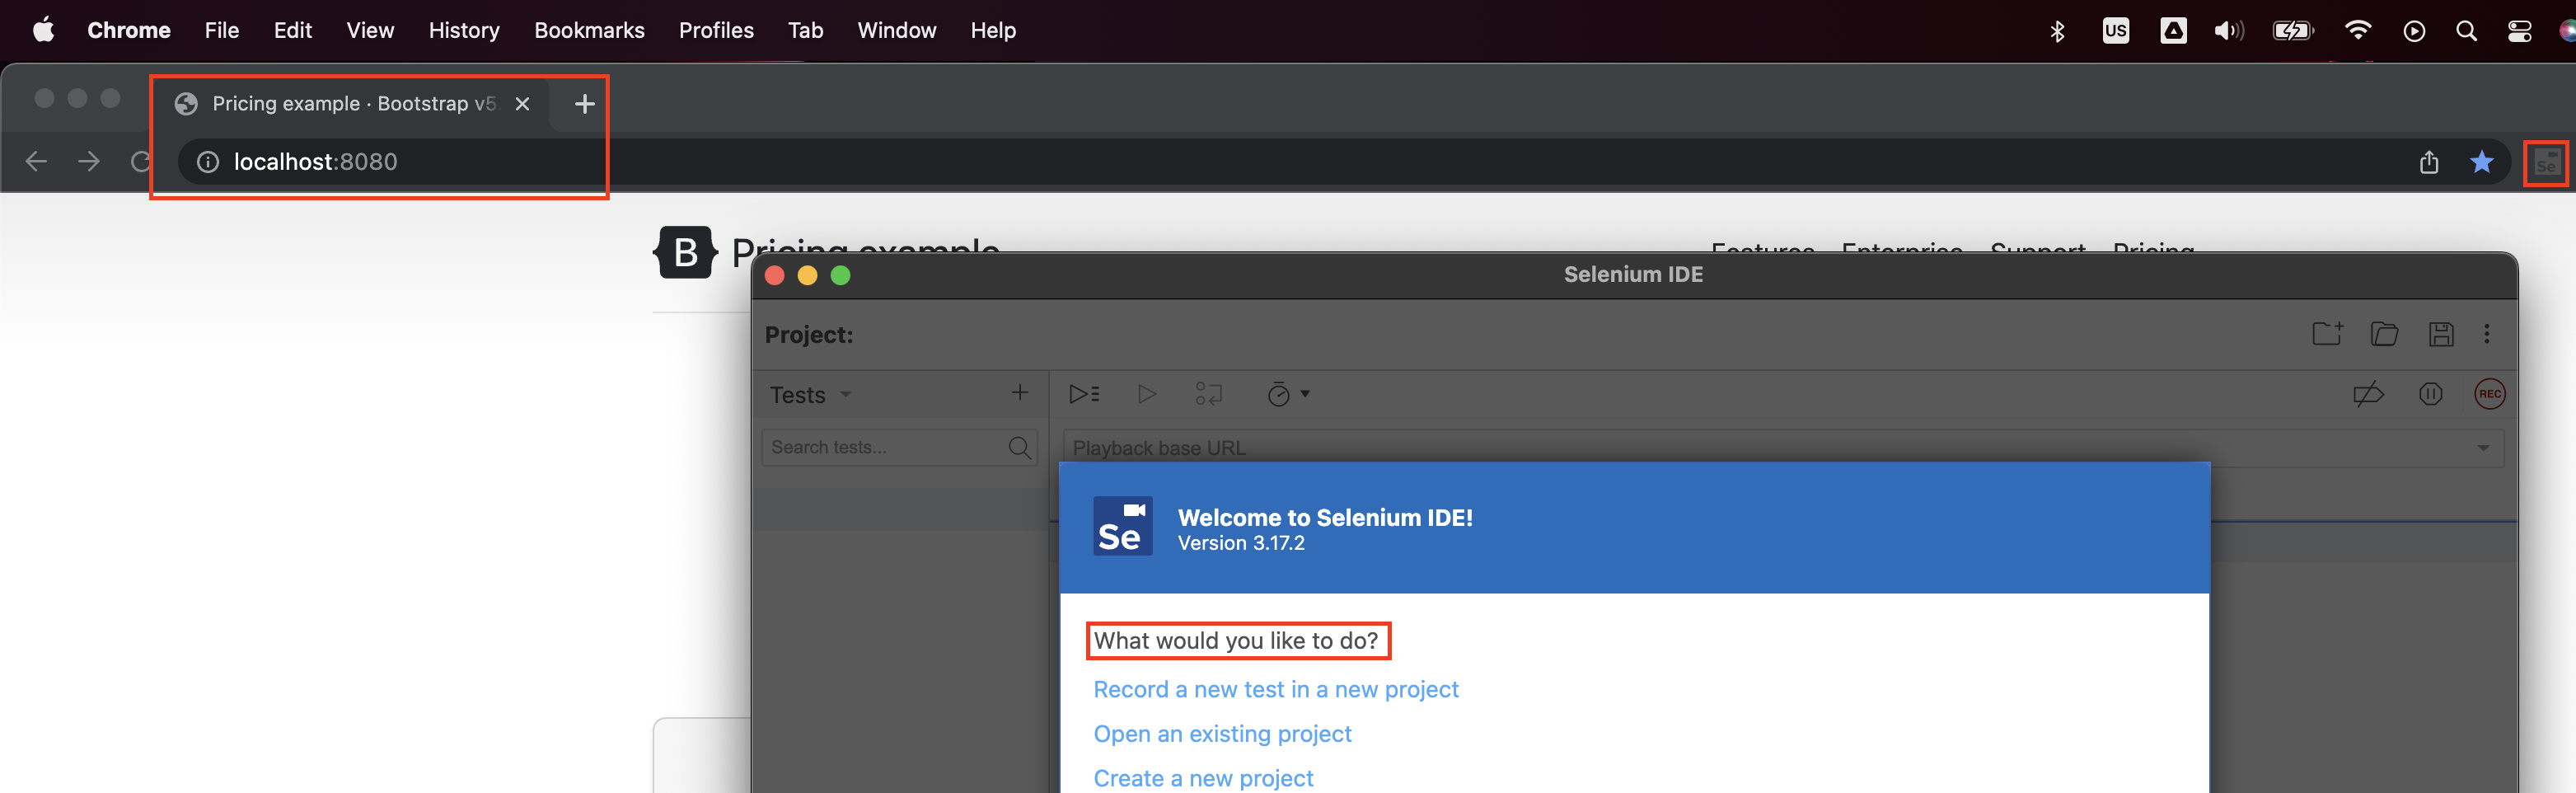
-
When prompted for the Project Name, use any name that you like.
-
When prompted for the Base URL, use
http://localhost:8080**, and then select Start Recording. -
You should now see a pop up that says
Selenium is Recordingat the bottom right of the page.

-
Your browser should have opened another tab, which is the IDE’s user interface. This interface is for managing the steps recorded.
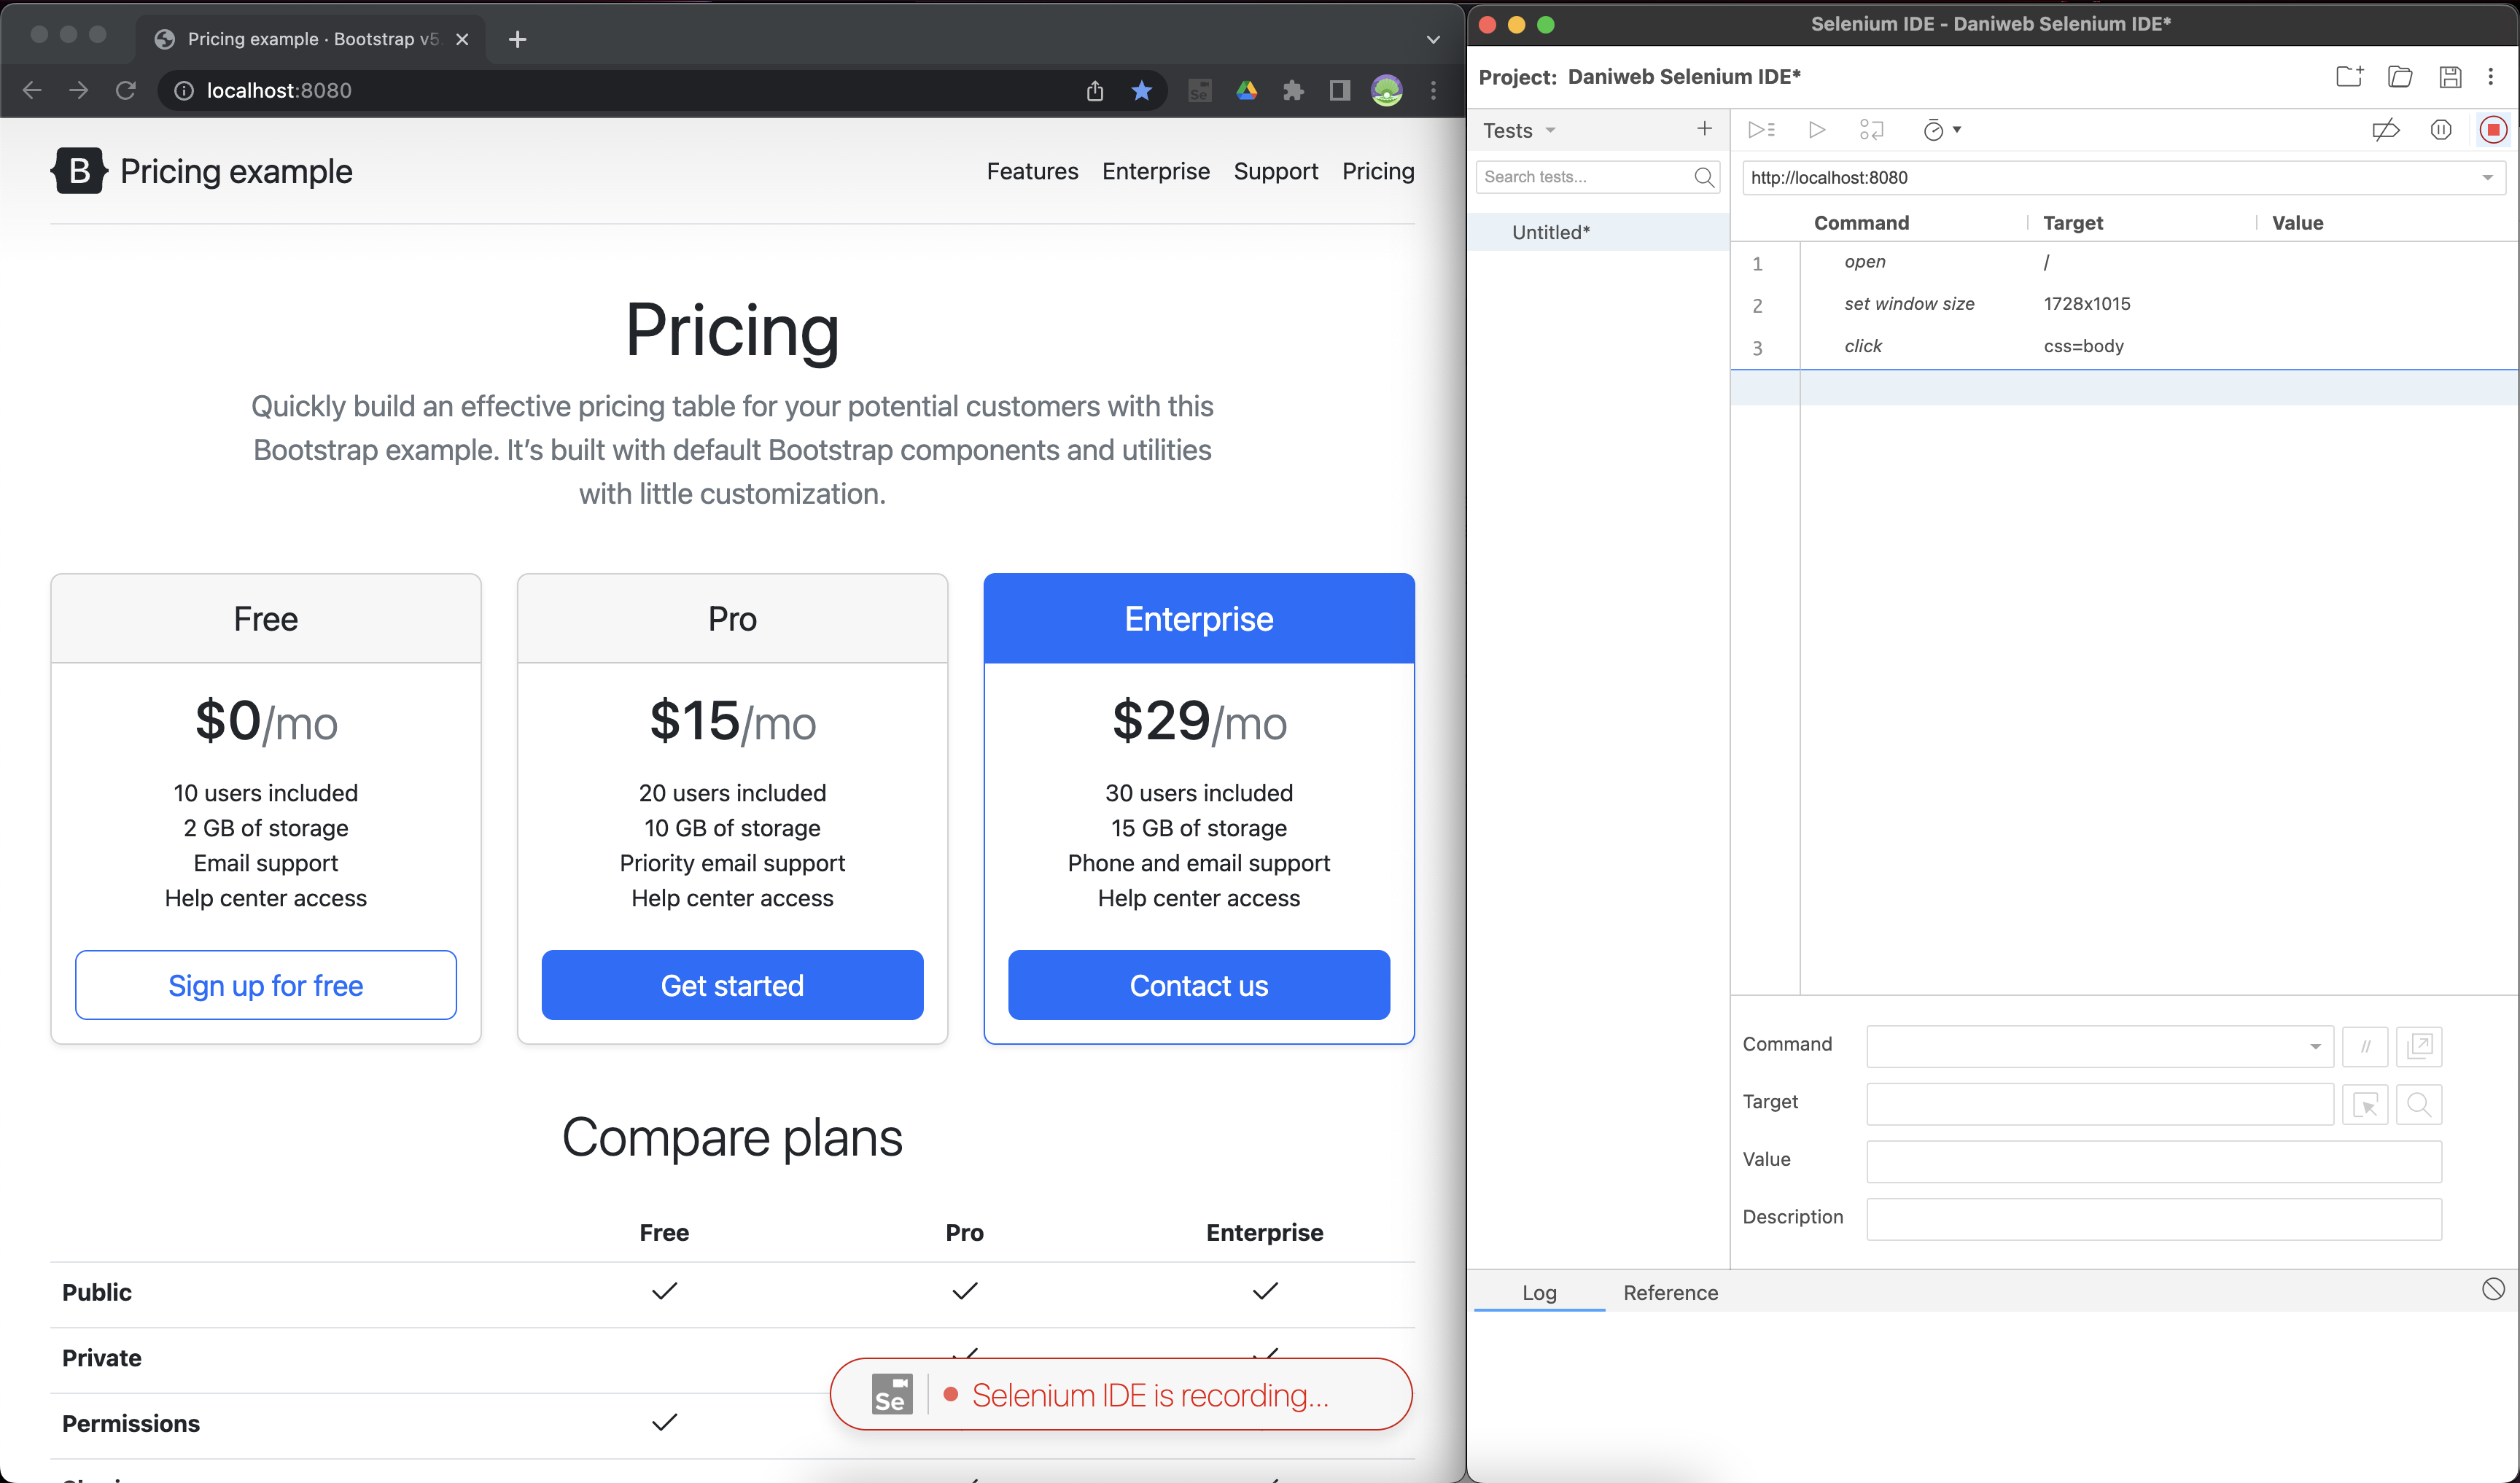
Record Steps
To record the steps that you take on the site, simply click on any element you want. The screenshot below shows the steps that I took on the web browser, clicking on random elements from the left to the right.
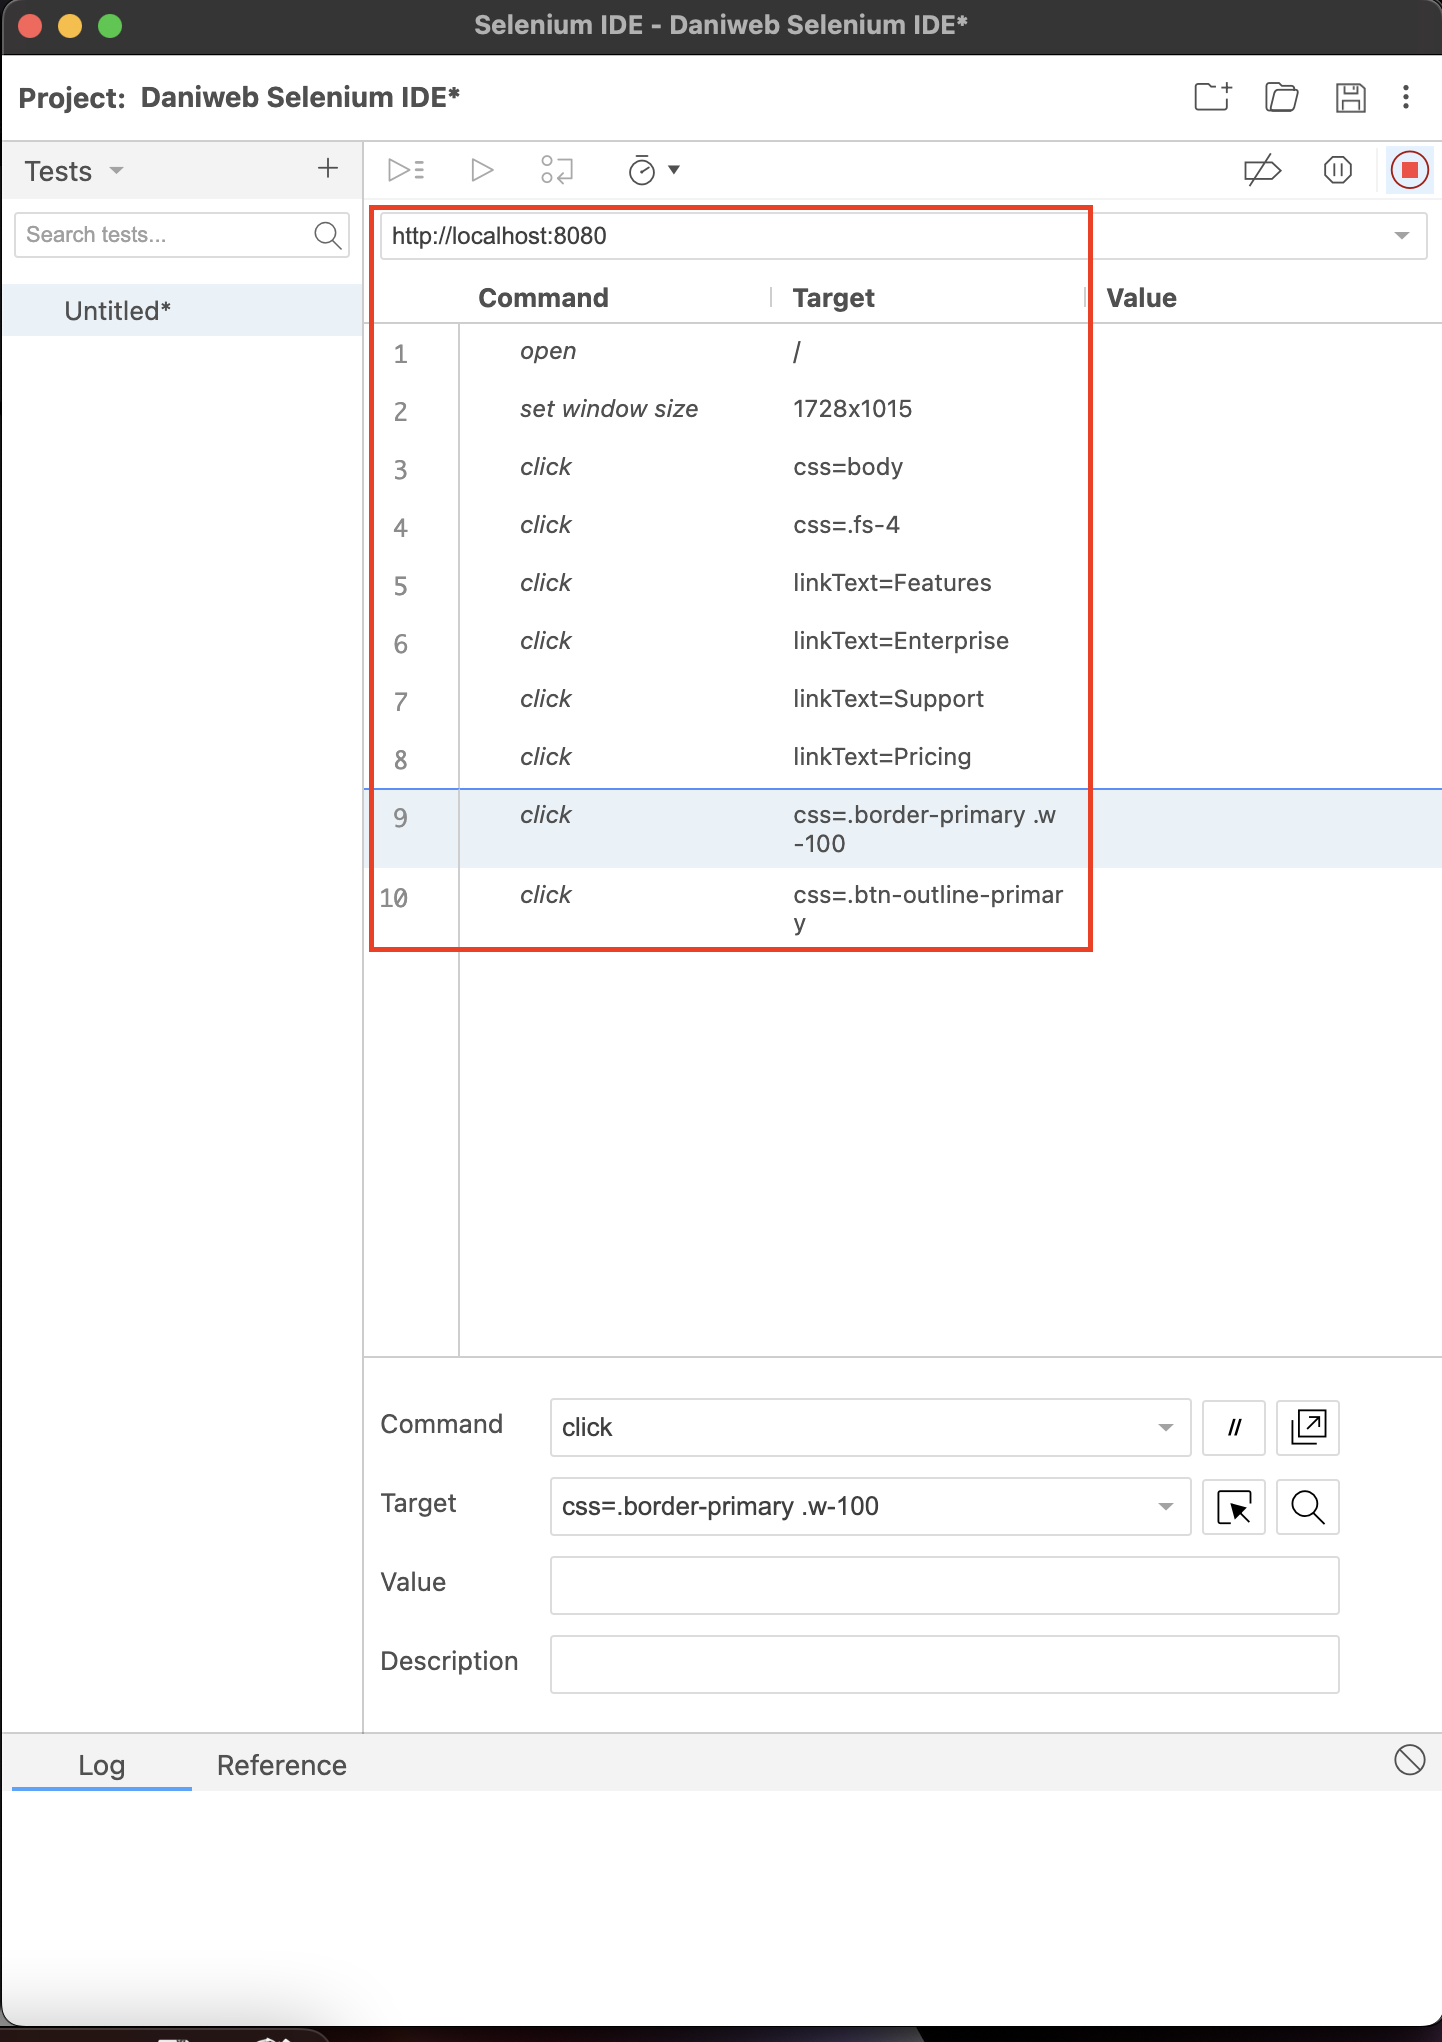
For each element that you spied, the IDE generates a few options for matching that element on the web browser.
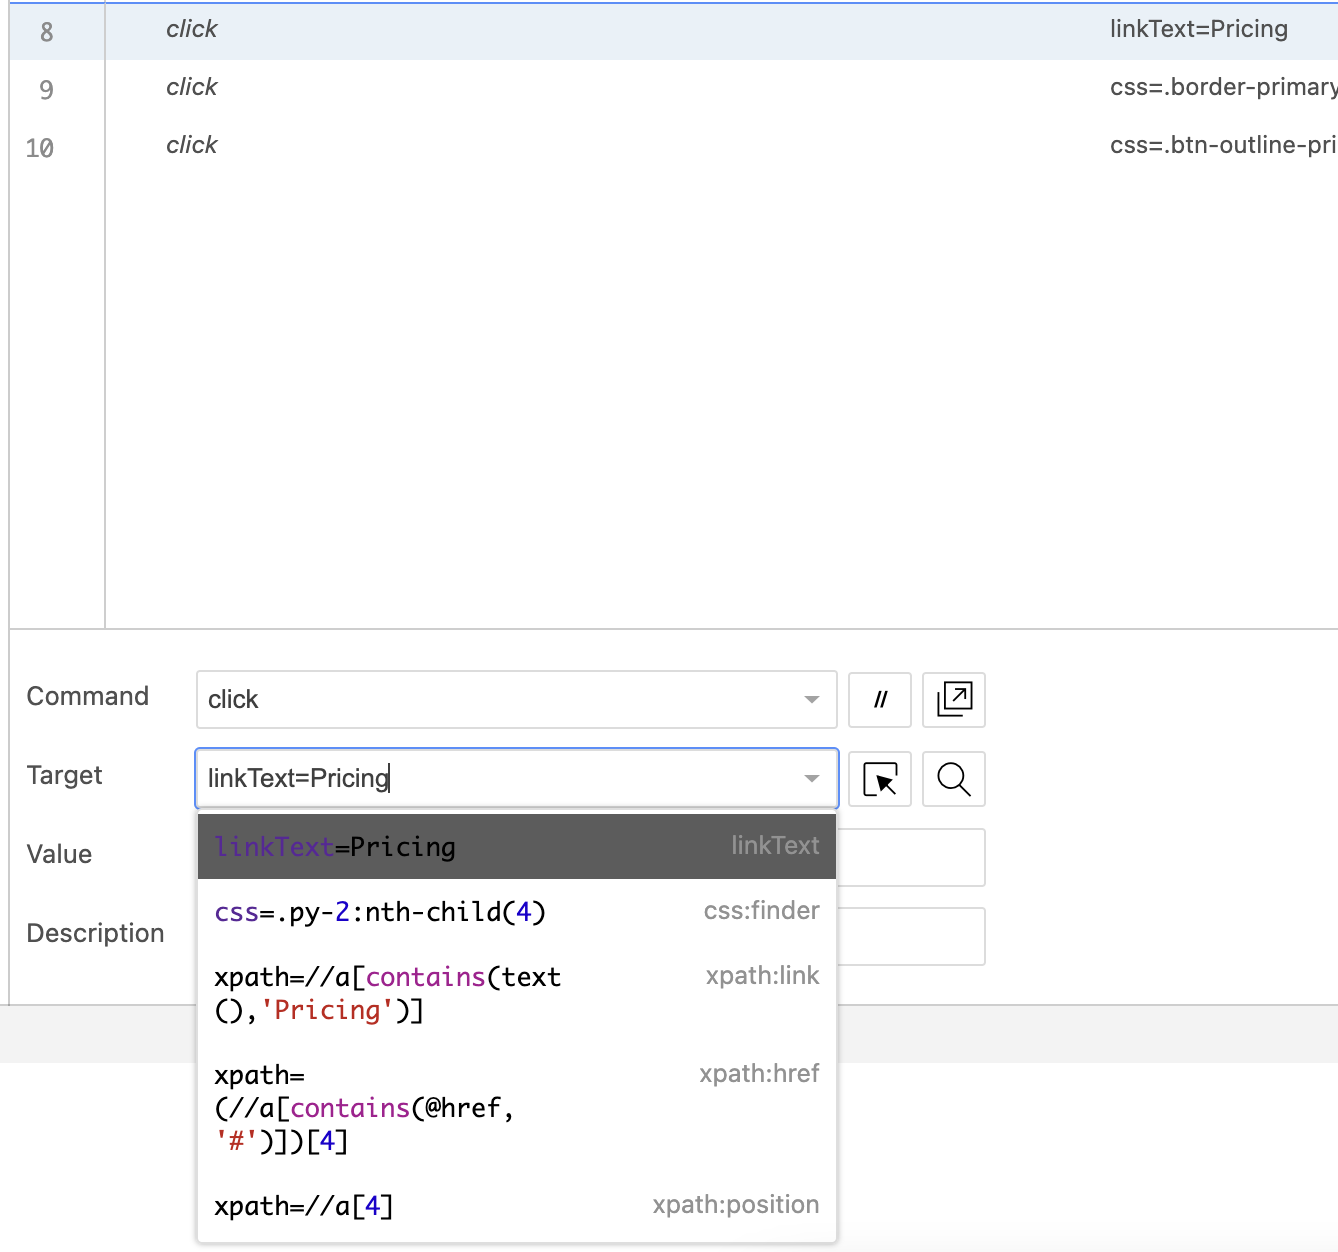
You should put performance and flakiness into consideration when choosing one locator over another. The topic over performance is large and cannot be covered in this tutorial.
Generate Code From Recorded Steps
When you are done with the test, you can right-click on the test name and select Export.
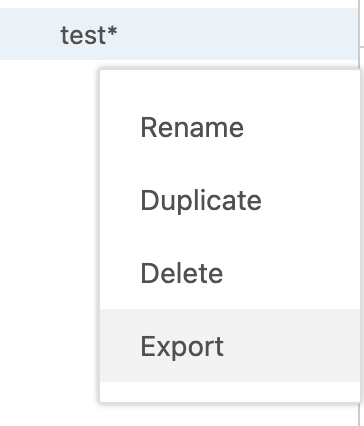
The IDE can export more than just Java code. A few other languages are also supported.
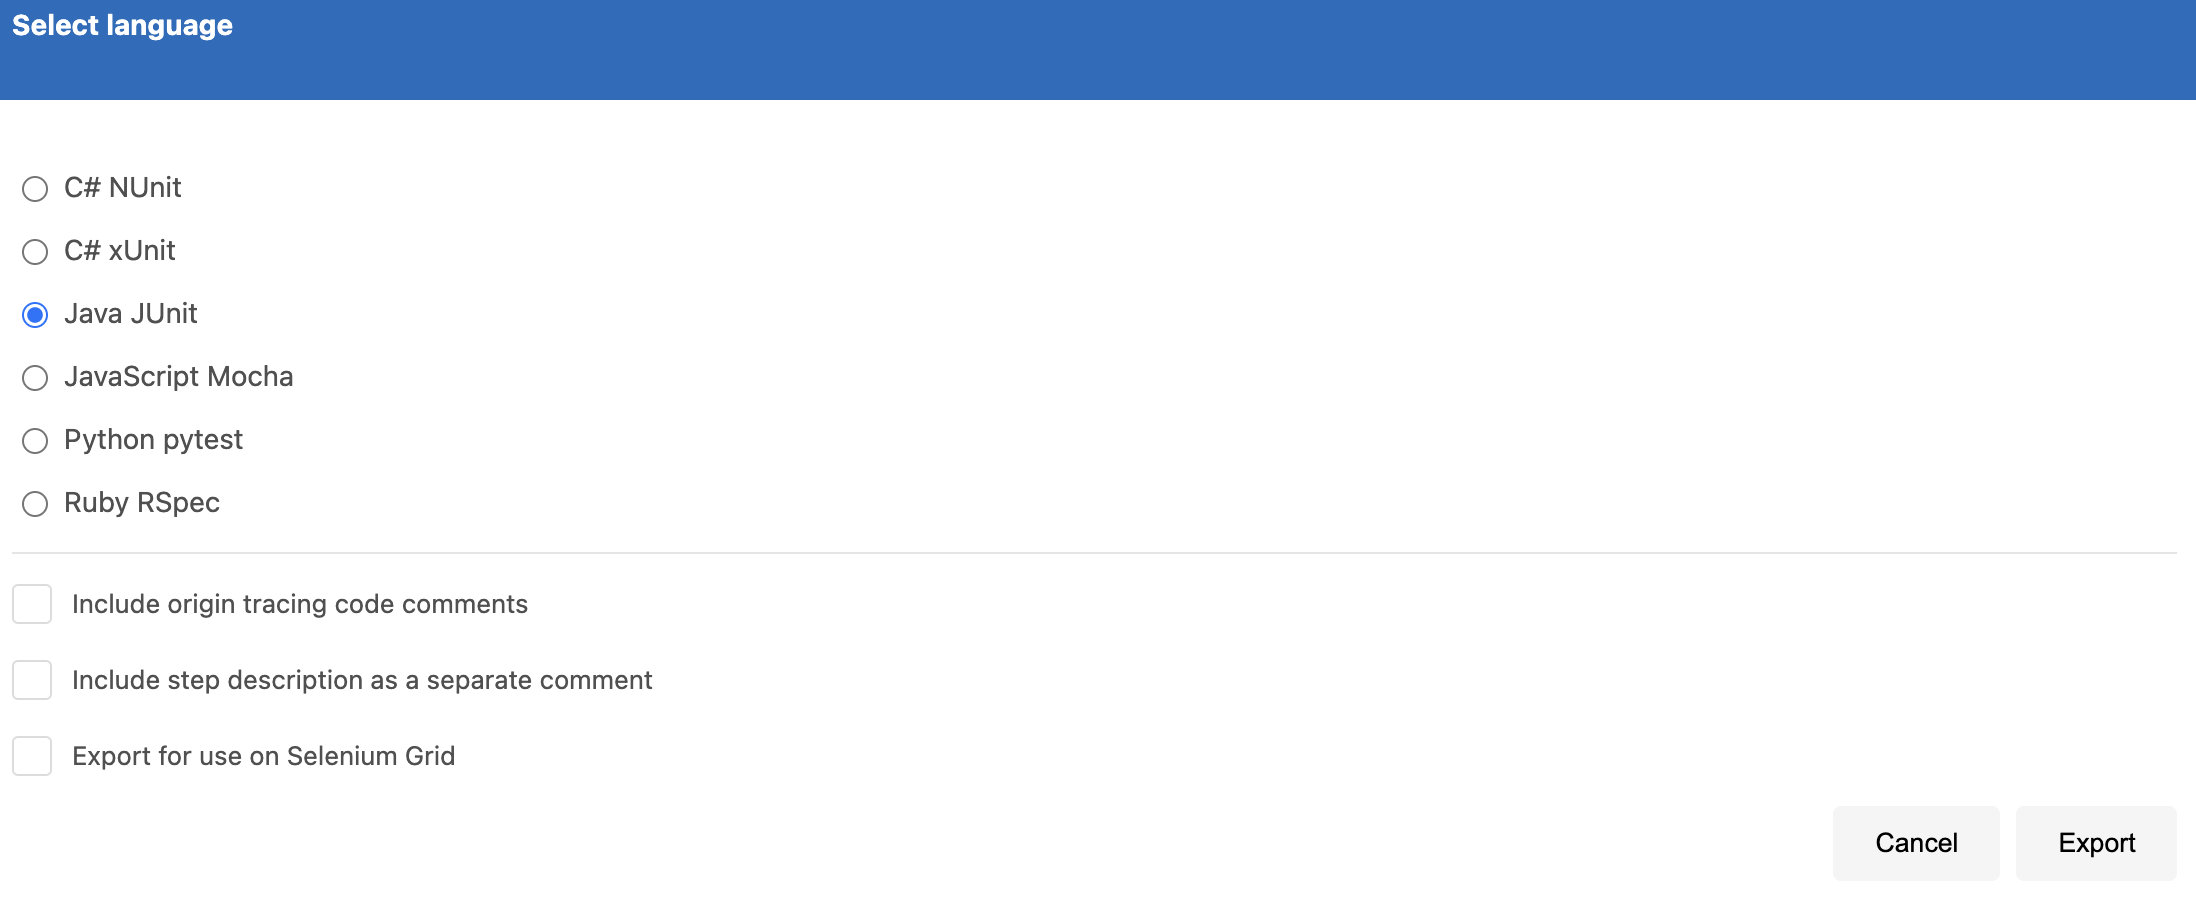
The exported file might look like this:
public class TestTest {
 private WebDriver driver;
 private Map<String, Object> vars;
 JavascriptExecutor js;
 @Before
 public void setUp() {
   driver = new ChromeDriver();
   js = (JavascriptExecutor) driver;
   vars = new HashMap<String, Object>();
 }
 @After
 public void tearDown() {
   driver.quit();
 }
 @Test
 public void test() {
   driver.get("http://localhost:8080/");
   driver.manage().window().setSize(new Dimension(1728, 1015));
   driver.findElement(By.cssSelector("body")).click();
   driver.findElement(By.cssSelector(".fs-4")).click();
   driver.findElement(By.linkText("Features")).click();
   driver.findElement(By.linkText("Enterprise")).click();
   driver.findElement(By.linkText("Support")).click();
   driver.findElement(By.linkText("Pricing")).click();
   driver.findElement(By.cssSelector(".border-primary .w-100")).click();
   driver.findElement(By.cssSelector(".btn-outline-primary")).click();
 }
}
This is human-readable code, so all you need to do is to copy and paste the content of the test() method into your own code. You should modify the driver.get() call because our test uses a different port number.
After copying the recorded test into our project, we have the new test below.
@Test
void automatedTest(){
  driver.get("http://localhost:" + port);
  driver.manage().window().setSize(new Dimension(1728, 1015));
  driver.findElement(By.cssSelector("body")).click();
  driver.findElement(By.cssSelector(".fs-4")).click();
  driver.findElement(By.linkText("Features")).click();
  driver.findElement(By.linkText("Enterprise")).click();
  driver.findElement(By.linkText("Support")).click();
  driver.findElement(By.linkText("Pricing")).click();
  driver.findElement(By.cssSelector(".border-primary .w-100")).click();
  driver.findElement(By.cssSelector(".btn-outline-primary")).click();
}
You can switch to the ide_record branch of the repository to see this test in your project.
Summary
We have learned how to record automation steps using the Selenium IDE in this tutorial. The full project code can be found at https://github.com/dmitrilc/Daniweb_Selenium/tree/ide_record.