Introduction
In the last tutorial, we learned how to set up our own RabbitMQ exchanges and queues. In this tutorial, we will learn how to send messages to our custom daniweb-exchange.
Goals
At the end of the tutorial, you would have learned:
- How to send messages in RabbitMQ.
Tools Required
- A RabbitMQ server with the same custom exchange and queue from this tutorial.
Prerequisite Knowledge
- RabbitMQ Exchanges and Queues.
- Basic Java (only second part).
Project Setup
To follow along with the tutorial, perform the steps below:
- Log into RabbitMQ’s management interface.
Send Message Using The Management Interface
The most convenient method to send a message is via the management interface itself. Keep in mind that this is only possible to users who have permission to access the management interface.
To send a message to the daniweb-exchange, follow the steps below.
-
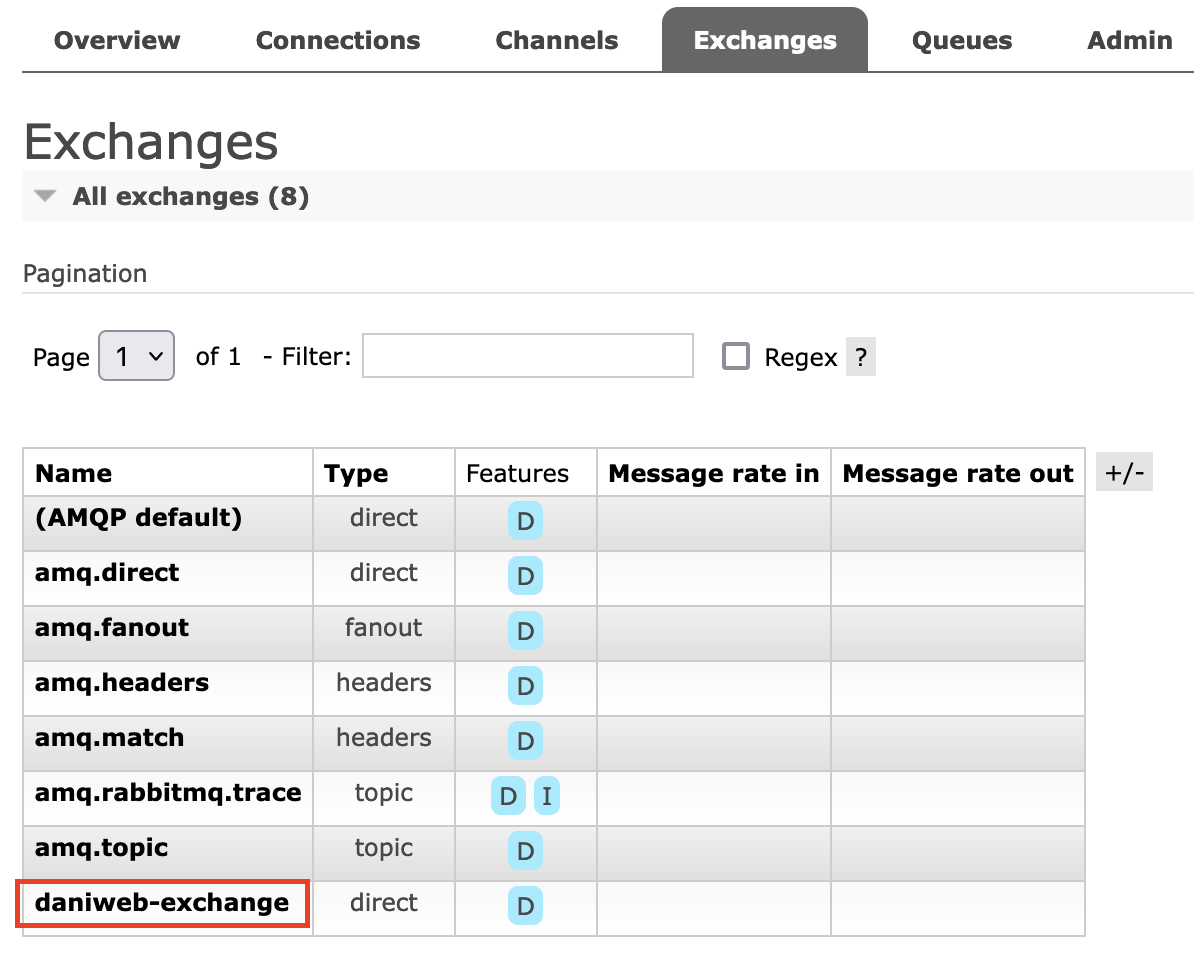
Go to Exchanges, and then select daniweb-exchange.
-
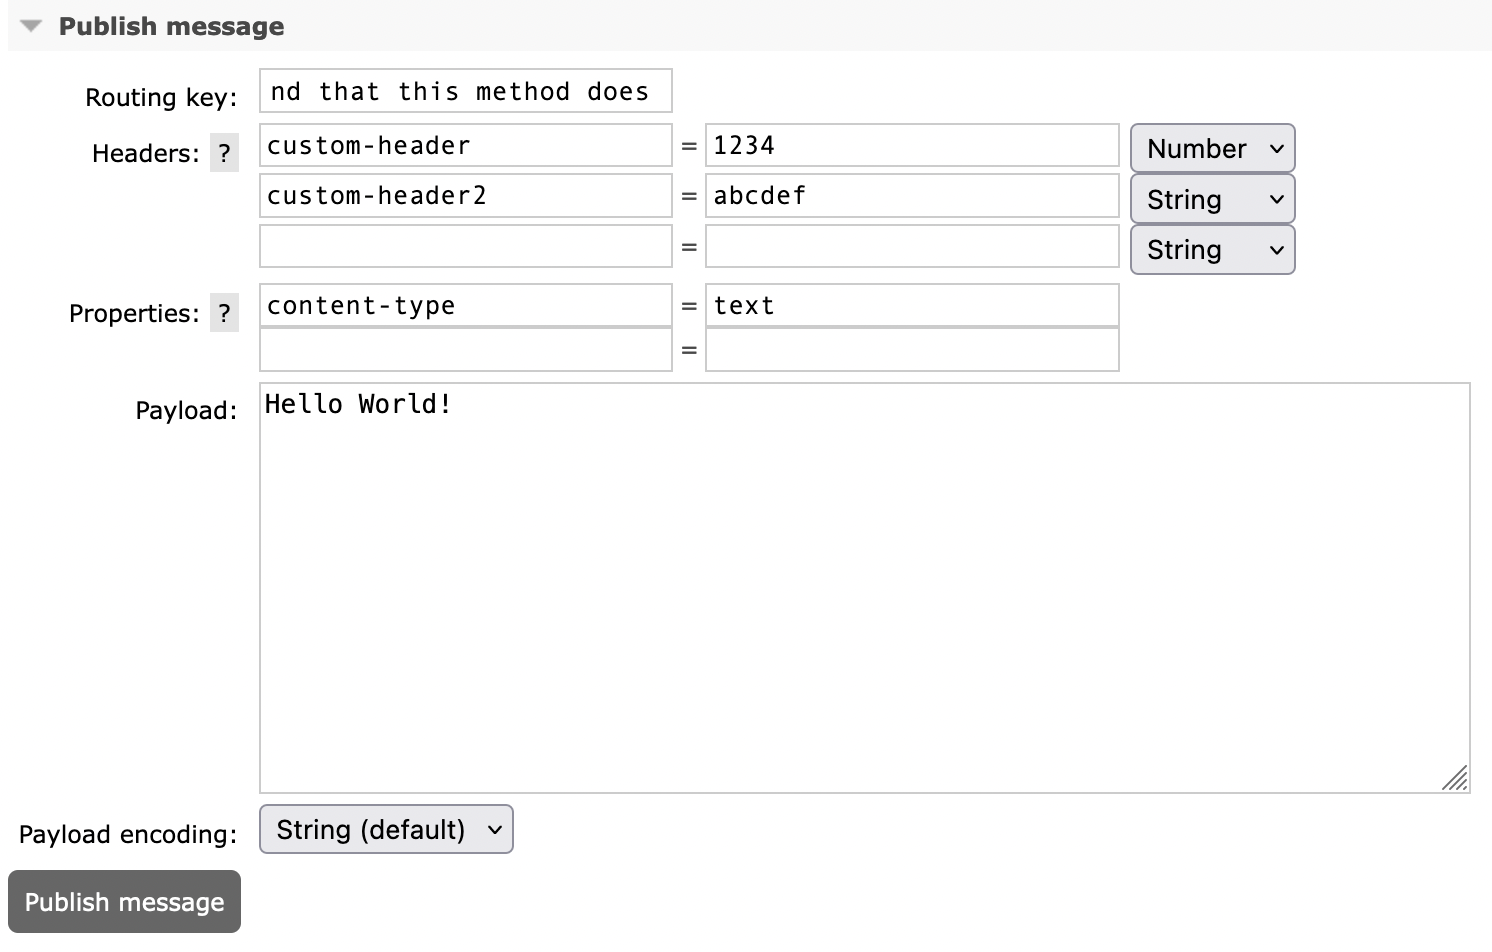
Scroll down until you see Publish Message. Fill in the information exactly like the screenshot below. The Routing key and the Properties must be valid. Payload and Headers can be set with your value of choice.
-
Hit Publish message.
Because we used the routing key daniweb-to-my-queue, the message is automatically sent to my-queue. If we switched back to the my-queue view, then we can see the message that we just sent in the ready status.

This message will stay in the queue until it is consumed and acked.
Creating A New User
The admin user that we have been using is fine for tasks that can be done on the management interface, but for sending or receiving messages from outside the management interface, it is probably better to create a different user. To create a new user, follow the steps below.
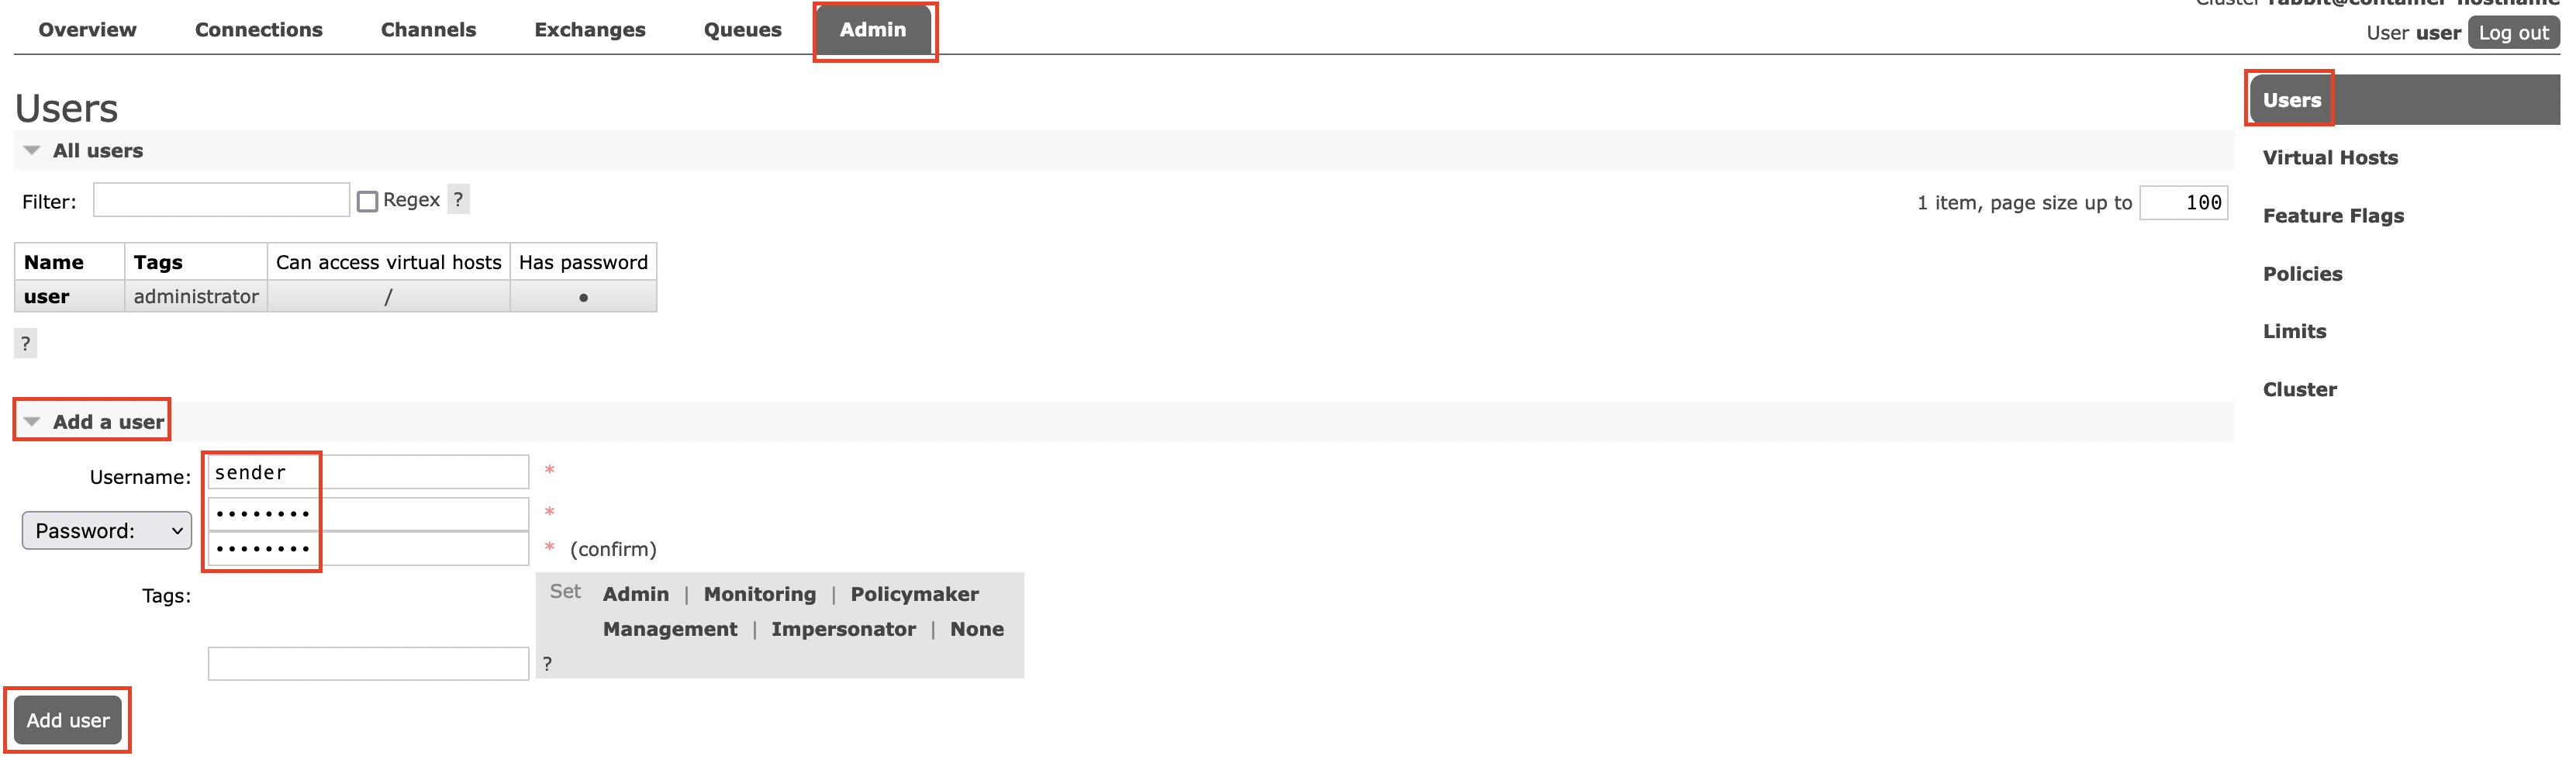
- Select the Admin tab.
- On the right-hand-side navigation bar, select Users.
- Expand Add a user.
- Set the username to sender.
- Sett the password to password.
- Hit Add user.
After the user sender is created, the management interface will show that this user has no access to any virtual host.

In RabbitMQ, virtual hosts are used to isolate exchanges, queues, authorization (authentication is still shared among all virtual hosts) and many more properties. This feature is useful when you are running a multi-tenant setup.
For example, if you own a paid weather data streaming service and charges your clients to access this data, then it probably makes more sense to have two different clients, Weather Channel and AccuWeather, on different virtual hosts, so each client can have their own queues and exchanges.
Because our project system is simple, we are only going to be concerned about the default virtual host slash (/). In order to send messages, then the sender user would need the write permission to a virtual host /.
- Click on the Name sender to go into its configuration.
- Leave Configure regex and Read regex blank.
- The Write regex needs to have
.*as the value. - Finally, hit Set permission.
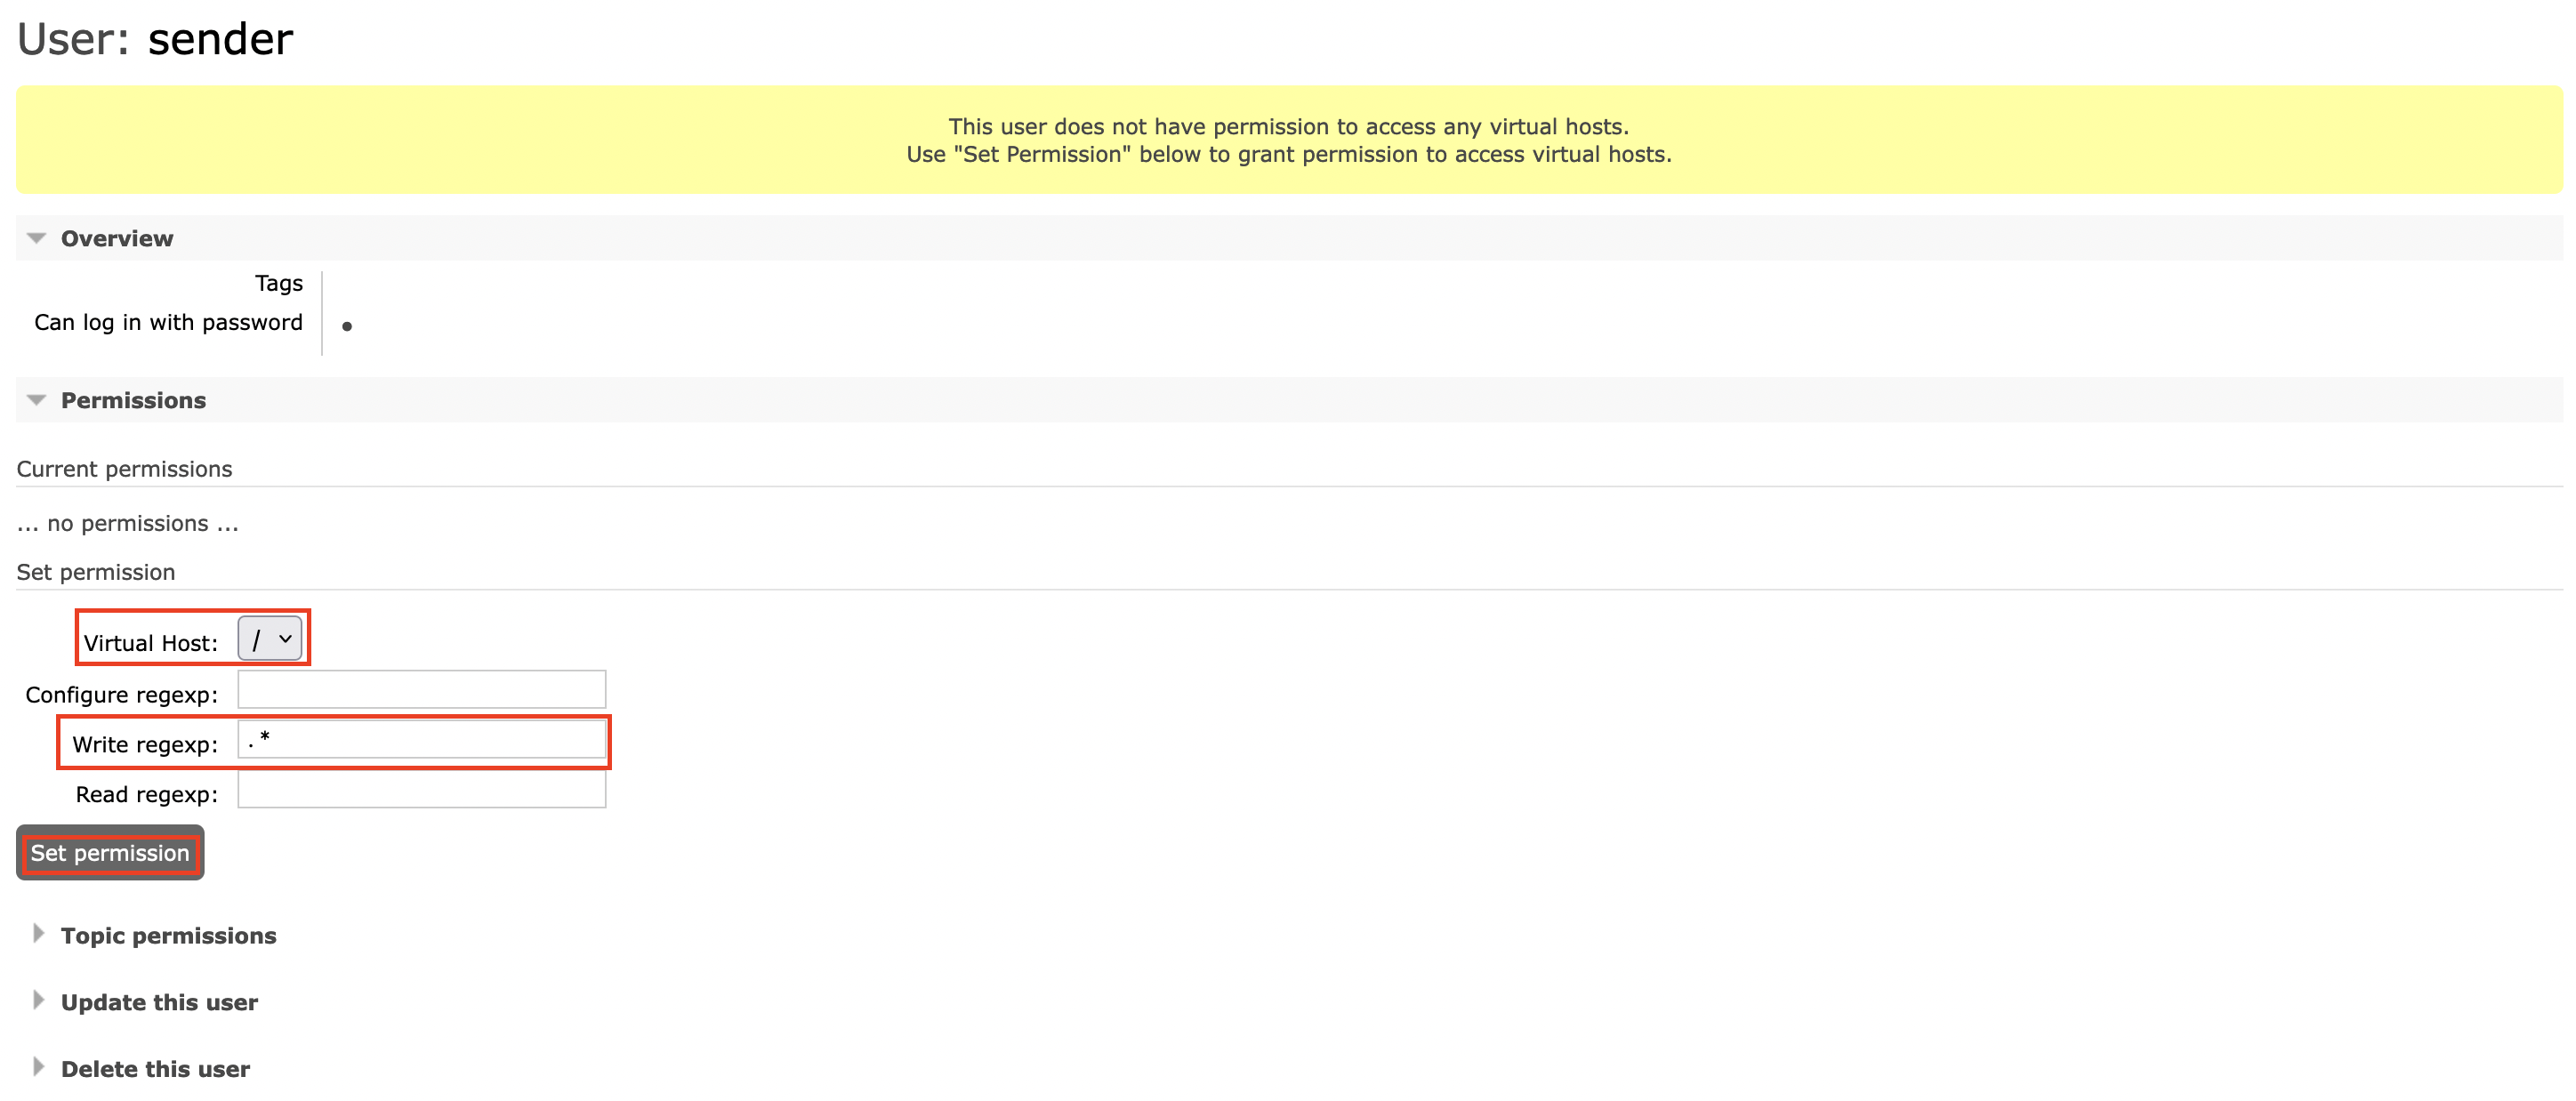
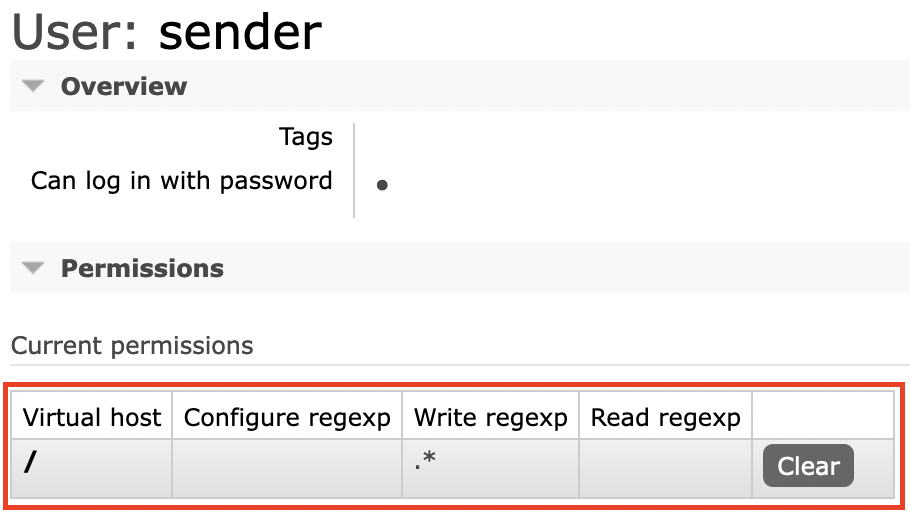
We can now see that the use has permission to send messages to the virtual host /.
Send Message In Code
A more normal method of sending messages with a program. Follow the steps below to create a small Java program.
-
Create a new text file called PublishSample.java under the ~/Downloads directory for your system.
-
Copy and paste the code below into the file.
import com.rabbitmq.client.AMQP; import com.rabbitmq.client.ConnectionFactory; import java.io.IOException; import java.nio.charset.StandardCharsets; import java.util.concurrent.TimeoutException; public class PublishSample { private static final String USERNAME = "sender"; private static final String PASSWORD = "password"; private static final String ROUTING_KEY = "daniweb-to-my-queue"; private static final String EXCHANGE_NAME = "daniweb-exchange"; private static final String BODY = "Hello World From Java!"; public static void main(String... args){ var factory = new ConnectionFactory(); factory.setUsername(USERNAME); factory.setPassword(PASSWORD); factory.setHost(ConnectionFactory.DEFAULT_HOST); factory.setVirtualHost(ConnectionFactory.DEFAULT_VHOST); factory.setPort(ConnectionFactory.DEFAULT_AMQP_PORT); try(var conn = factory.newConnection(); var channel = conn.createChannel()){ var props = new AMQP.BasicProperties.Builder() .deliveryMode(1) .build(); channel.basicPublish(EXCHANGE_NAME, ROUTING_KEY, props, BODY.getBytes(StandardCharsets.UTF_8)); } catch (IOException | TimeoutException e) { throw new RuntimeException(e); } } } -
Download the amqp-client-5.15.0.jar from https://www.rabbitmq.com/java-client.html.
-
Download the slf4j-simple-2.0.0.jar from https://repo1.maven.org/maven2/org/slf4j/slf4j-simple/2.0.0/.
-
Download the slf4j-api-2.0.0.jar from https://repo1.maven.org/maven2/org/slf4j/slf4j-api/2.0.0/.
-
Place all three jars under the ~/Downloads directory in your system.
-
In your terminal, execute the program using the command
java -cp "Downloads/*" Downloads/PublishSample.java. You might need to modify the directories in the command, depending on your current working directory or operating system.
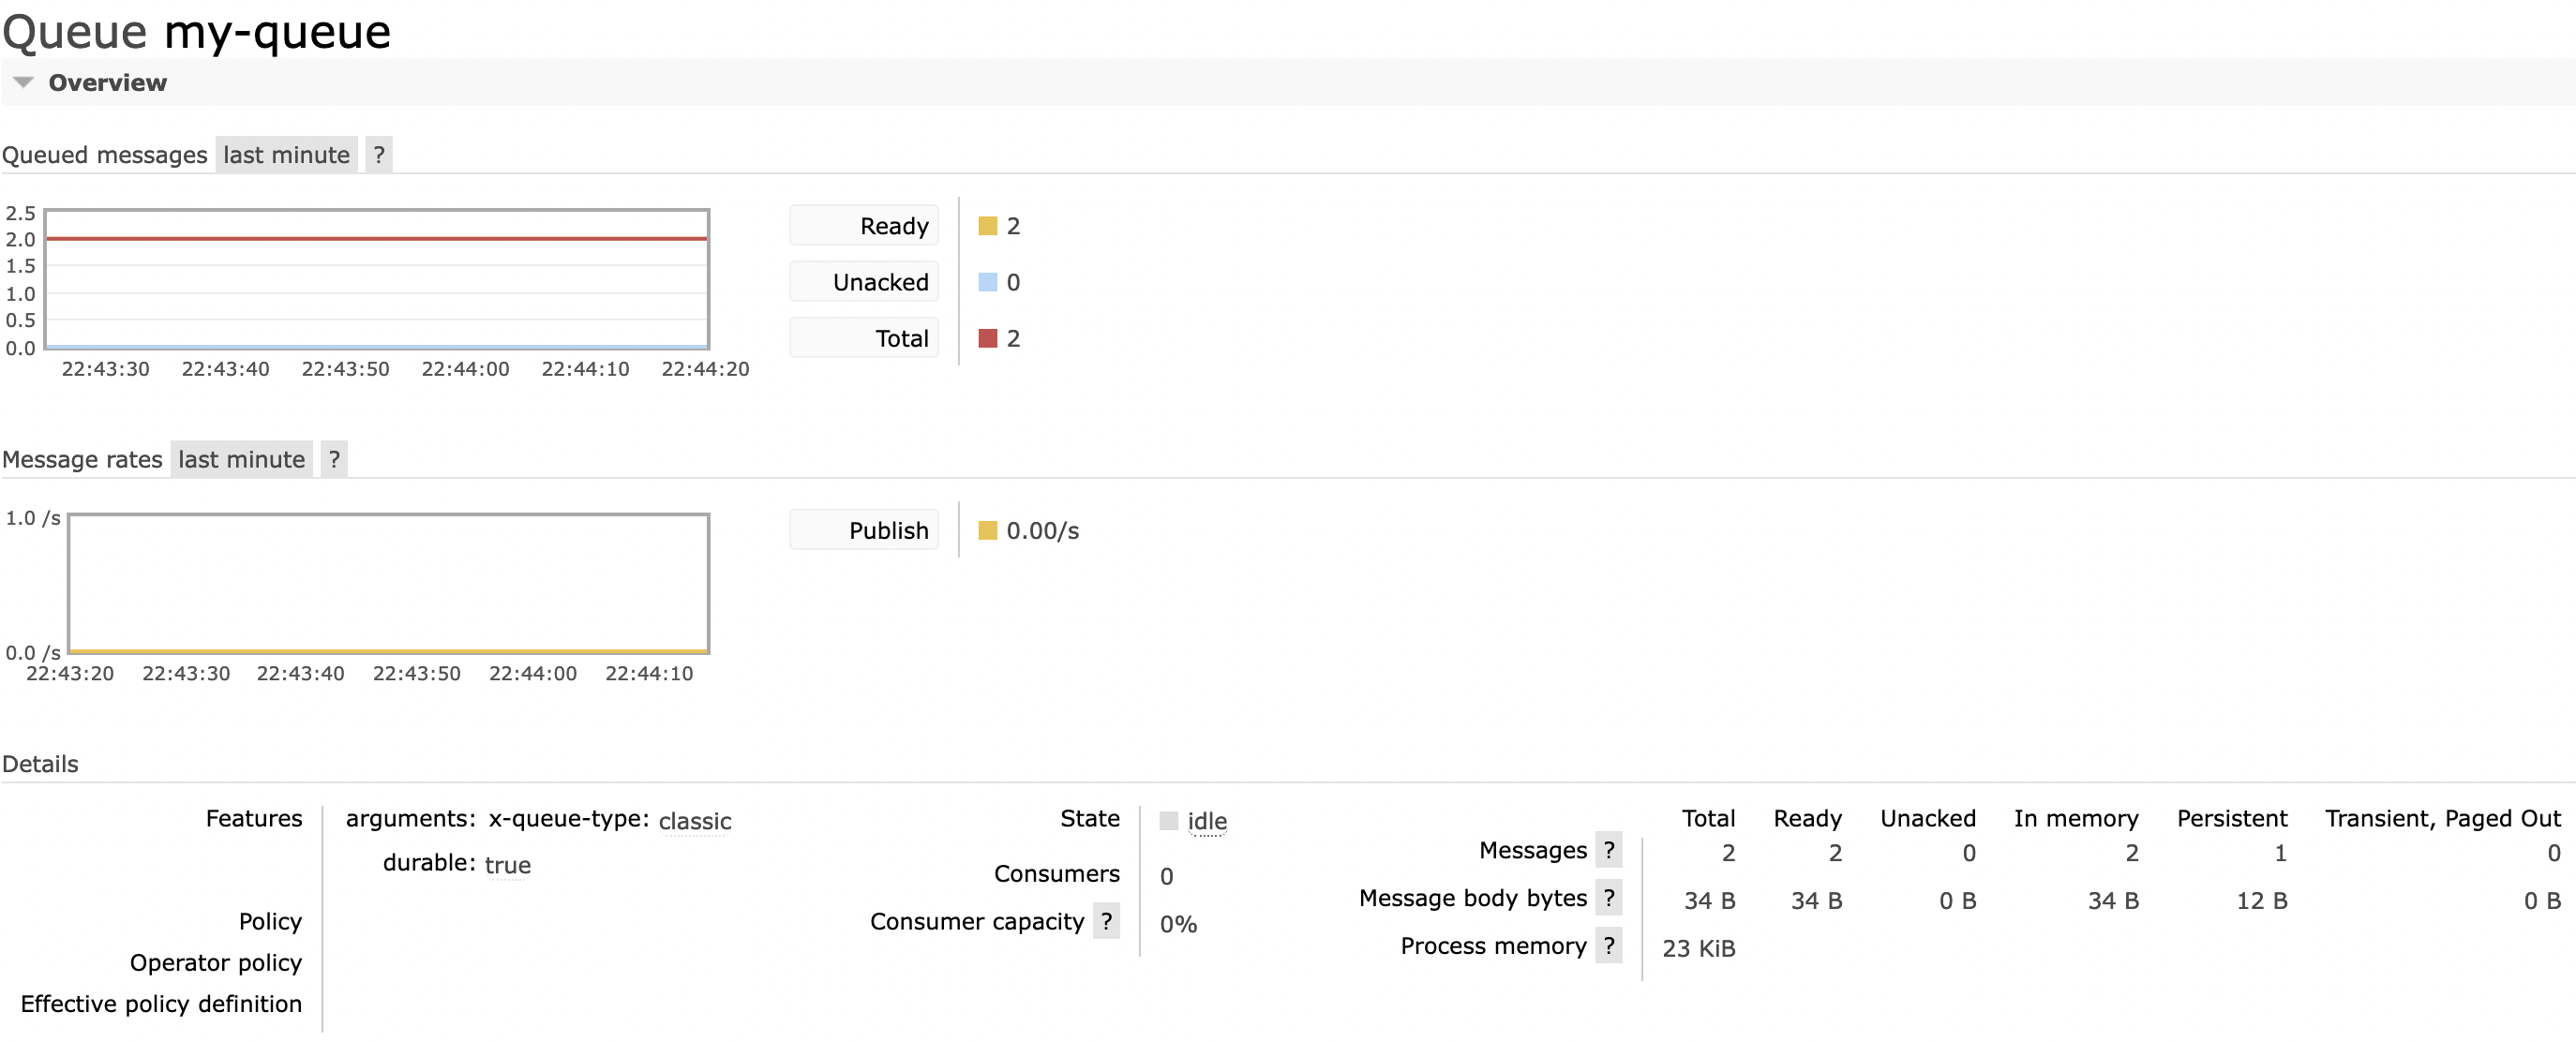
After the command is executed, then you can see another message in the RabbitMQ management system (two messages in total).
Summary
You have learned how to send messages using two different ways in RabbitMQ, as well as how to create a new user. In the next tutorial, we will learn how to consume these messages.