In this tutorial, you will learn to fine-tune a Hugging Face Transformers model for video classification in PyTorch. The Hugging Face documentation provides an example of performing video classification using the Hugging Face Trainer with one of Hugging Face's built-in datasets. However, the process of fine-tuning a video transformer on a custom dataset in PyTorch is not explained. I will cover this gap in this article and show you how to fine-tune a Hugging Face video transformer on your custom dataset in PyTorch. So, let's begin without further ado.
Installing and Importing Required Libraries
As always, we will first install and import the libraries required to run the scripts in this tutorial:
The following script installs the required libraries:
!pip install -q pytorchvideo datasets transformers[sentencepiece] evaluate
!pip install accelerate -U
And the script below imports the libraries we will use to run codes in this tutorial:
import av
import datasets
from datasets import load_dataset, DatasetDict,  Audio
import pandas as pd
import os
import glob
import io
import numpy as np
from sklearn.model_selection import train_test_split
from sklearn.metrics import f1_score, classification_report, accuracy_score
from transformers import AutoImageProcessor, VideoMAEModel,  AdamW
import torch
import torch.nn as nn
import torch.utils.data
from torch.utils.data import Dataset, DataLoader
from datasets import load_dataset
from sklearn.metrics import f1_score, classification_report, accuracy_score
from sklearn.preprocessing import LabelEncoder
from sklearn.model_selection import train_test_split
Downloading and Importing the Dataset
You can download the dataset for this tutorial using the following command:
!wget -q https://git.io/JGc31 -O ucf101_top5.tar.gz
!tar xf ucf101_top5.tar.gz
The above command will download the train and test folders containing videos for training and test sets. In addition, the above command will also download train.csv and test.csv files. These files contain video names and the corresponding label category.
Let's look at the train.csv file first. The following script imports the train.csv in a Pandas DataFrame, shuffles the DataFrame rows, and displays the DataFrame header.
train_df = pd.read_csv("/content/train.csv")
train_df = train_df.sample(frac=1, random_state=42)
train_df.head()
Output:
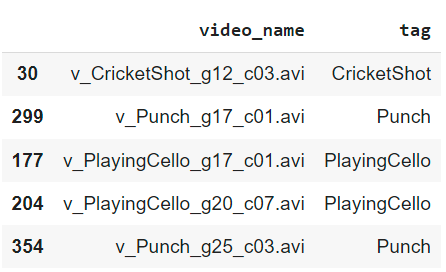
The DataFrame contains two columns: video_name and tag. The video_name column contains the file names of videos, while the tag column contains corresponding labels.
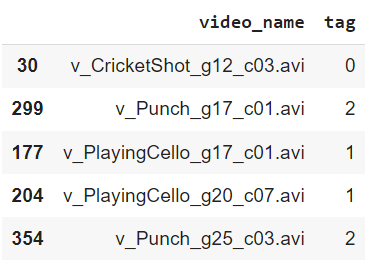
The labels are in string format; we must convert them to integers. You can use the LabelEncoder from the sklearn.preprocessing module to convert string labels to integers.
label_encoder = LabelEncoder()
train_df['tag'] = label_encoder.fit_transform(train_df['tag'])
train_df.head()
Output:
In the same way, we will import the test.csv file and convert its tag column into integer values.
test_df =  pd.read_csv("/content/test.csv")
test_df['tag'] = label_encoder.transform(test_df['tag'])
Finally, we will split our training set into training and validation sets. The validation set will be used to select the best model across training epochs.
train_df, val_df = train_test_split(train_df, test_size=0.15, random_state=42)Defining Video Preprocessing Functions
We will fine-tune the VideoMAE (Video Masked Auto Encoder) transformer for video classification in this article. This transformer accepts video frames in a specific format. To convert our video into the VideoMAE compliant format, the VideoMAE documentation provides some helper functions.
Let's define them in our code.
def read_video_pyav(container, indices):
    '''
    Decode the video with PyAV decoder.
    Args:
        container (`av.container.input.InputContainer`): PyAV container.
        indices (`List[int]`): List of frame indices to decode.
    Returns:
        result (np.ndarray): np array of decoded frames of shape (num_frames, height, width, 3).
    '''
    frames = []
    container.seek(0)
    start_index = indices[0]
    end_index = indices[-1]
    for i, frame in enumerate(container.decode(video=0)):
        if i > end_index:
            break
        if i >= start_index and i in indices:
            frames.append(frame)
    return np.array(np.stack([x.to_ndarray(format="rgb24") for x in frames]))
The read_video_pyav() function defined above receives a video container and frame indices array and returns the corresponding video frames as a NumPy array.
Next, we will define the sample_frame_indices() function, which is used to sample a given number of frame indices from a video. The function returns a list of sampled frame indices. To retrieve the sampled video frames, the frame indices are passed to the read_video_pyav() we defined before. Here is the script for the sample_frame_indices() function.
def sample_frame_indices(clip_len, frame_sample_rate, seg_len):
    '''
    Sample a given number of frame indices from the video.
    Args:
        clip_len (`int`): Total number of frames to sample.
        frame_sample_rate (`int`): Sample every n-th frame.
        seg_len (`int`): Maximum allowed index of sample's last frame.
    Returns:
        indices (`List[int]`): List of sampled frame indices
    '''
    converted_len = int(clip_len * frame_sample_rate)
    end_idx = np.random.randint(converted_len, seg_len)
    start_idx = end_idx - converted_len
    indices = np.linspace(start_idx, end_idx, num=clip_len)
    indices = np.clip(indices, start_idx, end_idx - 1).astype(np.int64)
    return indices
Finally, we will define the get_image_processor_inputs() function, which accepts the video file path as a parameter. Inside the function, the av.open() method opens the video and places it into a video container. Next, the previously defined sample_frame_indices() function is used to sample frame indices. We set the clip length to 16, as the VideoMAE, by default, expects 16 frames per video.
Subsequently, the frame indices and the video container are passed to the read_video_pyav() function to retrieve sampled video frames. These sampled video frames are then passed to the image_processor (which we will define later), returning the input representations for the VideoMAE transformer.
def get_image_processor_inputs(file_path):
  container = av.open(file_path)
  indices = sample_frame_indices(clip_len=16, frame_sample_rate=1, seg_len=container.streams.video[0].frames)
  video = read_video_pyav(container, indices)
  inputs = image_processor(list(video), return_tensors="pt")
  return inputs
The rest of the process is similar to what I explained in the articles on audio classification with whispers and image classification with transformers in PyTorch. We will first create a PyTorch dataset, fine-tune the VideoMAE transformer model, and evaluate its performance on the test set.
Creating PyTorch Datasets
The following script defines the VideoClassificationDataset class for creating PyTorch datasets for this tutorial.
class VideoClassificationDataset(Dataset):
    def __init__(self, root_dir, data_df, image_processor):
        self.data = data_df.dropna()
        self.root_dir = root_dir
        self.image_processor = image_processor

    def __len__(self):
        return len(self.data)

    def __getitem__(self, index):

        image_path = self.data.iloc[index]['video_name']

        video_path = os.path.join(self.root_dir, image_path)

        video_encodings = get_image_processor_inputs(video_path).pixel_values

        labels = np.array(self.data.iloc[index]["tag"])

        return video_encodings, torch.tensor(labels)
The following script instantiates the AutoImageProcessor image processor and VideoMAE model from pre-trained checkpoints. If you want, you can try other video transformers from Hugging Face. The process remains the same.
image_processor = AutoImageProcessor.from_pretrained("MCG-NJU/videomae-base")
video_encoder = VideoMAEModel.from_pretrained("MCG-NJU/videomae-base")

device = torch.device('cuda' if torch.cuda.is_available() else 'cpu')
Next, we will create training, test, and validation datasets and the corresponding data loaders.
train_dataset = VideoClassificationDataset("/content/train", train_df,  image_processor)
test_dataset = VideoClassificationDataset("/content/test",  test_df, image_processor)
val_dataset = VideoClassificationDataset("/content/train",  val_df, image_processor)

batch_size = 4

train_loader = DataLoader(train_dataset, batch_size=batch_size, shuffle=True)
test_loader = DataLoader(test_dataset, batch_size=batch_size, shuffle=False)
val_loader = DataLoader(val_dataset, batch_size=batch_size, shuffle=False)
Model Training and Evaluation
Now, we have everything to fine-tune the VideoMAE model for video classification.
We will define our VideoClassifier model as a PyTorch model. Here the trick is that we pass the output of the VideoMAE encoder model to sequential layers.
class VideoClassifier(nn.Module):
    def __init__(self, num_labels, video_encoder):
        super(VideoClassifier, self).__init__()
        self.video_encoder = video_encoder
        self.classifier = nn.Sequential(
            nn.Linear(self.video_encoder.config.hidden_size, 2048),
            nn.ReLU(),
            nn.Linear(2048, 1024),
            nn.ReLU(),
            nn.Linear(1024, 512),
            nn.ReLU(),
            nn.Linear(512, num_labels)
        )

    def forward(self, video_features):
        outputs = self.video_encoder(video_features)
        pooled_output = outputs['last_hidden_state'][:, 0, :]
        logits = self.classifier(pooled_output)
        return logits
Next, we will create our model and define the optimizer and loss functions.
num_labels = train_df['tag'].nunique()

model = VideoClassifier(num_labels, video_encoder).to(device)
optimizer = AdamW(model.parameters(), lr=2e-5, betas=(0.9, 0.999), eps=1e-08)
criterion = nn.CrossEntropyLoss()
Finally we will define the functions for training and evaluating the model.
The script below defines the training function.
# Define the training function
def train(model, train_loader, val_loader, optimizer,  criterion, device, num_epochs):

    best_accuracy = 0.0

    for epoch in range(num_epochs):

        model.train()

        for i, batch in enumerate(train_loader):

            video_features, labels = batch

            if video_features.shape[0] == 1:
              video_features = video_features.squeeze(0)
            else:
              video_features = video_features.squeeze()

            video_features = video_features.to(device)

            labels = labels.view(-1)
            labels = labels.to(device)

            optimizer.zero_grad()

            logits = model(video_features)

            loss = criterion(logits, labels)
            loss.backward()

            optimizer.step()

            if (i+1) % 8 == 0:
                print(f'Epoch {epoch+1}/{num_epochs}, Batch {i+1}/{len(train_loader)}, Train Loss: {loss.item() :.4f}')
                train_loss = 0.0

        val_loss, val_accuracy, val_f1, _ , _ = evaluate(model, val_loader, device)

        if val_accuracy > best_accuracy:
            best_accuracy = val_accuracy
            torch.save(model.state_dict(), 'best_model.pt')

        print("========================================================================================")
        print(f'Epoch {epoch+1}/{num_epochs}, Val Loss: {val_loss:.4f}, Val Accuracy: {val_accuracy:.4f}, Val F1: {val_f1:.4f}, best_accuracy: {best_accuracy:.4f}')
        print("========================================================================================")
The script below defines the evaluation function.
def evaluate(model, data_loader,  device):

    print("evaluate started")
    all_labels = []
    all_preds = []
    total_loss = 0.0

    with torch.no_grad():

        for i, batch in enumerate(data_loader):

          video_features, labels = batch

          if video_features.shape[0] == 1:

            video_features = video_features.squeeze(0)
          else:
            video_features = video_features.squeeze()

          video_features = video_features.to(device)

          labels = labels.view(-1)
          labels = labels.to(device)

          logits = model(video_features)
          loss = criterion(logits, labels)
          total_loss += loss.item()

          _, preds = torch.max(logits, 1)

          all_labels.append(labels.cpu().numpy())
          all_preds.append(preds.cpu().numpy())


    all_labels = np.concatenate(all_labels, axis=0)
    all_preds = np.concatenate(all_preds, axis=0)

    loss = total_loss / len(data_loader)
    accuracy = accuracy_score(all_labels, all_preds)
    f1 = f1_score(all_labels, all_preds, average='macro')
    return loss, accuracy, f1, all_labels, all_preds
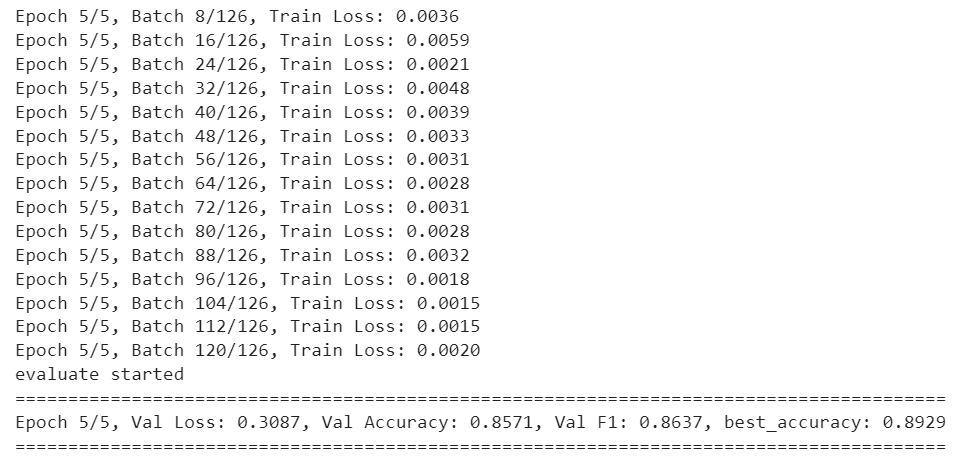
We are now ready to train our model on the training set and evaluate it on the validation set. We will save the best-performing model on the validation set. The results of the 5th and final epoch are printed below. You can see that we get an accuracy of 89.29% on the validation set.
num_epochs = 5
train(model, train_loader, val_loader, optimizer, criterion, device, num_epochs)
As a last step, we will evaluate the trained model on the test set to see how well the model performs on unseen data.
state_dict = torch.load('best_model.pt')

best_model = VideoClassifier(num_labels, video_encoder).to(device)
best_model.load_state_dict(state_dict)

test_loss, test_accuracy, test_f1, all_labels, all_preds = evaluate(best_model, test_loader, device)

print(f"test loss: {test_loss}, test accuracy: {test_accuracy}, test_f1: {test_f1}")
print(classification_report(all_labels, all_preds))
print(accuracy_score(all_labels, all_preds))
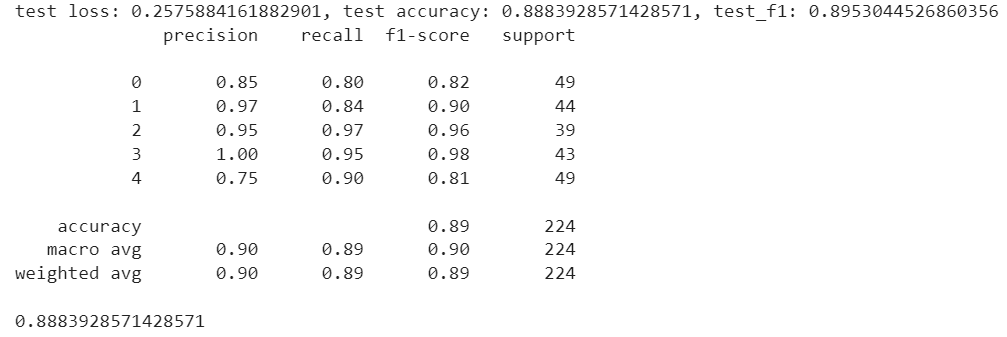
The model achieves an accuracy of 88.38% on the test set. I suggest you add dropout layers and play around with the number of layers to see if you can get better accuracy.
Conclusion
Initially designed for natural language processing, transformer models have increasingly found applications in image and video processing tasks. This article explores their adaptation for video classification in PyTorch, explicitly focusing on fine-tuning a Hugging Face video transformer model. By the end of this tutorial, you should have gained the expertise to fine-tune video transformer models on your custom datasets. I welcome your feedback and any questions you may have.