Introduction
All TextView objects have a special attribute called textAppearance. This attribute can be used to set the style for text content in a TextView without affecting other styling attributes on the same TextView object.
In this tutorial, we will learn how to apply textAppearance to TextView objects.
Goals
At the end of the tutorial, you would have learned:
- How to apply
textAppearanceto TextViews.
Tools Required
- Android Studio. The version used in this tutorial is Arctic Fox 2020.3.1 Patch 3.
Prerequisite Knowledge
- Basic Android.
Project Setup
To follow along with the tutorial, perform the steps below:
-
Create a new Android project with the default Empty Activity.
-
Extract the
Hello World!String resource to thestrings.xmlfile, sores/values/strings.xmlshould have<string name="hello_world">Hello World!</string>
Apply textAppearance via XML
There are two ways to apply textAppearance to a TextView. We can apply it via XML or programmatically. To apply textAppearance using XML, we would need to set the android:textAppearance attribute.
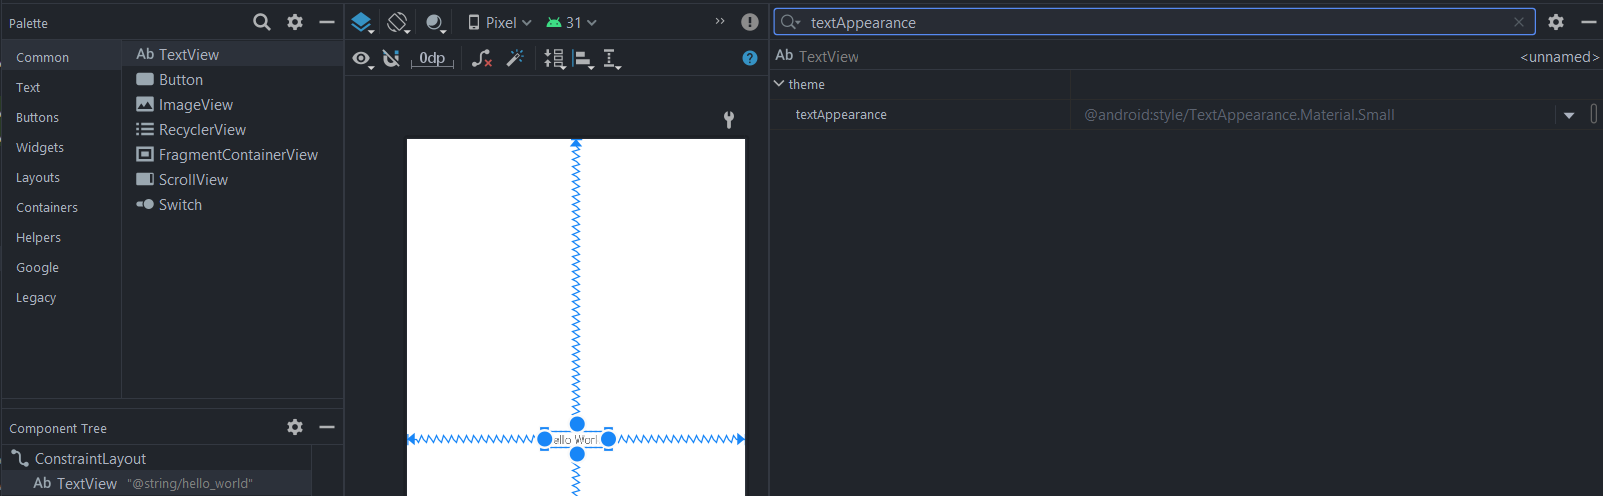
- Open up
activity_main.xmlin the Design surface, select the TextView, and search for “textAppearance” in the Attributes panel.
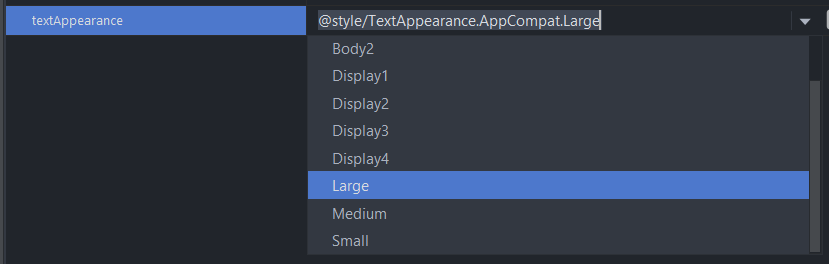
- Select the dropdown menu to use the Large value.
-
In Code view, the attribute that was added to TextView is:
android:textAppearance="@style/TextAppearance.AppCompat.Large"
There are a lot more values or even custom styles that you can add to textAppearance that are not in the dropdown menu. To see more values provided by Android,
- Switch to Design view.
- Select the “Pick a Resource” button on the textAppearance attribute. The button is tiny, so it can be hard to spot. Refer to the screenshot below.

- Upon the window opening, you will be able to find a lot of premade
textAppearancestyles.
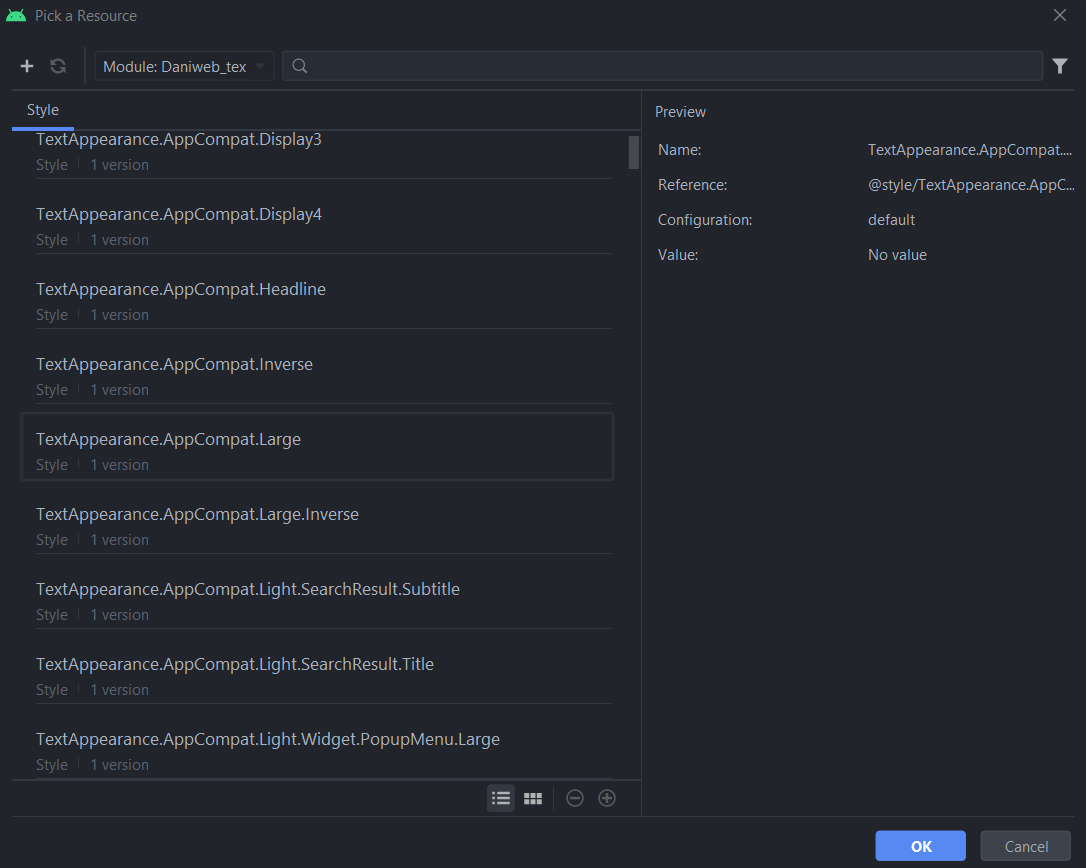
- Select Cancel to close the window.
So far, our TextView XML looks like below.
<TextView
android:layout_width="wrap_content"
android:layout_height="wrap_content"
android:text="@string/hello_world"
android:textAppearance="@style/TextAppearance.AppCompat.Large"
app:layout_constraintBottom_toBottomOf="parent"
app:layout_constraintLeft_toLeftOf="parent"
app:layout_constraintRight_toRightOf="parent"
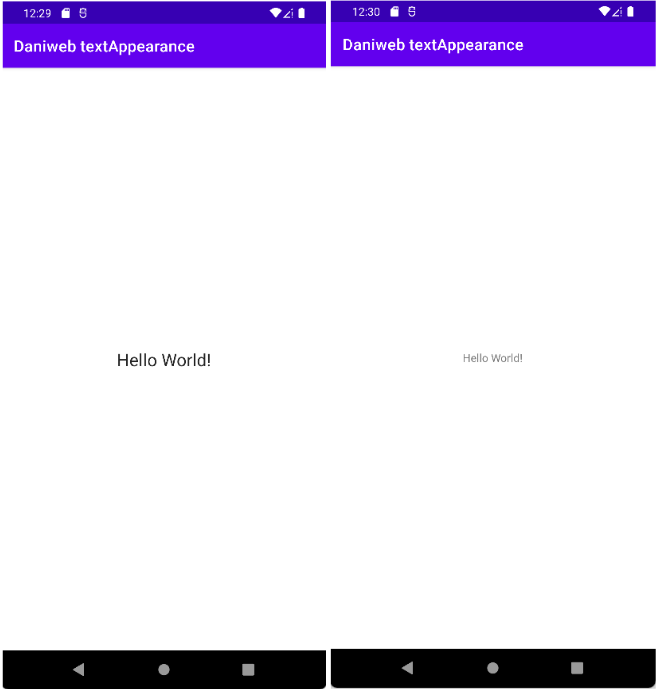
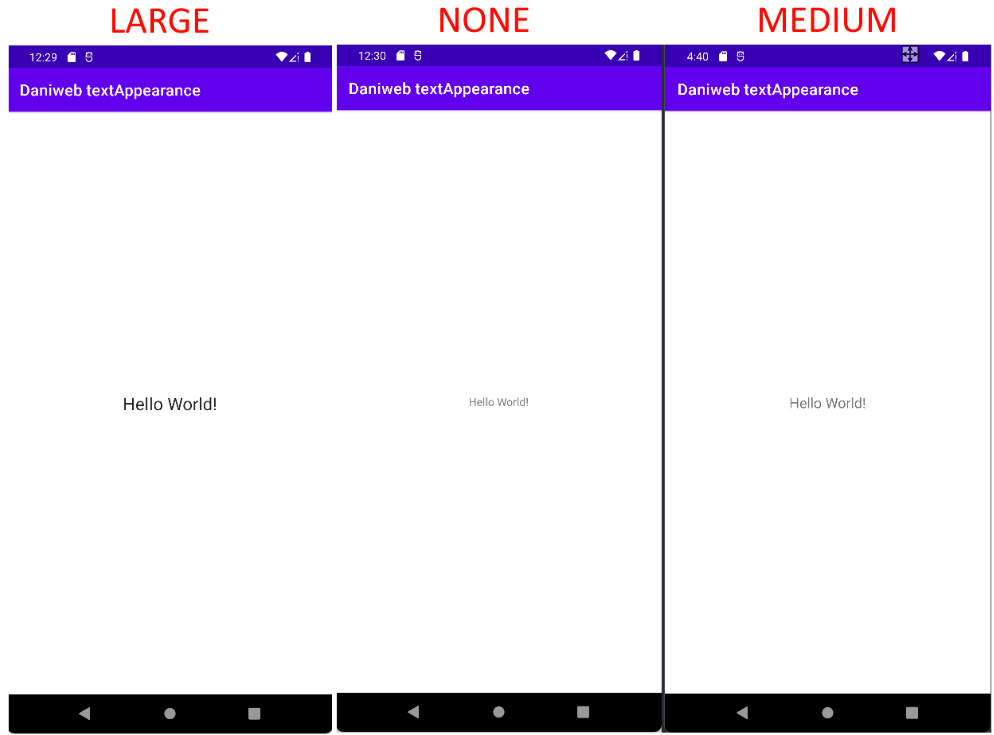
app:layout_constraintTop_toTopOf="parent" />Run the app and we can see that the text is larger than without this attribute.
Apply textAppearance programmatically
Now that we have successfully set textAppearance via XML, we will learn how to set it programmatically in this section. Setting textAppearance programmatically has a higher precedence than via XML, so textAppearance in code will override any value set in XML. To prove this point, we will attempt to set the textAppearance to Medium and observe how the app behaves at runtime.
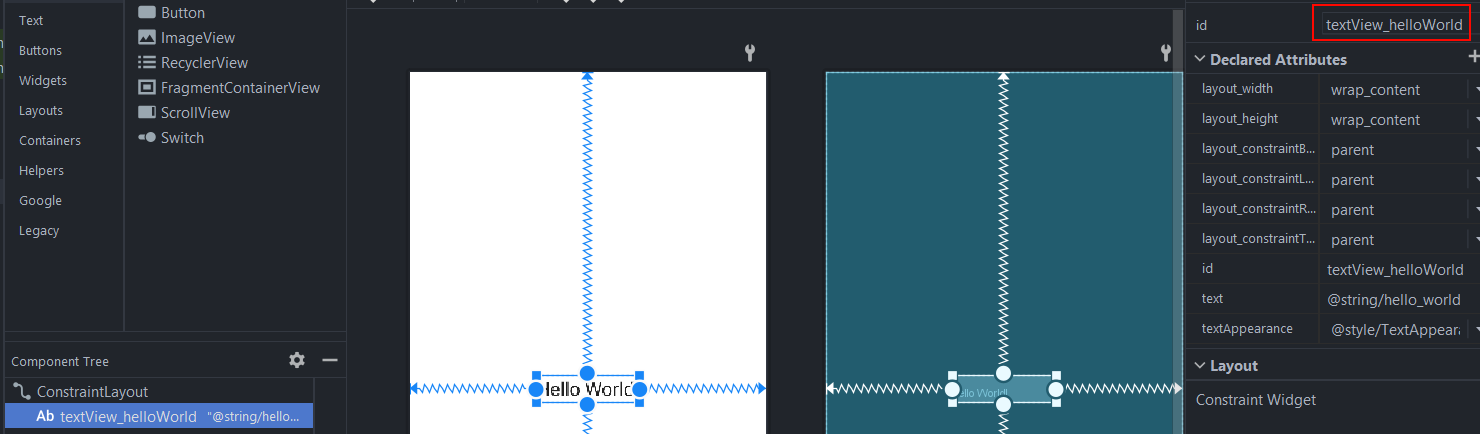
We have not set an ID for textView yet, so let us add it to make it easier to get a reference to the textView object in our code. To set the ID in Design surface,
- Open
activity_main.xmlin Design surface. - Select the TextView in the Component Tree.
- In the Attributes panel, add
textView_helloWorld. There does not seem to be an official naming convention forandroid:idby Google, so I am using elementType_elementDescription because it is the most readable to me. That is totally fine if you follow a different naming convention.
If you want to add the ID in Code view instead, copy and paste the XML below.
<TextView
   android:id="@+id/textView_helloWorld"
   android:layout_width="wrap_content"
   android:layout_height="wrap_content"
   android:text="@string/hello_world"
   android:textAppearance="@style/TextAppearance.AppCompat.Large"
   app:layout_constraintBottom_toBottomOf="parent"
   app:layout_constraintLeft_toLeftOf="parent"
   app:layout_constraintRight_toRightOf="parent"
   app:layout_constraintTop_toTopOf="parent" />
To set textAppearance programmatically, normally we can use the setTextAppearance() function. Its method signature is
open fun setTextAppearance(resId: Int): UnitThe resId argument requires an ID of a textAppearance style resource found via R.style.textAppearance*.
-
Open
MainActivity.kt. -
In the
onCreate()function, after thesetContentView()function call, add the code below.val textViewHelloWorld = findViewById<TextView>(R.id.textView_helloWorld) textViewHelloWorld.setTextAppearance(R.style.TextAppearance_AppCompat_Medium) -
If your minimum target has been set to API level 21 (the default setting for the IDE used in this tutorial), you will run into a problem with the code above because the version of
setTextAppearance()that we used was added in API level 23.

-
Fortunately, there is a TextViewCompat helper class that we can use to provide compatibility to older API levels. We do not need to provide complex API checking logic with this helper class. The helper method that we need to use is:
static fun setTextAppearance(@NonNull textView: TextView, @StyleRes resId: Int): Unit
It is a static method, so we do not have to create a TextViewCompat object. We simply need to provide a TextView object and the style resource ID. Replace the code written in the previous step with the code below.
TextViewCompat.setTextAppearance(
   findViewById(R.id.textView_helloWorld),
   R.style.TextAppearance_AppCompat_Medium)
Run the app and we will see that textView_helloWorld now displays in Medium size, completely overwriting the Large size set with android:textAppearance earlier.
Solution Code
activity_main.xml
<?xml version="1.0" encoding="utf-8"?>
<androidx.constraintlayout.widget.ConstraintLayout xmlns:android="http://schemas.android.com/apk/res/android"
   xmlns:app="http://schemas.android.com/apk/res-auto"
   xmlns:tools="http://schemas.android.com/tools"
   android:layout_width="match_parent"
   android:layout_height="match_parent"
   tools:context=".MainActivity">

   <TextView
       android:id="@+id/textView_helloWorld"
       android:layout_width="wrap_content"
       android:layout_height="wrap_content"
       android:text="@string/hello_world"
       android:textAppearance="@style/TextAppearance.AppCompat.Large"
       app:layout_constraintBottom_toBottomOf="parent"
       app:layout_constraintLeft_toLeftOf="parent"
       app:layout_constraintRight_toRightOf="parent"
       app:layout_constraintTop_toTopOf="parent" />

</androidx.constraintlayout.widget.ConstraintLayout>
MainActivity.kt
package com.example.daniwebtextappearance

import androidx.appcompat.app.AppCompatActivity
import android.os.Bundle
import androidx.core.widget.TextViewCompat

class MainActivity : AppCompatActivity() {

   override fun onCreate(savedInstanceState: Bundle?) {
       super.onCreate(savedInstanceState)
       setContentView(R.layout.activity_main)

       TextViewCompat.setTextAppearance(
           findViewById(R.id.textView_helloWorld),
           R.style.TextAppearance_AppCompat_Medium)
   }
}
strings.xml
<resources>
   <string name="app_name">Daniweb textAppearance</string>
   <string name="hello_world">Hello World!</string>
</resources>
Summary
We have learned how to set textAppearance on TextView objects. The full project code can be found here https://github.com/dmitrilc/DaniwebTextAppearance/tree/main