Introduction
Complex Views can use up RAM and reduce the performance of your Android apps. If a View is rarely used, you should consider delaying its rendering until it is needed by your app. One way to do that is to use the ViewStub View.
ViewStub is very cheap to inflate, so it can often be used as a stub for complex Views.
Goals
At the end of the tutorial, you would have learned:
- How to use ViewStub to lazily load Views.
Prerequisite Knowledge
- Basic Android development knowledge.
Tools Required
- Android Studio.
Project Setup
To follow along with the tutorial, perform the steps below:
- Create a new Android project with the default Empty Activity.
- Delete the “Hello World”
TextView.
ViewStub Concept Overview
ViewStub is cheap to inflate because it is invisible and has zero dimensions. At development time, it references another layout file with the android:layout attribute. The XML file that it references does not necessarily have to be one of the LayoutX classes (FrameLayout, ConstraintLayout, etc). Any View would do.
When a ViewStub is inflated, the underlying layout will inherit ViewStub’s layout parameters and replaces ViewStub in the parent layout. You should be careful when attempting to reference the ViewStub id after inflation because the app will throw a NullPointerException.
There are two common ways to inflate a ViewStub:
- Set the
visibilityto the constantView.VISIBLE. UsesetVisibility()method if you are using Java. - Call the
inflate()function from the ViewStub object.
We will set visibility directly on this tutorial because it is the most readable option on Kotlin.
Create a View to stub
First, let us start with creating a View for ViewStub to reference. We will just use the Widget ProgressBar for this tutorial.
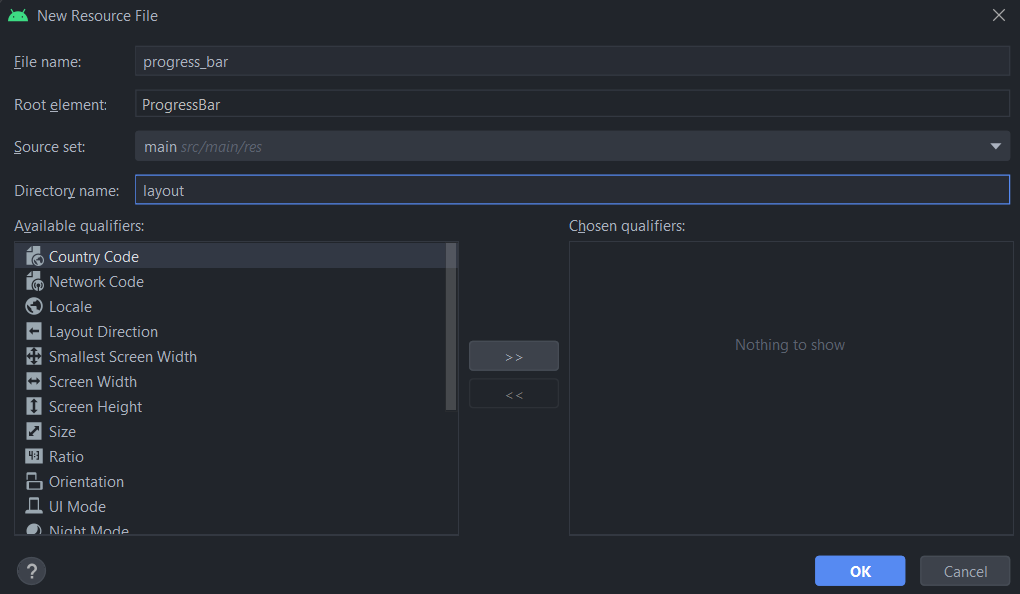
Create a progress_bar.xml file in res/layout that will only contain the ProgressBar itself.
- Right-click on the layout directory.
- New
- Layout Resource File.
- Use
progress_baras the File name. - Change the root element to
ProgressBar. - Select OK.
The XML content of progress_bar.xml should be something like this.
<?xml version="1.0" encoding="utf-8"?>
<ProgressBar xmlns:android="http://schemas.android.com/apk/res/android"
   android:layout_width="match_parent"
   android:layout_height="match_parent">

</ProgressBar>
Create the ViewStub
Now that we have the ProgressBar View ready, let us add a ViewStub as its light-weight placeholder.
-
Open
activity_main.xmlin the Design surface. -
Under
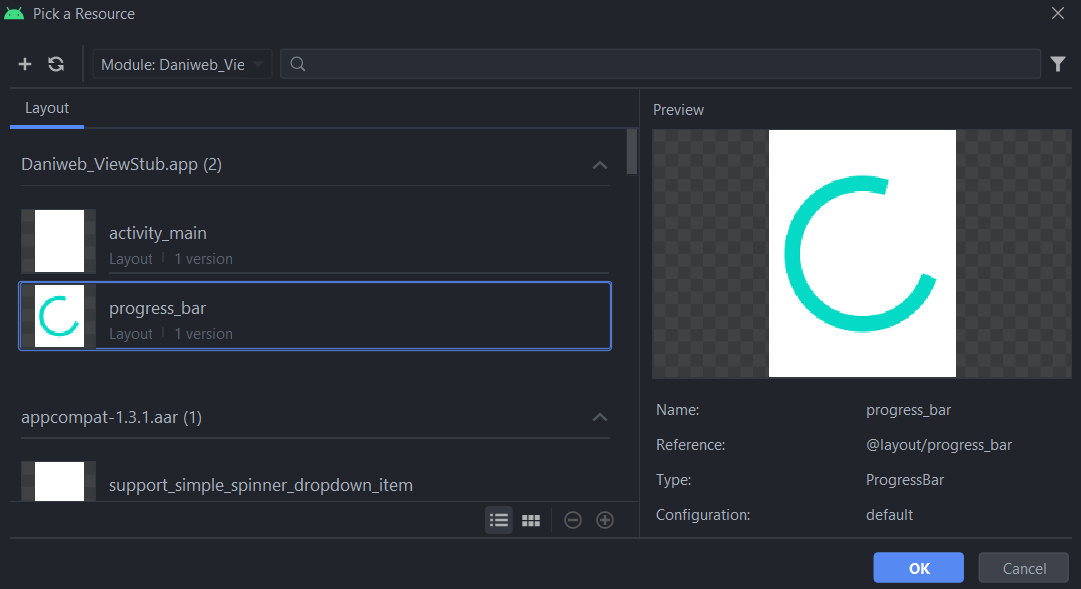
Palette/Containers, drag a newViewStubintoConstraintLayout. -
When prompted for a resource to stub, select
progress_bar. -
Hit OK.
-
Open
activity_main.xmlin Code view, and you will see an attribute calledandroid:layoutinside the ViewStub tag, as explained in the ViewStub Concept Overview section.<ViewStub android:id="@+id/viewStub" android:layout_width="wrap_content" android:layout_height="wrap_content" android:layout="@layout/progress_bar" /> -
Switch back to the Design surface.
-
Add the bottom, left and right constraints to ViewStub. All with zero margins. Do not forget that the ProgressBar will also inherit these constraints when it is inflated at runtime.
-
Below is the code for the ViewStub constraints
 app:layout_constraintBottom_toBottomOf="parent"
 app:layout_constraintEnd_toEndOf="parent"
 app:layout_constraintStart_toStartOf="parent"
Add a trigger
To activate the layout inflation, let us add a simple Button to the layout.
-
Open
activity_main.xmlin the Design surface. -
From
Palette/Buttons, drag a new Button intoConstraintLayout. -
Constraint it to all four sides of ConstraintLayout with zero margins.
-
Extract the hardcoded text of Button to a separate String resource.
-
Constraint the top of ViewStub to the bottom of Button. Since ViewStub dimensions are not selectable in the Design surface, switch to the Code view and add this attribute to the ViewStub tag.
app:layout_constraintTop_toBottomOf="@id/button" -
Your Button tag should now look like this.
<Button android:id="@+id/button" android:layout_width="wrap_content" android:layout_height="wrap_content" android:text="@string/button" app:layout_constraintBottom_toBottomOf="parent" app:layout_constraintEnd_toEndOf="parent" app:layout_constraintStart_toStartOf="parent" app:layout_constraintTop_toTopOf="parent" /> -
If we want our button to do something useful, then we will need to add an
onClickListenerto it. InMainActivity.kt, add the code below toonCreate().val button = findViewById<Button>(R.id.button) button.setOnClickListener { findViewById<ViewStub>(R.id.viewStub).visibility = View.VISIBLE //ViewStub is killed after this }
The first line attempts to find the Button by id. The second line changes the visibility of ViewStub so the ProgressBar will be inflated.
Run the app
We are now done with all prerequisites to use the ViewStub. It is time to run the app. If you also add a Profiler into the running app, then you can also see that the CPU usage increases from 0% to around 5% constantly (depending on your computer/emulator).
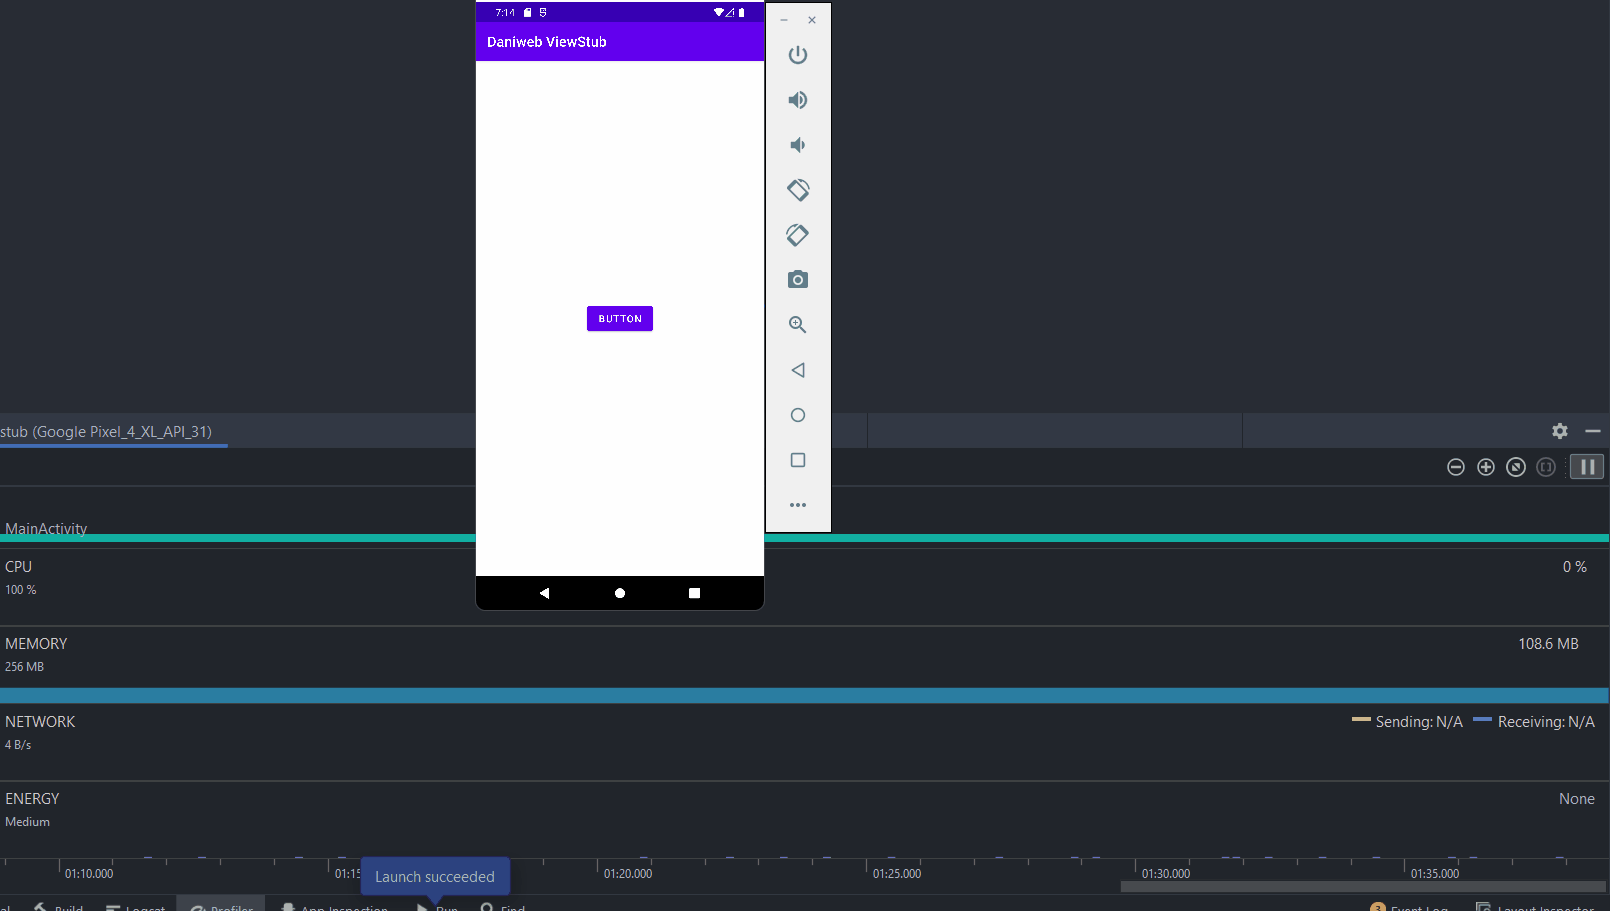
This further proves that this kind of view should only be loaded when it is needed.
NullPointerException on destroyed ViewStub
Please note that if you click the button twice, then your app will crash because your onClickListener is still referencing the same ViewStub that is no longer in the view hierachy.
If you no longer need the Button or whatever trigger that your app uses, then you can just destroy the Button itself.
Another option is to simply add an elvis operator (?) to your findViewById() function call like the code below.
findViewById<ViewStub>(R.id.viewStub)?.visibility = View.VISIBLESolution Code
MainActivity.kt
package com.example.daniwebviewstub

import androidx.appcompat.app.AppCompatActivity
import android.os.Bundle
import android.view.View
import android.view.ViewStub
import android.widget.Button

class MainActivity : AppCompatActivity() {
   override fun onCreate(savedInstanceState: Bundle?) {
       super.onCreate(savedInstanceState)
       setContentView(R.layout.activity_main)

       val button = findViewById<Button>(R.id.button)
       button.setOnClickListener {
           findViewById<ViewStub>(R.id.viewStub)?.visibility = View.VISIBLE //ViewStub is killed after this
       }

   }
}
activity_main.xml
<?xml version="1.0" encoding="utf-8"?>
<androidx.constraintlayout.widget.ConstraintLayout xmlns:android="http://schemas.android.com/apk/res/android"
   xmlns:app="http://schemas.android.com/apk/res-auto"
   xmlns:tools="http://schemas.android.com/tools"
   android:layout_width="match_parent"
   android:layout_height="match_parent"
   tools:context=".MainActivity">

   <Button
       android:id="@+id/button"
       android:layout_width="wrap_content"
       android:layout_height="wrap_content"
       android:text="@string/button"
       app:layout_constraintBottom_toBottomOf="parent"
       app:layout_constraintEnd_toEndOf="parent"
       app:layout_constraintStart_toStartOf="parent"
       app:layout_constraintTop_toTopOf="parent" />

   <ViewStub
       android:id="@+id/viewStub"
       android:layout_width="wrap_content"
       android:layout_height="wrap_content"
       android:layout="@layout/progress_bar"
       app:layout_constraintBottom_toBottomOf="parent"
       app:layout_constraintEnd_toEndOf="parent"
       app:layout_constraintStart_toStartOf="parent"
       app:layout_constraintTop_toBottomOf="@id/button" />

</androidx.constraintlayout.widget.ConstraintLayout>
progress_bar.xml
<?xml version="1.0" encoding="utf-8"?>
<ProgressBar xmlns:android="http://schemas.android.com/apk/res/android"
   android:layout_width="match_parent"
   android:layout_height="match_parent">

</ProgressBar>
strings.xml
<resources>
   <string name="app_name">Daniweb ViewStub</string>
   <string name="button">Button</string>
</resources>
Summary
Congrations! You have learned how to use ViewStub on Android Native. The full project code can be found at https://github.com/dmitrilc/DaniwebViewStubAndroid/tree/main