This short code might just give you a hint:
http://www.daniweb.com/software-development/python/threads/191210/1558321#post1558321
vegaseat 1,735 DaniWeb's Hypocrite Team Colleague
predator78 commented: figured you might have the code already :D +3
vegaseat 1,735 DaniWeb's Hypocrite Team Colleague
These two code examples will illustrate the purpose and meaning of Popen ...
# save this code as calendar_may_2011.py

import calendar

calendar.prmonth(2011, 5)
... now run this code ...
# calendar_may_2011_popen.py
# Popen (Pipe open) will open the 'pipe' containing the
# standard output stream from a given Python program

import subprocess

# this will run the Python program in the working directory
# (or give full path of .py file so python.exe can find it)
cmd = "C:/Python27/python.exe calendar_may_2011.py"
p = subprocess.Popen(cmd, shell=True, stdout=subprocess.PIPE)

# allow the program to finish
p.wait()

# pipe the standard output to string s
s = p.stdout.read()

print(s)

'''you should see -->

      May 2011
Mo Tu We Th Fr Sa Su
                   1
 2  3  4  5  6  7  8
 9 10 11 12 13 14 15
16 17 18 19 20 21 22
23 24 25 26 27 28 29
30 31

'''
The old os.popen() has been deprecated since Python version 2.6
vegaseat 1,735 DaniWeb's Hypocrite Team Colleague
If you want to play around with Java based Jython, here is a simple way to test some of the widgets in the Java GUI toolkit swing ...
"""
jy_Button_test1.py
"""

# pawt will find module swing on your computer
from pawt import swing

s = 'Click me!'

# default size fits the text s, you can change it
swing_button = swing.JButton(text=s, preferredSize=(200, 20))

# a simple way to show/test the button widget
swing.test(swing_button)
"""
jy_Button_test2.py
"""
# pawt will find module swing on your computer
from pawt import swing
def click(event):
print('Clicked!')
swing_button.text = 'Clicked!'
s = 'Click me!'
swing_button = swing.JButton()
swing_button.text = s
swing_button.actionPerformed = click
# default size fits the text s, change it
swing_button.preferredSize = (200, 20)
# a simple way to show/test the button widget
swing.test(swing_button)"""
jy_List_test1.py
"""
# pawt will find module swing on your computer
from pawt import swing
text = 'Fred Ann Bob Joe Moe Zack Paul Egon Helga Jean Roger Beth'
mylist = text.split()
swing_list = swing.JList(mylist)
# a simple way to show/test the list widget
swing.test(swing_list)"""
jy_List_test2.py
"""
# pawt will find module swing on your computer
from pawt import swing
text = 'Fred Ann Bob Joe Moe Zack Paul Egon Helga Jean Roger Beth'
mylist = text.split()
# adds scrolling to the list
swing_list = swing.JScrollPane(swing.JList(mylist))
# a simple way to show/test the list widget
swing.test(swing_list)The '99 bottles of beer' Jython code is located at:
http://www.daniweb.com/software-development/java/threads/366459
vegaseat 1,735 DaniWeb's Hypocrite Team Colleague
How about this gem with a Stuttgart license plate?
vegaseat 1,735 DaniWeb's Hypocrite Team Colleague
"The scientist only imposes two things, namely truth and sincerity, imposes them upon himself and upon other scientists."
-- Erwin Schrodinger
vegaseat 1,735 DaniWeb's Hypocrite Team Colleague
Another simple example ...
# convert to a dictionary and handle key collisions

a = [
('a', 1),
('b', 5),
('c', 7),
('a', 2),
('a', 3)
]

d = {}
[d.setdefault(k, []).append(v) for k, v in a]

print(d) # {'a': [1, 2, 3], 'c': [7], 'b': [5]} [V] commented: Just what I was looking for +1
vegaseat 1,735 DaniWeb's Hypocrite Team Colleague
This might be simpler ...
"""jy_hello_bat2.py
run a batch file using Jython

The Windows batch file 'hello.bat' is:
echo Hello, from batch file

tested with jython2.5.2
"""

import os

os.system('hello.bat') vegaseat 1,735 DaniWeb's Hypocrite Team Colleague
try:
    x = int(input())
except ValueError as err:
    print(err)
    # split at ':', strip white space then "'"
    err2 = str(err).split(':')[1].strip().strip("'")
    print(err2)

''' possible result (Python3) ...
invalid literal for int() with base 10: 'abcd'
abcd
''' vegaseat 1,735 DaniWeb's Hypocrite Team Colleague
For those who might be interested, PythonCard is a somewhat outdated (last activity 2006) form builder for wxPython projects.
vegaseat 1,735 DaniWeb's Hypocrite Team Colleague
"Simple things should be simple and complex things should be possible."
-- Elmer Fudd
vegaseat 1,735 DaniWeb's Hypocrite Team Colleague
You can also create GUI programs using the GUI toolkit that comes with Java. Java is normally installed on just about any computer. Instead of the usual Python (actually C based Python) you use Jython (Java based Python). Jython is easy to install on Windows and Unix systems. Here is a short example ...
"""jy_Table1.py
create a swing JTable widget using Jython
load it with a list of tuples

download file jython_installer-2.5.2.jar
from http://www.jython.org/downloads.html

on Windows just double click the .jar file
and Java will install the Jython program
into a directory called jython252

to run on Windows use  Jython.bat jy_Table1.py

tested with jython2.5.2  by  vegaseat
"""

# import needed Java libraries
# swing is the Java GUI toolkit
from javax.swing import *
from java.awt import *
from javax.swing.table import DefaultTableModel

class JTableView:

    def __init__(self, data_list, header):
        frame = JFrame("Jython JTable View")
        frame.setSize(400, 150)
        frame.setLocation(100, 100)
        frame.setLayout(BorderLayout())

        # use a list of lists/tuples
        self.tableData = data_list
        colNames = header
        dataModel = DefaultTableModel(self.tableData, colNames)
        self.table = JTable(dataModel)

        scrollPane = JScrollPane()
        scrollPane.setPreferredSize(Dimension(300, 100))
        scrollPane.getViewport().setView((self.table))

        panel = JPanel()
        panel.add(scrollPane)

        frame.add(panel, BorderLayout.CENTER)
        frame.setDefaultCloseOperation(WindowConstants.EXIT_ON_CLOSE)
        frame.setVisible(True)


header = ['First Name', 'Last Name', 'Age', 'Weight']
# a list of (firstname, lastname, age, weight) tuples
data_list = [
('Mary', 'Munchki', '17', '112'),
('Heidi', 'Kalumpa', '36', '127'),
('Frank', 'Maruco', '27', '234'),
('Larry', 'Pestraus', '19', '315'),
('Serge', 'Romanowski', '59', '147'),
('Carolus', 'Arm', '94', '102'),
('Michel', 'Sargnagel', '21', '175'),
('Fred', 'Ferkel', '52', '278')
]

# test it ...
JTableView(data_list, header)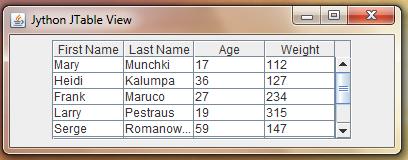
vegaseat 1,735 DaniWeb's Hypocrite Team Colleague
Read the comments ...
# draw a checker board with Python module turtle

import turtle as myTurtle

def drawCheckerBoard(myTurtle, sideLength):

    myTurtle.speed('fastest')

    # turtle by default starts at (x=0, y=0) center of a (450x550) window
    # to pick another center lift the pen up then move
    # to the left -x units and up y units
    # now drop the pen down to start drawing
    myTurtle.up()
    # sideLength * 4 should be okay for centering
    myTurtle.goto(-4 * sideLength, 4 * sideLength)
    myTurtle.down()

    for i in range (8):
        myTurtle.forward(sideLength)
        myTurtle.right(90)
        myTurtle.forward(sideLength)
        myTurtle.right(90)
        myTurtle.forward(sideLength)
        myTurtle.right(90)
        myTurtle.forward(sideLength)
        myTurtle.right(90)
        myTurtle.forward(sideLength)

    for i in range (1):
        myTurtle.right(90)
        myTurtle.forward(sideLength*2)
        myTurtle.right(90)

    for i in range(8):
        myTurtle.forward(sideLength)
        myTurtle.right(90)
        myTurtle.forward(sideLength)
        myTurtle.right(90)
        myTurtle.forward(sideLength)
        myTurtle.right(90)
        myTurtle.forward(sideLength)
        myTurtle.right(90)
        myTurtle.forward(sideLength)

    for i in range(1):
        myTurtle.left(90)
        myTurtle.forward(sideLength)
        myTurtle.left(90)

    for i in range (8):
        myTurtle.forward(sideLength)
        myTurtle.left(90)
        myTurtle.forward(sideLength)
        myTurtle.left(90)
        myTurtle.forward(sideLength)
        myTurtle.left(90)
        myTurtle.forward(sideLength)
        myTurtle.left(90)
        myTurtle.forward(sideLength)

    for i in range (1):
        myTurtle.right(90)
        myTurtle.forward(sideLength)
        myTurtle.right(90)

    for i in range(8):
        myTurtle.forward(sideLength)
        myTurtle.right(90)
        myTurtle.forward(sideLength)
        myTurtle.right(90)
        myTurtle.forward(sideLength)
        myTurtle.right(90)
        myTurtle.forward(sideLength)
        myTurtle.right(90)
        myTurtle.forward(sideLength)


myTurtle.title('centered checker board')
# test it ... … vegaseat 1,735 DaniWeb's Hypocrite Team Colleague
You need to keep your indentation spacing consistent. Like predator78 pointed out, you are switching from 4 spaces to 3 spaces in the same block of code. Not good!
Most Python IDEs will assist you on obvious mistakes like that.
vegaseat 1,735 DaniWeb's Hypocrite Team Colleague
Some security setting in Windows Vista could be the problem?
vegaseat 1,735 DaniWeb's Hypocrite Team Colleague
Works fine for me using Python27 on Windows7 OS.
VulcanDesign commented: Thanks for the help! +2
vegaseat 1,735 DaniWeb's Hypocrite Team Colleague
Nice approach.
However, opening a potentially endless amount of windows is terribly resource demanding. I would suggest to put the mouse info into the title bar of the root window ...
# PlottingProgram101.py

try:
    # Python2
    import Tkinter as tk
except ImportError:
    # Python3
    import tkinter as tk


class FunctionFrame(object):
    def __init__(self, root):
        self._root = root
        functionRow = tk.Frame(root, relief='sunken')
        functionRow.grid(column=0, row=2)
        g1 = tk.Label(functionRow, text='Function in X: ')
        g1.pack(side='left')
        functionInXInput = tk.Entry(functionRow, width=35)
        functionInXInput.pack(side='left')
        h1 = tk.Label(functionRow, text='       Function Colour: ')
        h1.pack(side='left')
        functionColourInput = tk.Entry(functionRow, width=20)
        functionColourInput.pack(side='left')
        space = tk.Label(functionRow, text='       ')
        space.pack(side='left')
        b1 = tk.Button(functionRow, text='Select', padx=5,
            command=createFunction())
        b1.pack(side='right')


class PlotFrame(object):
    def __init__(self, root):
        self._root = root
        plotRow = tk.Frame(root, relief='sunken')
        plotRow.grid(column=0, row=3, pady=20)
        a = tk.Label(plotRow, text='Plot Settings   ')
        a.pack(side='left')
        b1 = tk.Label(plotRow, text='Start X: ')
        b1.pack(side='left')
        startXInput = tk.Entry(plotRow, width=10)
        startXInput.pack(side='left')
        c1 = tk.Label(plotRow, text='   End X: ')
        c1.pack(side='left')
        endXInput = tk.Entry(plotRow, width=10)
        endXInput.pack(side='left')
        d1 = tk.Label(plotRow, text='  Start Y: ')
        d1.pack(side='left')
        startYInput = tk.Entry(plotRow, width=10)
        startYInput.pack(side='left')
        e1 = tk.Label(plotRow, text='   End Y: ')
        e1.pack(side='left')
        endYInput = tk.Entry(plotRow, width=10)
        endYInput.pack(side='left')
        f1 = tk.Label(plotRow, text='   Steps: ')
        f1.pack(side='left')
        stepsInput = tk.Entry(plotRow, width=10)
        stepsInput.pack(side='left')


class PlotApp(object):
    def __init__(self, root):
        self._root = root
        PlotFrame(root)
        FunctionFrame(root)
        self.createCanvas()

    def createCanvas(self):
        canvas = tk.Canvas(self._root, bg='white')
        canvas.grid(column=0, row=1, sticky='nwes')
        canvas.bind("<Button-1>", self.clicked)
        canvas.bind("<Enter>", self.moved)

    def clicked(self, event):
        x, y = event.x, event.y
        s = "Last point clicked at x=%s  y=%s" % (x, y)
        self._root.title(s)

    def moved(self, event):
        x, y = event.x, event.y
        s = "Cursor at x=%s  y=%s" % (x, y)
self._root.title(s) … Ene Uran commented: agree muchly +13
vegaseat 1,735 DaniWeb's Hypocrite Team Colleague
Continued fraction expansion is a simple way to approximate common trigonometry functions to a relatively high precision. In this example we only look at sin and cosine. The results compare well with the results of high precision packages like SymPy. The Python module decimal is used to achieve the high precision.
TrustyTony commented: You catched the hint +13
sneekula commented: good use of modules +12
vegaseat 1,735 DaniWeb's Hypocrite Team Colleague
The Terse
Flea Verse:
Adam
Had 'em.
vegaseat 1,735 DaniWeb's Hypocrite Team Colleague
This seems to be a relatively easy way to create a timed alert message in your wxPython program.
The wx.SplashScreen() widget takes is message as an image file, so let's create that first ...
# create an alert image for a wx.SplashScreen()
# and safe it to an image file eg. alert007.jpg

import wx

class MyFrame(wx.Frame):
    def __init__(self, parent=None, id=-1, title=None):
        wx.Frame.__init__(self, parent, id, title, size=(320, 200))
        self.draw_image()
        self.save_image()

    def draw_image(self):
        # select the width and height of the blank bitmap
        # should fit the client frame
        w, h = 280, 80
        # create the blank bitmap as a draw background
        draw_bmp = wx.EmptyBitmap(w, h)
        # create the canvas on top of the draw_bmp
        canvas_dc = wx.MemoryDC(draw_bmp)
        # make the canvas yellow
        canvas_dc.SetBackground(wx.Brush('yellow'))
        canvas_dc.Clear()

        face = u'Comic Sans MS'
        font = wx.Font(12, wx.SWISS, wx.NORMAL, wx.NORMAL, False, face)
        canvas_dc.SetFont(font)
        canvas_dc.SetTextForeground('red')
        s1 = 'The host name should be superman.'
        s2 = 'Closing this window in 3 seconds ...'
        canvas_dc.DrawText(s1, x=10, y=10)
        canvas_dc.DrawText(s2, x=10, y=40)

        self.stat_bmp = wx.StaticBitmap(self)
        # now put the canvas drawing into a bitmap to
        # display and later save it to an image file
        # (remember the canvas is on top of draw_bmp)
        self.stat_bmp.SetBitmap(draw_bmp)

    def save_image(self):
        """save the drawing that is on the bitmap"""
        finished_image = self.stat_bmp.GetBitmap()
        finished_image.SaveFile("alert007.jpg", wx.BITMAP_TYPE_JPEG)


app = wx.App(0)
MyFrame(title='canvas draw text and save').Show()
app.MainLoop()
Now we can insert the splash scrren into the program, something like this will do ...
# using a wx.SplashScreen() to splash a timed alert message

import wx …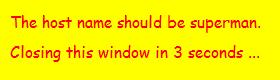
vegaseat 1,735 DaniWeb's Hypocrite Team Colleague
A moving image can be created this way with wxPython ...
# show a moving image using a wx.ClientDC() canvas on a panel
# tested with Python27 and wxPython28  by  vegaseat

import wx

class CanvasPanel(wx.Panel):
    """ create a panel with a canvas to draw on"""
    def __init__(self, parent):
        wx.Panel.__init__(self, parent, -1)
        # pick a small .jpg, .png, .gif, or .bmp image file
        # you have in the working folder or give full path
        image_file = 'Duck3.jpg'
        self.bmp = wx.Bitmap(image_file)
        # initial x position of image
        self.x = 0

        # this small delay may be  needed to
        # allow initial loading of large images
        #wx.FutureCall(50, self.create_canvas)
        # now create the canvas
        wx.EVT_SIZE(self, self.create_canvas)

        self.timer = wx.Timer(self)
        # Start(int milliseconds, oneShot=False)
        # lower timer interval gives faster speed
        self.timer.Start(30)
        # bind EVT_TIMER event to self.onTimer()
        self.Bind(wx.EVT_TIMER, self.onTimer)

    def onTimer(self, event):
        self.canvas.Clear()
        # DrawBitmap(bitmap, x, y, bool transparent)
        # x, y are upper left corner coordinates of image location
        self.canvas.DrawBitmap(self.bmp, self.x, 10, True)
        # increment x to start moving
        self.x += 1
        # optional continuous movement
        # experiment with wrap around values
        if self.x > 500:
            self.x = -250
        # print(self.x)  # test

    def create_canvas(self, event=None):
        """create the paint canvas"""
        self.canvas = wx.ClientDC(self)


app = wx.App(0)
frame = wx.Frame(None, -1, "Watch the duck move", size=(500, 400))
# will fill the frame
CanvasPanel(frame)
frame.Show(True)
app.MainLoop()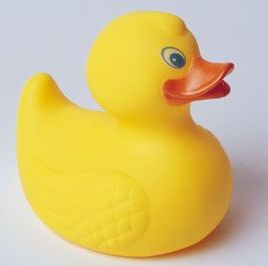
sneekula commented: nice find +12
Lardmeister commented: works very well +10
vegaseat 1,735 DaniWeb's Hypocrite Team Colleague
Programming without Google? Hard to imagine!
vegaseat 1,735 DaniWeb's Hypocrite Team Colleague
A simpler matplotlib example ...
# plotting with the pylab module from matplotlib
# http://sourceforge.net/projects/matplotlib/files/matplotlib/
# used Windows installer matplotlib-1.0.1.win32-py2.7.exe
# modified Ene's code, tested with Python27

import math
import matplotlib.pylab as pylab

# create the x list data
# arange() is just like range() but allows float numbers
# actually uses numpy's arange()
#
x_list = pylab.arange(0.0, 5.0, 0.01)

# calculate the y list data
#
y_list = []
for x in x_list:
    # give it some fancy decaying function
    y = math.cos(2*math.pi*x) * math.exp(-x)
    y_list.append(y)

pylab.xlabel("x")
pylab.ylabel("cos(2pi * x) * exp(-x)")

# draw the plot with a blue line 'b' (default)
# using x,y data from the x_list and y_list
#
# other drawing styles -->
# 'r' red line, 'g' green line, 'y' yellow line
# 'ro' red dots, 'r.' smaller red dots, 'r+' red pluses
# 'r--' red dashed line, 'g^' green triangles, 'bs' blue squares
# 'rp' red pentagons, 'r1', 'r2', 'r3', 'r4' just check them out
#
pylab.plot(x_list, y_list, 'b')

# optionally save the plot as a .png image file
pylab.savefig('pylab_fancy.png')

# show the pylab plotting window
# zoom the graph, drag the graph, change the margins, save the graph
pylab.show() Lardmeister commented: works well +10
vegaseat 1,735 DaniWeb's Hypocrite Team Colleague
Here we use the module matplotlib to plot a histogram (bar chart) of characters 'a' through 'z' as they appear in a given text ...
# create a list of [char,freq] lists of a text
# the plotting part needs the matplotlib module
# from
# http://sourceforge.net/projects/matplotlib/files/matplotlib/
# Windows installer matplotlib-1.0.1.win32-py2.7.exe
# or for Python32 use
# Windows installer matplotlib-1.1.0.dev.win32-py3.2.exe
# from
# http://www.lfd.uci.edu/~gohlke/pythonlibs/
# tested with Python27 and Python32  by  vegaseat

# use pylab namespace for clarity
import matplotlib.pylab as pylab

# just a simple text for testing
text = """\
Mississippi
"""

alpha = 'abcdefghijklmnopqrstuvwxyz'
# create initial list of [char,freq] lists
# of all lower case characters and freq=0
alpha_freq = [[c, 0]  for c in alpha]

print(alpha_freq)  # test
print('-'*60)

# increment the freq of a given character
for c in text.lower():
    if c in alpha:
        ix = alpha.index(c)
        alpha_freq[ix][1] += 1

print(alpha_freq)  # test
print('-'*60)

# use alpha_freq list to plot a char, freq histogram
# using the matplotlib module's pylab
fig = pylab.figure()
ax = fig.add_subplot(111)
# data points ...
heights = [freq for c, freq in alpha_freq]
values = range(len(alpha))
# draw a matlib bar chart
pylab.bar (values, heights)
pylab.grid (True)
pylab.title ('Letter frequency in a text')
pylab.xlabel ('char a-z')
ax.set_xticks(values)
ax.set_xticklabels(tuple(alpha))
pylab.ylabel ('counts')

pylab.show() vegaseat 1,735 DaniWeb's Hypocrite Team Colleague
Just a little Tkinter drawing fun. You can create a triangle on the Tkinter canvas by using the canvas.create_polygon() method, and then animate it with canvas.move() ...
# Tkinter animate via canvas.move(obj, xAmount, yAmount)
# object is a triangle/polygon
# tested with Python32  by  vegaseat

import time
try:
    # Python2
    import Tkinter as tk
except ImportError:
    # Python3
    import tkinter as tk

# create the main window
root = tk.Tk()
root.title("move a canvas triangle/polygon")

# create the drawing canvas
canvas = tk.Canvas(root, width=500, height=450, bg='white')
canvas.pack()

# draw a triangle using a polygon
# endpoint of polygon is same as starting point
x1 = 20
y1 = 10
x2 = 10
y2 = 20
x3 = 30
y3 = 20
triangle = canvas.create_polygon(x1, y1, x2, y2, x3, y3, fill="red")

# increments for move
y = x = 2
for k in range(200):
    time.sleep(0.025)
    # move triangle by increments x, y
    canvas.move(triangle, x, y)
    canvas.update()

# start the GUI event loop
root.mainloop() vegaseat 1,735 DaniWeb's Hypocrite Team Colleague
Not quite as much physics involved here, just a bouncing ball within the Tkinter canvas ...
# an animated red ball bouncing within the Tkinter canvas
# tested with Python27 and Python32

try:
    # Python2
    import Tkinter as tk
except ImportError:
    # Python3
    import tkinter as tk

root = tk.Tk()
root.title("Tkinter Bouncing Ball")

w = 420
h = 300
cv = tk.Canvas(root, width=w, height=h, bg='black')
cv.pack()

# 50x50 square box for the circle boundries
x1 = 10
y1 = 50
x2 = 60
y2 = 100
# set x, y increments
dx = 2
dy = 3
# create the ball object
# give it a tag name for reference
ball = cv.create_oval(x1,y1,x2,y2,fill="red", tag='red_ball')
# endless animation loop till window corner x is clicked
while True:
    # move the ball by given increments
    cv.move('red_ball', dx, dy)
    # 15 millisecond delay
    # higher value --> slower animation
    cv.after(15)
    cv.update()
    # change direction as ball touches canvas sides
    if x2 >= w:
        dx = -2
    if y2 >= h:
        dy = -3
    if x1 < 0:
        dx = 2
    if y1 < 0:
        dy = 3
    # increment circle box boundries to detect sides touch
    x1 += dx
    y1 += dy
    x2 += dx
    y2 += dy

root.mainloop()
Illustrates the use of tag names.
vegaseat 1,735 DaniWeb's Hypocrite Team Colleague
See:
"Getting tkSnack sound module to work with Python3"
http://www.daniweb.com/software-development/python/code/357467
vegaseat 1,735 DaniWeb's Hypocrite Team Colleague
Well, you are on to something, the tuple has changed. However, the id() of the whole tuple is still the same after the change.
My advice, don't rely blindly on tuples not changing as advertised.
vegaseat 1,735 DaniWeb's Hypocrite Team Colleague
The Python module pymunk is a wrapper for the 2D-Physics module Chipmunk, together with module pygame you can easily make animated physics programs ...
# Python module pygame works well with
# module pymunk (Python wrapper for 2d physics library Chipmunk)
# from:
# http://code.google.com/p/pymunk/
# in this case I downloaded Windows installer
# pymunk-1.0.0.win32.exe
# this falling ball example modified from the site ...
# http://code.google.com/p/pymunk/wiki/SlideAndPinJointsExample
# tested with Python27 and Python32 by vegaseat
#
# to make pymunk work with Python32
# change line 60 of site-packages/pymunk/package __init__.py
# from
# chipmunk_version = cp.cpVersionString.value + "r428"
# to
# chipmunk_version = cp.cpVersionString.value + "r428".encode("utf8")

import sys
import random
import pygame as pg
import pymunk as pm
import math

def to_pygame(p):
    """Small hack to convert pymunk to pygame coordinates"""
    return int(p.x), int(-p.y+600)

def add_ball(space):
    mass = 1
    radius = 14
    inertia = pm.moment_for_circle(mass, 0, radius) # 1
    body = pm.Body(mass, inertia) # 2
    x = random.randint(120,380)
    body.position = x, 550 # 3
    shape = pm.Circle(body, radius) # 4
    space.add(body, shape) # 5
    return shape

def draw_ball(screen, ball):
    p = int(ball.body.position.x), 600-int(ball.body.position.y)
    blue = (0, 0, 255)
    pg.draw.circle(screen, blue, p, int(ball.radius), 2)

def add_static_L(space):
    """an L shaped shelf"""
    body = pm.Body(pm.inf, pm.inf)  # 1
    body.position = (300,300)
    l1 = pm.Segment(body, (-150, 0), (255.0, 0.0), 5.0)  # 2
    l2 = pm.Segment(body, (-150.0, 0), (-150.0, 50.0), 5.0)
    space.add_static(l1, l2) # 3
    return l1,l2

def draw_lines(screen, lines):
    """draw an L shaped shelf"""
    for line in lines:
body = … Lardmeister commented: neat physics +10
vegaseat 1,735 DaniWeb's Hypocrite Team Colleague
Thanks for the cx_Freeze setup example. The version for Python32 has seen much improvement. The older Python31 version used to make you jump through hoops with tkinter GUI programs, now it's easy. Here is a mildly improved version of Lardmeister's code using a tkinter code example, simply run it once you have supplied the file name ...
"""
tk_setup2.exe

Using cx_Freeze with Python32 to package a Tkinter GUI toolkit
program to an executable file (.exe in Windows OS).  Module
cx_Freeze also is available for Unix systems.

Put this setup program and your Tkinter program file into the same
directory.  Change the filename in this setup program and also edit
name, version and description in setup() if you so desire.

A directory 'build' is created with a subdirectory 'exe.win32-3.2'
containing all the files needed for distribution including the
.exe file named after the Tkinter program file.

The total distribution has a size of about 13.5 MB

The Python32 version works much better now with tkinter code.

I used:
http://cx-freeze.sourceforge.net/
cx_Freeze-4.2.3.win32-py3.2.msi
"""

import sys
from cx_Freeze import setup, Executable

sys.argv.append("build")  # replaces commandline arg 'build'

# change the filename to your program file
filename = "tk_calculator2.py"

base = None
if sys.platform == "win32":
    base = "Win32GUI"

setup(
    name = "Calculator2",
    version = "1.0",
    description = "cx_Freeze Tkinter script",
executables = [Executable(filename, base=base)]) Ene Uran commented: just what I needed +13
vegaseat 1,735 DaniWeb's Hypocrite Team Colleague
Python comes with module sqlite3 to create and process databases that can be queried with its common query language. First, let's create a database file ...
# explore Python module sqlite3
# create a database file
# the query language is in optional upper case
# using unique id numbers prevents appending an existing db file
# tested with Python27 and Python32

import sqlite3

# create/connect to a permanent database file
file_name = "stock_portfolio2.db3"
con = sqlite3.connect(file_name)

# establish the cursor
cur = con.cursor()

# if it doesn't exist yet, create the table named stocks
# give each transaction a unique id number
cur.execute('''CREATE TABLE IF NOT EXISTS stocks
    (id INT PRIMARY KEY, date TEXT, trans TEXT,
    symbol TEXT, qty REAL, price REAL)''')

# insert several lines at once using a
# list of (id, date, trans, symbol, qty, price) tuples
# each tranaction is given a unique id for data security
# the unique id primary key prevents any existing database file
# from being appended with a potentially conflicting data id
try:
    stocks = [
    (100, '2011-05-07', 'buy', 'AZN', 500, 55.05),
    (101, '2011-05-07', 'buy', 'CAT', 200, 110.34),
    (102, '2011-05-07', 'sell', 'IBM', 100, 168.89),
    (103, '2011-05-07', 'buy', 'GE', 2000, 20.01)
    ]
    # the ? placeholders match tuple items
    cur.executemany("""INSERT INTO stocks
    VALUES (?, ?, ?, ?, ?, ?)""", stocks)
except:
    pass

# commit current data to the db file
con.commit()

# quickly test the database, in sorted order by symbol
cur.execute('SELECT * FROM stocks ORDER BY symbol')
# … HiHe commented: makes sql look easy +5
Ene Uran commented: easy to understand +13
Lardmeister commented: well done +10
vegaseat 1,735 DaniWeb's Hypocrite Team Colleague
Let's hope the HeLa cells stay in vitro!
vegaseat 1,735 DaniWeb's Hypocrite Team Colleague
"Heaven has no rage like love to hatred turned, nor hell a fury like a woman scorned."
-- William Congreve
vegaseat 1,735 DaniWeb's Hypocrite Team Colleague
Another way is to run Tkinter and PIL simultaneously. You can save the in memory PIL image in many file formats ...
# random circles in Tkinter
# a left mouse double click will idle action for 5 seconds and
# save the canvas drawing to an image file
# the Tkinter canvas can only be saved in postscript format
# run PIL imagedraw simultaneously which
# draws in memory, but can be saved in many formats
# modified vegaseat's code from (circles):
# http://www.daniweb.com/software-development/python/code/216626
# and (simultaneous PIL imagedraw):
# http://www.daniweb.com/software-development/python/code/216929

import random as rn
import time
from PIL import Image, ImageDraw
try:
    # Python2
    import Tkinter as tk
except ImportError:
    # Python3
    import tkinter as tk

def idle_5sec(event=None):
    """freeze the action for 5 seconds and save to file"""
    root.title("Idle for 5 seconds, save to file circles.png")
    time.sleep(5)
    root.title("Happy Circles ...")
    # PIL images can be saved as .png .jpg .gif or .bmp files
    filename = "happy_circles.jpg"
    # save the PIL image
    img_pil.save(filename)

# create the window form
root = tk.Tk()
# window title text
root.title("Happy Circles (click on window to idle for 5 seconds)")

# set width and height
w = 640
h = 480
# create the Tkinter canvas for drawing
cv_tk = tk.Canvas(width=w, height=h, bg='black')
cv_tk.pack()
# create a PIL canvas in memory and use in parallel
black = (0, 0, 0)
img_pil = Image.new("RGB", (w, h), black)
cv_pil = ImageDraw.Draw(img_pil)

# endless loop to draw the random circles
while True: … vegaseat 1,735 DaniWeb's Hypocrite Team Colleague
Generally, it pays (no pun intended) to keep your pay list object intact. Save and load it with module pickle. A purely numeric list like that makes the rest of the calculations easy ...
# sample list of annual salaries
pay_list = [
35500,
49600,
28450,
75234,
51230
]

# get lowest pay
print(min(pay_list))  # 28450

# get highest pay
print(max(pay_list))  # 75234

# get average pay
print(float(sum(pay_list))/len(pay_list)) # 48002.8 vegaseat 1,735 DaniWeb's Hypocrite Team Colleague
How did you get such a srtange looking numpy array?
How will Python know that this is supposed to be a numpy array type?
Generally ...
# Python list to numpy array and then text string

import numpy as np

mylist = [
[1000, 2, 3],
[4, 5000, 6],
[7, 8, 9000]
]

# create a numpy array from a corresponding Python list object
np_arr = np.array(mylist)

print(np_arr)

''' result ...
[[1000    2    3]
 [   4 5000    6]
 [   7    8 9000]]
'''

# np.array_str(a, max_line_width=None, precision=None, suppress_small=None)
# convert to a text string
arr_str = np.array_str(np_arr)

sf = """
Include the array into a text string
%s
"""
print(sf % arr_str)

''' result ...
Include the array into a text string
[[1000    2    3]
 [   4 5000    6]
 [   7    8 9000]]
''' vegaseat 1,735 DaniWeb's Hypocrite Team Colleague
Yes, you can do it with the help of Python module thread ...
# using VPython (visual) and Tkinter together
# with the help of Python module thread
# tested with VPython 5.4.1 and Python 2.7.1 by vegaseat

import visual as vs
import Tkinter as tk
import thread

# will be global
sphere = None

def vthread():
    global sphere
    vs.scene.title = "Sphere in space (3D drag with right mouse button)"
    vs.scene.autoscale = False
    sphere = vs.sphere(pos=(0, 0, 0), color=vs.color.green)

def move_sphere_incr_x(event=None):
    """moves along the x axis incrementing x"""
    x, y, z = sphere.pos
    sphere.pos = (x+1, y, z)

def move_sphere_decr_x(event=None):
    """moves along the x axis decrementing x"""
    x, y, z = sphere.pos
    sphere.pos = (x-1, y, z)

root = tk.Tk()
w = 300
h = 200
x = 450
y = 100
# use width x height + x_offset + y_offset (no spaces!)
root.geometry("%dx%d+%d+%d" % (w, h, x, y))
root.title("Control Sphere from here")

b_incr_x = tk.Button(root, text="move on x axis increment x")
# bind passes an event to function
b_incr_x.bind("<Button-1>", move_sphere_incr_x)
b_incr_x.grid(row=0, column=0, padx=20, pady=10)

b_decr_x = tk.Button(root, text="move on x axis decrement x")
# bind passes an event to function
b_decr_x.bind("<Button-1>", move_sphere_decr_x)
b_decr_x.grid(row=1, column=0, padx=10)

# use thread to do run VPython and Tkinter simultaneously
# thread.start_new_thread(function, args)
# args is an empty tuple here
sphere = thread.start_new_thread(vthread, ())

root.mainloop()
You can add buttons and functions to change y and z too.
You can get VPython for Python27 from:
http://vpython.org/contents/download/VPython-Win-Py2.7-5.41.exe
sneekula commented: interesting concept +12
vegaseat 1,735 DaniWeb's Hypocrite Team Colleague
The deque rotate function might be something to consider ...
# Caesar Cipher encryption/decryption
# using Python's double-ended queue

from collections import deque

def doCaesarCipher(text, shift):
    alpha = 'abcdefghijklmnopqrstuvwxyz'
    dq = deque(alpha)
    # shift/rotate the alphabet (dq in place)
    dq.rotate(shift)
    encrypted = ""
    for c in text.lower():
        if c in alpha:
            index_alpha = alpha.index(c)
            encrypted += dq[index_alpha]
        else:
            encrypted += c
    return encrypted


text = 'pumpkin'
# positive value shifts to the right
# negative value shifts to the left
shift = -5
encrypted = doCaesarCipher(text, shift)

print(text)       # pumpkin
print(encrypted)  # uzrupns

# shift to the right to get original text back
print(doCaesarCipher('uzrupns', 5))  # pumpkin
'abcdefghijklmnopqrstuvwxyz' can be obtained from module string.
vegaseat 1,735 DaniWeb's Hypocrite Team Colleague
Use the financial formulas presented at:
http://www.financeformulas.net/
to create a Python financial calculator.
Ene Uran commented: practical +13
vegaseat 1,735 DaniWeb's Hypocrite Team Colleague
A little more IronPython. Here I have used the SharpDevelop4 IDE and its Frame-builder to create the bulk of the IronPython code. A few extra lines of code have been added to make the program run without the use of the SharpDevelop environment ...
# a colorful IronPython data entry form
# tested with IronPython 2.7 and MS.NET Framework 4.0

import clr
clr.AddReference("System.Windows.Forms")
clr.AddReference("System.Drawing")

# created with the SharDevelop4 IDE Formbuilder
import System.Drawing
import System.Windows.Forms

from System.Drawing import *
from System.Windows.Forms import *

class MainForm(Form):
    def __init__(self):
        self.InitializeComponent()

    def InitializeComponent(self):
        self._groupBox1 = System.Windows.Forms.GroupBox()
        self._groupBox2 = System.Windows.Forms.GroupBox()
        self._button1 = System.Windows.Forms.Button()
        self._label1 = System.Windows.Forms.Label()
        self._label2 = System.Windows.Forms.Label()
        self._label3 = System.Windows.Forms.Label()
        self._textBox1 = System.Windows.Forms.TextBox()
        self._textBox2 = System.Windows.Forms.TextBox()
        self._textBox3 = System.Windows.Forms.TextBox()
        self._groupBox1.SuspendLayout()
        self._groupBox2.SuspendLayout()
        self.SuspendLayout()
        #
        # groupBox1
        #
        self._groupBox1.BackColor = System.Drawing.Color.YellowGreen
        self._groupBox1.Controls.Add(self._textBox2)
        self._groupBox1.Controls.Add(self._textBox1)
        self._groupBox1.Controls.Add(self._label2)
        self._groupBox1.Controls.Add(self._label1)
        self._groupBox1.Location = System.Drawing.Point(12, 12)
        self._groupBox1.Name = "groupBox1"
        self._groupBox1.Size = System.Drawing.Size(301, 133)
        self._groupBox1.TabIndex = 0
        self._groupBox1.TabStop = False
        self._groupBox1.Text = "Data Entry"
        #
        # groupBox2
        #
        self._groupBox2.BackColor = System.Drawing.Color.PowderBlue
        self._groupBox2.Controls.Add(self._textBox3)
        self._groupBox2.Controls.Add(self._label3)
        self._groupBox2.Location = System.Drawing.Point(12, 184)
        self._groupBox2.Name = "groupBox2"
        self._groupBox2.Size = System.Drawing.Size(301, 66)
        self._groupBox2.TabIndex = 1
        self._groupBox2.TabStop = False
        self._groupBox2.Text = "Result"
        #
        # button1
        #
        self._button1.BackColor = System.Drawing.Color.Bisque
        self._button1.Location = System.Drawing.Point(12, 155)
        self._button1.Name = "button1"
        self._button1.Size = System.Drawing.Size(301, 23)
        self._button1.TabIndex = 2
        self._button1.Text = "Press to process data"
        self._button1.UseVisualStyleBackColor = False
        self._button1.Click += self.Button1Click
        #
        # label1
        #
        self._label1.Location = System.Drawing.Point(6, 27)
        self._label1.Name = "label1"
        self._label1.Size = System.Drawing.Size(100, 23)
        self._label1.TabIndex = 0
        self._label1.Text = "Enter Name:"
        #
        # label2
        #
        self._label2.Location = System.Drawing.Point(6, 77)
        self._label2.Name = "label2"
        self._label2.Size = …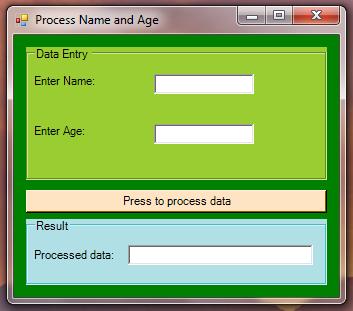
vegaseat 1,735 DaniWeb's Hypocrite Team Colleague
You might have an empty list, no data elements in it ...
mylist = []

print(mylist)       # []
print(len(mylist))  # 0

# empty list will give IndexError: list index out of range
print(mylist[0]) vegaseat 1,735 DaniWeb's Hypocrite Team Colleague
Ironpython 2.7 (Python27 based) is out and is greatly improved (IMHO). Let's revisit the '99 Bottles of Beer' song lyrics written in ironpython code ...
# ip_ListBox_99BoB.py
# add '99 bottles of beer' lyrics to a .NET list box
# simplified code using some defaults
# tested with IronPython 2.7 by  vegaseat

import clr

clr.AddReference('System.Windows.Forms')
clr.AddReference("System.Drawing")

import System
from System.Windows.Forms import *
from System.Drawing import *
from System.Collections import ArrayList

class BeerSong(Form):
    def __init__(self):
        # width, height of form
        self.ClientSize = System.Drawing.Size(220, 326)
        self.Text = '99 BoB lyrics'
        # create the listbox and fill the form (self) with it
        box = ListBox()
        # light yellow
        box.BackColor = System.Drawing.Color.FromArgb(255, 255, 224)
        box.Dock = DockStyle.Fill
        self.Controls.Add(box)

        # move the lyrics into ArrayList then transfer to the box
        array = ArrayList()
        bottle = "%s bottle"
        beer = "s of beer on the wall!"
        take = "Take one down, pass it around,"
        for k in range(99, 0, -1):
            # an exercise in slicing
            s1 = bottle % k + beer[k==1:]
            s2 = (bottle % k + beer[k==1:])[:-13] + "!"
            s3 = bottle % (k-1 or "No")
            s4 = beer[k==2:-1] + "!"
            array.Add(s1)
            array.Add(s2)
            array.Add(take)
            array.Add(s3+s4)
            array.Add(" ")
        box.DataSource = array


Application.Run(BeerSong())
The nice thing about ironpython is that you can create a Windows executable with ease. Here is a short code to do just that with the above script file ...
# compile_ip1.py
# compile an ironpython sript file to an executable file
# creates a Windows .exe file and an associated … vegaseat 1,735 DaniWeb's Hypocrite Team Colleague
There is no trouble so great or grave that cannot be much diminished by a nice cup of tea.
-- Bernard-Paul Heroux (Basque philosopher)
vegaseat 1,735 DaniWeb's Hypocrite Team Colleague
"Deep Impact" with Elijah Wood, Maximillian Schell and Tea Leoni. A great Science Fiction movie with top stars and effects.
Arbus commented: yeah +0
vegaseat 1,735 DaniWeb's Hypocrite Team Colleague
Not sure why UFOs have to show lights. If it is from outer space, it would have been "on the road" for at least a million years and the lights would have long burned out. :)
vegaseat 1,735 DaniWeb's Hypocrite Team Colleague
This shows you how to compress and decompress a typical text file using Python module gzip ...
# using module gzip to compress and decompress files
# default compression level is 9 (out of 1-9)
# needs Python27 or higher
# tested with Python27 and Python32  by vegaseat

import gzip

txt_file = "Edictionary.txt"
gz_file = "Edictionary.gz"

# reads in a 747kb .txt file, compresses to a 201kb .gz file
# mode='rb' is needed for the text file
with open(txt_file, 'rb') as f_in:
    with gzip.open(gz_file, 'wb') as f_out:
        f_out.writelines(f_in)

print("Read .gz file in as one string ..")
with gzip.open(gz_file, 'rb') as f:
    # decode <class 'bytes'> to string
    # .decode("utf8") does not work here
    text2 = f.read().decode("latin1")

print("Show first 80 characters:")
print(text2[:80])

print('-'*37)

# a mildly different approach using the class
print("Read .gz file in as list of lines ...")
gzin = gzip.GzipFile(gz_file, 'rb')
lines = gzin.readlines()
gzin.close()

print("Show first 10 lines:")
for line in lines[:10]:
    # decode <class 'bytes'> to string
    line = line.decode("latin1").rstrip()
    print(line)

'''result ...
Read .gz file in as one string ..
Show first 80 characters:
Aachen
aardvark
aardvarks
aaron
abaci
aback
abacus
abacuses
abaft
abalo
-------------------------------------
Read .gz file in as list of lines ...
Show first 10 lines:
Aachen
aardvark
aardvarks
aaron
abaci
aback
abacus
abacuses
abaft
abalone
'''The attachment preview is chopped off after the first 10 KB. Please download the entire file.
Aachen
aardvark
aardvarks
aaron
abaci
aback
abacus
abacuses
abaft
abalone
abandon
abandoned
abandoning
abandonment
abandons
abase
abased
abasement
abases
abash
abashed
abashes
abashing
abasing
abatable
abate
abated
abatement
abatements
abates
abating
abattoir
abattoirs
abbacies
abbacy
abbas
abbess
abbesses
abbey
abbeys
abbot
abbots
abbott
abbr
abbreviate
abbreviated
abbreviates
abbreviating
abbreviation
abbreviations
abbreviator
abbreviators
abdicate
abdicated
abdicates
abdicating
abdication
abdications
abdicator
abdomen
abdomens
abdominal
abduct
abducted
abducting
abduction
abductions
abductor
abductors
abducts
abe
abeam
abecedarian
abecedarians
abed
abel
aberdeen
abernathy
aberrance
aberrant
aberration
aberrations
abet
abets
abetted
abetting
abettor
abettors
abeyance
abeyant
abhor
abhorred
abhorrence
abhorrent
abhorrer
abhorrers
abhorring
abhors
abidance
abide
abided
abider
abiders
abides
abiding
abidingly
abigail
abilities
ability
abject
abjection
abjectly
abjuration
abjurations
abjure
abjured
abjurer
abjurers
abjures
abjuring
ablate
ablated
ablates
ablating
ablation
ablations
ablative
ablatives
ablaze
able
abler
ablest
abloom
ablution
ablutions
ably
abnegate
abnegated
abnegates
abnegating
abnegation
abnegator
abnegators
abnormal
abnormalities
abnormality
abnormally
abo
aboard
abode
abodes
abolish
abolished
abolishes
abolishing
abolishment
abolition
abolitionism
abolitionist
abolitionists
abominable
abominably
abominate
abominated
abominates
abominating
abomination
abominations
abominator
abominators
aboriginal
aborigine
aborigines
abort
aborted
aborting
abortion
abortionist
abortionists
abortions
abortive
aborts
abound
abounded
abounding
abounds
about
above
aboveboard
aboveground
abrade
abraded
abrader
abraders
abrades
abrading
abraham
abramson
abrasion
abrasions
abrasive
abrasively
abrasives
abreaction
abreast
abridge
abridged
abridgement
abridgements
abridger
abridgers
abridges
abridging
abroad
abrogate
abrogated
abrogates
abrogating
abrogation
abrupt
abruptly
abruptness
abscess
abscessed
abscesses
abscessing
abscise
abscised
abscises
abscising
abscissa
abscissas
abscission
abscond
absconded
absconding
absconds
absence
absences
absent
absented
absentee
absenteeism
absentees
absentia
absenting
absently
absentminded
absentmindedly
absentmindedness
absents
absinthe
absinthes
absolute
absolutely
absoluteness
absolutes
absolution
absolutions
absolutism
absolutist
absolutists
absolvable
absolve
absolved
absolver
absolvers
absolves
absolving
absorb
absorbable
absorbed
absorbencies
absorbency
absorbent
absorbents
absorber
absorbers
absorbing
absorbs
absorption
absorptive
abstain
abstained
abstaining
abstains
abstemious
abstemiously
abstention
abstentions
abstinence
abstinent
abstract
abstracted
abstractedness
abstracter
abstracters
abstracting
abstraction
abstractionism
abstractionist
abstractionists
abstractions
abstractly
abstractness
abstractor
abstractors
abstracts
abstruse
abstruseness
absurd
absurdities
absurdity
absurdly
abundance
abundant
abundantly
abuse
abused
abuser
abusers
abuses
abusing
abusive
abusively
abusiveness
abut
abutment
abutments
abuts
abutted
abutter
abutters
abutting
abysm
abysmal
abysmally
abysms
abyss
abyssal
abysses
ac
academe
academia
academic
academically
academician
academicians
academics
academies
academy
accede
acceded
accedes
acceding
accelerate
accelerated
accelerates
accelerating
acceleration
accelerations
accelerator
accelerators
accelerometer
accelerometers
accent
accented
accenting
accents
accentual
accentuate
accentuated
accentuates
accentuating
accentuation
accept
acceptability
acceptable
acceptably
acceptance
acceptances
acceptant
acceptation
accepted
accepting
acceptor
accepts
access
accessed
accesses
accessibility
accessible
accessibly
accessing
accession
accessions
accessories
accessory
accidence
accident
accidental
accidentally
accidentals
accidents
acclaim
acclaimed
acclaiming
acclaims
acclamation
acclamations
acclimate
acclimated
acclimates
acclimating
acclimation
acclimatise
acclimatised
acclimatising
accolade
accolades
accommodate
accommodated
accommodates
accommodating
accommodatingly
accommodation
accommodations
accommodative
accompanied
accompanies
accompaniment
accompaniments
accompanist
accompanists
accompany
accompanying
accompli
accomplice
accomplices
accomplish
accomplished
accomplishes
accomplishing
accomplishment
accomplishments
accord
accordance
accordant
accorded
according
accordingly
accordion
accordionist
accordionists
accordions
accords
accost
accosted
accosting
accosts
account
accountability
accountable
accountably
accountancy
accountant
accountants
accounted
accounting
accounts
accoutre
accoutred
accoutrement
accoutrements
accoutres
accoutring
accra
accredit
accreditation
accredited
accrediting
accredits
accrete
accreted
accretes
accreting
accretion
accretions
accruable
accrual
accruals
accrue
accrued
accruement
accrues
accruing
acct
accts
acculturate
acculturation
accumulate
accumulated
accumulates
accumulating
accumulation
accumulations
accumulative
accumulator
accumulators
accuracy
accurate
accurately
accurateness
accursed
accusation
accusations
accusative
accusatives
accusatorial
accusatory
accuse
accused
accuser
accusers
accuses
accusing
accusingly
accustom
accustomed
accustoming
accustoms
ace
aced
acerbate
acerbated
acerbates
acerbating
acerbic
acerbity
aces
acetate
acetates
acetic
acetone
ache
ached
aches
achievable
achieve
achieved
achievement
achievements
achiever
achievers
achieves
achieving
achilles
aching
achromatic
acid
acidic
acidification
acidified
acidifier
acidifiers
acidifies
acidify
acidifying
acidity
acidly
acidosis
acids
acidulate
acidulated
acidulates
acidulating
acidulation
acidulous
acing
aciran
ackley
acknowledge
acknowledgeable
acknowledged
acknowledgement
acknowledgements
acknowledges
acknowledging
acme
acne
aconite
acorn
acorns
acoustic
acoustical
acoustically
acoustics
acquaint
acquaintance
acquaintances
acquainted
acquainting
acquaints
acquiesce
acquiesced
acquiescence
acquiescent
acquiesces
acquiescing
acquirable
acquire
acquired
acquirement
acquirements
acquirer
acquirers
acquires
acquiring
acquisition
acquisitions
acquisitive
acquisitiveness
acquit
acquits
acquittal
acquittals
acquitted
acquitter
acquitting
acre
acreage
acres
acrid
acridity
acrimonious
acrimoniously
acrimony
acrobat
acrobatic
acrobatically
acrobatics
acrobats
acronym
acronyms
acrophobia
acropolis
acropolises
across
acrostic
acrostics
acrylate
acrylic
acrylics
act
acted
actin
acting
actinic
actinide
actinides
actinium
action
actionable
actions
activate
activated
activates
activating
activation
activator
activators
active
actively
actives
activex
activism
activist
activists
activities
activity
acton
actor
actors
actress
actresses
acts
actual
actualities
actuality
actually
actuarial
actuaries
actuary
actuate
actuated
actuates
actuating
actuation
actuator
actuators
acuity
acumen
acupuncture
acupuncturist
acupuncturists
acute
acutely
acuteness
ad
ada
adage
adages
adamant
adamantine
adamantly
adamants
adapt
adaptability
adaptable
adaptation
adaptations
adapted
adapter
adapters
adapting
adaptive
adapts
add
addax
added
addend
addenda
addends
addendum
adder
adders
addict
addicted
addicting
addiction
addictions
addictive
addicts
adding
addis
addison
addition
additional
additionally
additions
additive
additives
addle
addled
addles
addling
address
addressable
addressed
addressee
addressees
addresser
addressers
addresses
addressing
adds
adduce
adduced
adducers
adduces
adducing
adduct
adducted
adducting
adduction
adductor
adductors
adelaide
aden
adenine
adenoid
adenoidal
adenoids
adenoma
adenosine
adept
adeptly
adeptness
adepts
adequacies
adequacy
adequate
adequately
adhere
adhered
adherence
adherent
adherents
adheres
adhering
adhesion
adhesions
adhesive
adhesives
adiabatic
adipose
adiposity
adjacency
adjacent
adjacently
adjectival
adjective
adjectives
adjoin
adjoined
adjoining
adjoins
adjourn
adjourned
adjourning
adjournment
adjournments
adjourns
adjudge
adjudged
adjudges
adjudging
adjudicate
adjudicated
adjudicates
adjudicating
adjudication
adjudicative
adjudicator
adjudicators
adjunct
adjuncts
adjuration
adjurations
adjure
adjured
adjurer
adjurers
adjures
adjuring
adjust
adjustable
adjusted
adjuster
adjusters
adjusting
adjustment
adjustments
adjusts
adjutant
adjutants
adkins
adman
admen
administer
administered
administering
administers
administrate
administrated
administrates
administrating
administration
administrational
administrations
administrative
administratively
administrator
administrators
admirable
admirably
admiral
admirals
admiralties
admiralty
admiration
admire
admired
admirer
admirers
admires
admiring
admiringly
admissibility
admissible
admissibly
admission
admissions
admissive
admit
admits
admittance
admitted
admittedly
admitting
admix
admixed
admixes
admixing
admixture
admixtures
admonish
admonished
admonishes
admonishing
admonishment
admonishments
admonition
admonitions
admonitory
ado
adobe
adobes
adolescence
adolescent
adolescents
adopt
adopted
adopter
adopters
adopting
adoption
adoptions
adoptive
adopts
adorable
adorably
adoration
adore
adored
adorer
adorers
adores
adoring
adorn
adorned
adorning
adornment
adornments
adorns
adrenal
adrenaline
adrenals
adrian
adriatic
adrienne
adrift
adroit
adroitly
adroitness
ads
adsorb
adsorbed
adsorbe HiHe commented: great Python code +4
vegaseat 1,735 DaniWeb's Hypocrite Team Colleague
Those multiple underscores are somewhat of a devil! :)
As experts tonyjv and Griboullis pointed out, using Circle.__init__(self, r) is much clearer than using super().
The only advantage of super() is with Python3, where you can use it without hard-coding the class name.
HiHe commented: thank you +4
Gribouillis commented: agreed on super() in python 3 +13
vegaseat 1,735 DaniWeb's Hypocrite Team Colleague
For proper pygame code see:
http://www.daniweb.com/software-development/python/threads/191210/1542986#post1542986
vegaseat 1,735 DaniWeb's Hypocrite Team Colleague
A scrollable list box is handy if you want to display a text with many lines ...
# load a Tkinter listbox with the lyrics of '99 bottles of beer'
# tested with Python27 and Python32  by  vegaseat

try:
    # Python2
    import Tkinter as tk
except ImportError:
    # Python3
    import tkinter as tk

# the main window
root = tk.Tk()
root.title("99 BoB lyrics")

# create a listbox (height, width in characters)
listbox = tk.Listbox(root, height=30, width=32, bg='yellow')
listbox.grid(row=0, column=0)

# create a vertical scrollbar to the right of the listbox
yscroll = tk.Scrollbar(command=listbox.yview, orient='vertical')
yscroll.grid(row=0, column=1, sticky='ns')
listbox.configure(yscrollcommand=yscroll.set)

# create the lyrics and load the listbox
bottle = "%s bottle"
beer = "s of beer on the wall!"
take = "Take one down, pass it around,"
for k in range(99, 0, -1):
    # an exercise in slicing
    s1 = bottle % k + beer[k==1:]
    s2 = (bottle % k + beer[k==1:])[:-13] + "!"
    s3 = bottle % (k-1 or "No")
    s4 = beer[k==2:-1] + "!"
    listbox.insert('end', s1)
    listbox.insert('end', s2)
    listbox.insert('end', take)
    listbox.insert('end', s3+s4)
    listbox.insert('end', " ")

root.mainloop()
Enjoy!
vegaseat 1,735 DaniWeb's Hypocrite Team Colleague
Here we use the module pygame, but do not create a GUI frame ...
# play MP3 music files using Python module pygame
# pygame is free from: http://www.pygame.org
# or latest updates from:
# http://www.lfd.uci.edu/~gohlke/pythonlibs/
# tested with Windows7, Python3.2 and PyGame1.9.2 by vegaseat
# (does not create a GUI frame in this case)

import pygame as pg

def play_music(music_file, volume=0.8):
    """
    stream music with mixer.music module in blocking manner
    this will stream the sound from disk while playing
    """
    # set up the mixer
    freq = 44100     # audio CD quality
    bitsize = -16    # unsigned 16 bit
    channels = 2     # 1 is mono, 2 is stereo
    buffer = 2048    # number of samples (experiment for good sound)
    pg.mixer.init(freq, bitsize, channels, buffer)

    # set volume from 0 to 1.0
    pg.mixer.music.set_volume(volume)
    clock = pg.time.Clock()
    try:
        pg.mixer.music.load(music_file)
        print( "Playing file %s" % music_file )
    except pg.error:
        print("File %s not found! (%s)" % \
            (music_file, pg.get_error()))
        return
    pg.mixer.music.play()
    while pg.mixer.music.get_busy():
        # check if playback has finished
        clock.tick(30)
        # msecs since init, potential use for progress bar
        print(pg.time.get_ticks())

# pick MP3 music files you have in the working folder
# otherwise use the full file path
#music_file = "Hot80s.mp3"   # 0.5MB
music_file = "Beat_it.mp3"  # 6.1MB demo

# highest volume is 1.0
volume = 1.0
play_music(music_file, volume)
Have fun with this code!
vegaseat 1,735 DaniWeb's Hypocrite Team Colleague
Winston Churchill angry at a lady calling him drunk:
"When I wake up in the morning I am sober, but you dear lady are still ugly!"