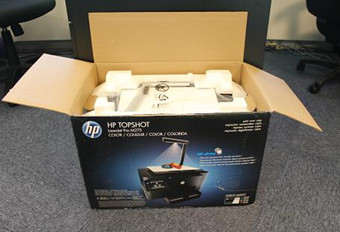
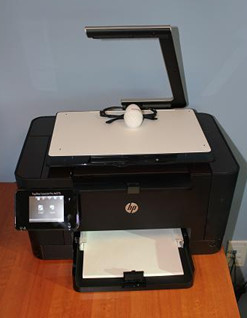
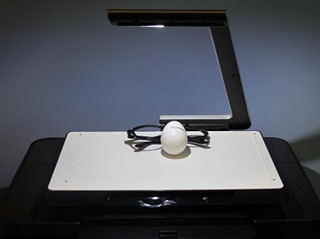
The HP TopShot LaserJet Pro M275 is a multi-function printer like no other. The printer portion of the TopShot is much like the HP LaserJet Pro 100 I reviewed before. What makes the TopShot different is the paper feeder and flatbed scanner on top has been replaced by a flat white platform, called the capture stage, and an arm that is positioned above the stage. On this arm there is a camera and 3 flashes. As the name suggests, it takes a picture of any 2D or 3D object you can fit onto the stage, under the arm. The end result is a mixed but, in the right environment could be a game changer for a business.
Whether connecting through a wireless network, a wired network or locally through USB the installation software is clear and easy to run. The printer does have HP’s ePrint features, so if you do connect your printer to the internet you can print from any internet connected device. A simple setup at the HP ePrint website and you can email what you want printed to the TopShot’s user configured email address. HP also offers an ePrint app for both Android and Apple devices.
Printing speed is about average for other laser printers at this price. Text comes in around 17 pages per minute, where as color was about 4 ppm. Granted, it’s not the fastest printer on the market the print quality is excellent. Colors are bold and vibrant, and text is clear and crisp. The TopShot, however, is not designed to be a workhorse. The paper tray only holds 150 sheets at a time, and the output tray will only hold 50 sheets. There is also no available auto duplexer or any tray upgrades of any kind and HP recommends a print volume between 250 and 950 pages per month.
What makes the TopShot stand separate from the competition is obviously the scanning function. The camera used by the TopShot for all scans is an 8 megapixel CMOS image sensor. On all scans there are six images taken, three with ambient light and three using the three flashes one at a time. The 6 images are then merged together to create a 2D image. For 3D objects the scans come out clear and detailed. It is not as good as a high quality camera, but the resulting image has the feel of a professional image taken in a light box due to the pure white stage as a back drop. While the images are clear, their resolution isn’t all that impressive. At only 245 dpi any resizing of the image starts to show distortion.
The only time I saw any problems with scans of 3D objects, that were not resized, was if there were highly reflective surfaces or if the object was too large. With some reflective objects I found some discoloration, for example a granola bar wrapper appeared to have a pattern of rainbow squares across it. As for the size limitations the TopShot claims to be able to scan any item 8.5”x11”, unfortunately the visible range of the camera narrows the higher the object is above the stage, so the edges of higher objects can get cut off.
With document scanning it’s a whole different ball game. While putting a page on the stage as easy as lining one up on a flatbed scanner it does have a draw back. If the paper is warped or folded in any way it will cause noticeable distortion in the copy. However, color and black and white scans of flat documents had very little problems. Text showed very little deformation that requires a very close inspection to even notice, and color matching was nearly perfect. The TopShot is functional as a document scanner, but if that is going to be the bulk of what you use the scanner for I would look elsewhere.
Whether scanning a 3D or 2D object the TopShot’s 3.5” touch screen display is very intuitive, but not very responsive around the edges. I would have to touch the display multiple times before it would respond, and often it would think I was pressing a button I wasn’t. For the most part I would recommend using the included software to control the printer. I did find one good reason to use the touch screen though. Features there include multipage copying, coalition copying and ID copy. ID copy will allow you to place a document or object, scan it, then move it, and get another angle or side of the object. Once you have finished all the scans it will print everything on one page. You have to be careful though, if you don’t properly space things out the TopShot will superimpose the images on top of each other, and unfortunately I couldn’t find a print preview option for this feature.
The HP TopShot LaserJet Pro M275 really did impress me with its 3D scanning, and I can think of many applications for its unique abilities, but it really is a niche device. There are better multi-function printers available and a good quality camera with a tabletop light booth will make for better quality images of 3D objects, but the convenience of having them all in one, and with a price tag of 349.99 from HP the TopShot may be just the thing to give your small business that competitive edge.