Introduction
Among all of the animation API’s on Android, MotionLayout is one of the best classes to use to create complex animations. It can animate property and motion of multiple views at the same time. Other benefits include declarative style XML and the intuitive Motion Editor built right into Android Studio.
In this tutorial, we will learn how to move a drawable resource with MotionLayout.
Goals
At the end of the tutorial, you would have learned:
- How to set up MotionLayout.
- How to use the Motion Editor in Android Studio.
Prerequisite Knowledge
- Basic Android development knowledge.
Tools Required
- Android Studio.
Project Setup
To follow along with the tutorial, perform the steps below:
-
Create a new Android project with the default Empty Activity.
-
Delete the “Hello World”
TextViewfromactivity_main.xml. -
Right-click on
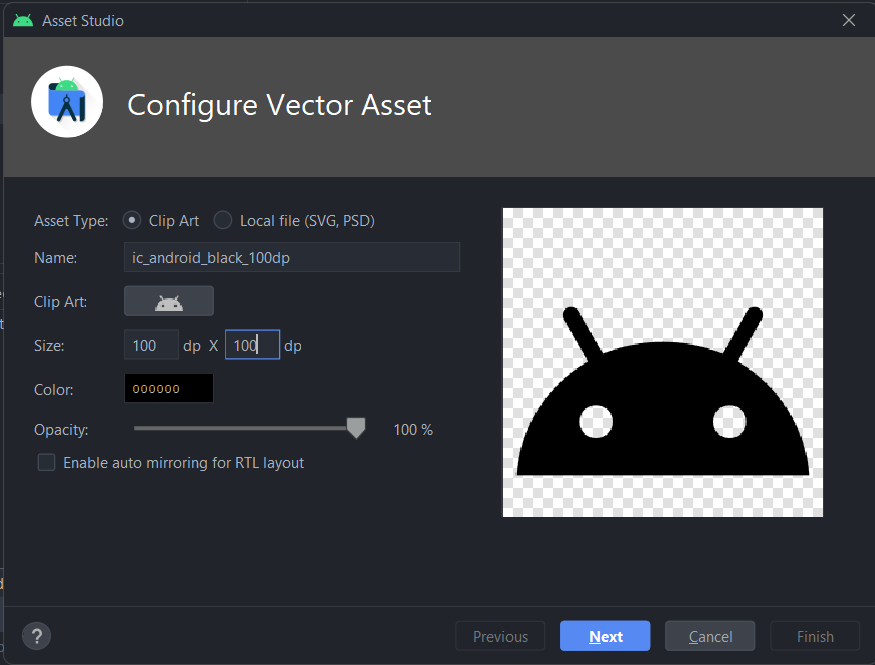
res/drawable-> New -> Vector Asset. -
Choose Clip Art as Asset Type.
-
For the Name, use ic_android_black_100dp.
-
For the Clip Art, find and select the
androidclip art. -
Set the size to
100x100. -
Use the default black color
000000. -
Opacity should be set to
100%. -
No need to check the TRL option.
-
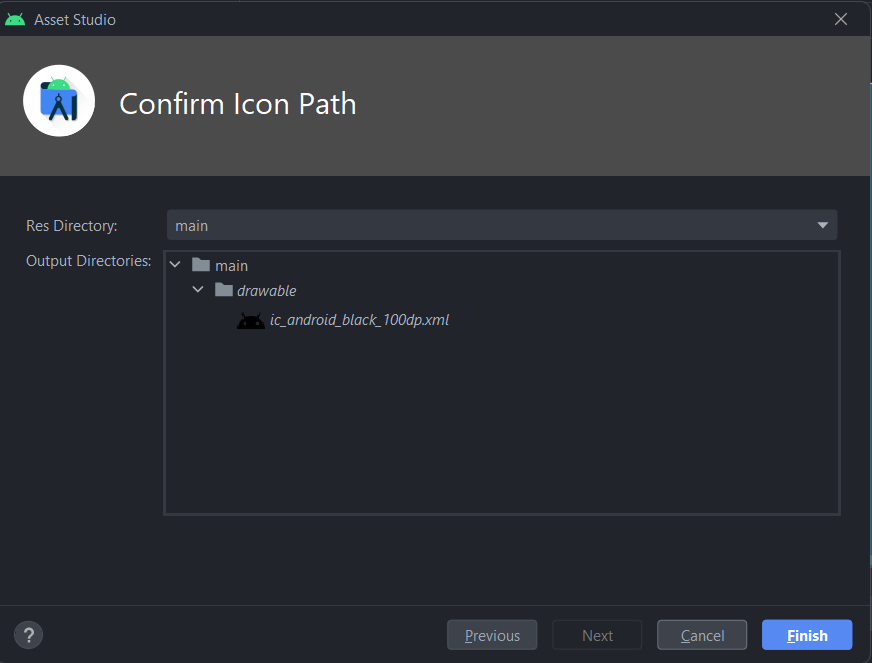
Select Next.
-
The icon path is under the default drawable directory at
main/drawable/ic_android_black_100dp.xml
-
Add a new
ImageViewbelow ConstraintView inactivity_main.xml, selectingic_android_black_100dpas the resource. If you do not want to use to the Design surface, the XML equivalence is:<ImageView android:id="@+id/imageView" android:layout_width="wrap_content" android:layout_height="wrap_content" app:srcCompat="@drawable/ic_android_black_100dp" /> -
Click Finish.
MotionLayout subclasses ConstraintLayout
MotionLayout is a subclass of ConstraintLayout, so it is fine to replace ConstraintLayout with MotionLayout when you need to manage animation for child Views. We can safely convert the top level ConstraintLayout in activity_main.xml to a MotionLayout. The easiest way to do that is
- Open
activity_main.xmlin the Design surface. - Right-click on ConstraintLayout.
- Convert to MotionLayout.
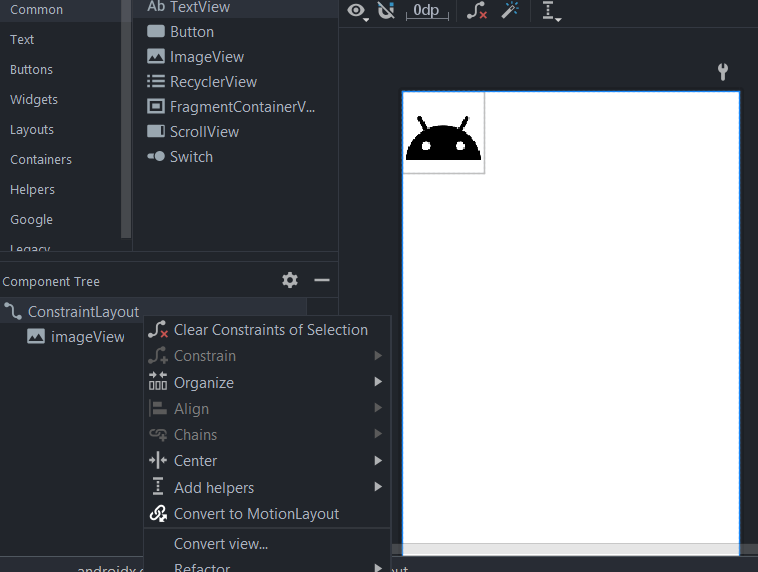
- When prompted that the
action will convert your layout into a MotionLayout and create a separate MotionScene file, select Convert.

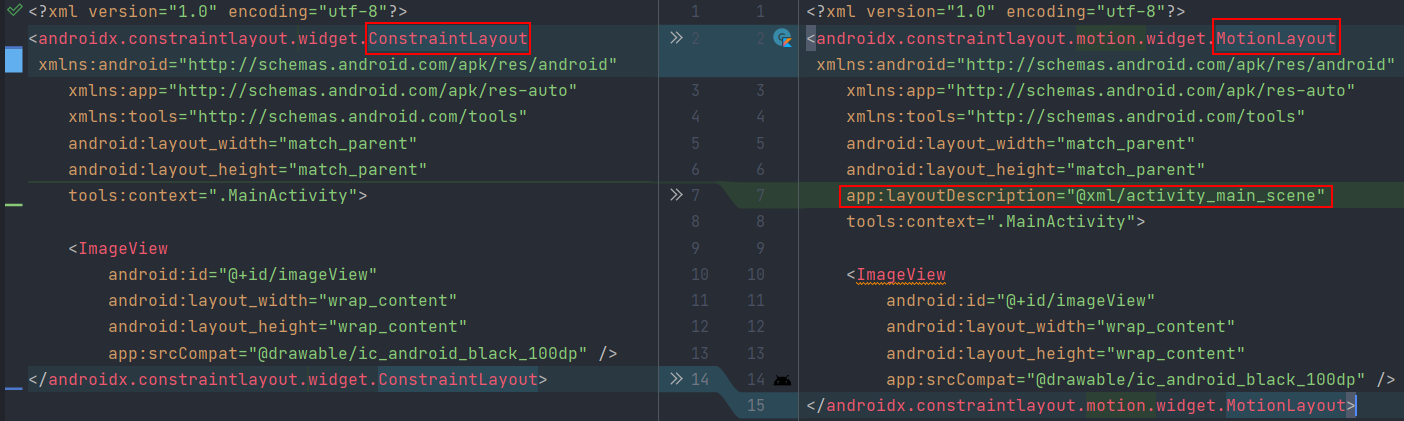
- Right-click on
activity_main.xmlfile -> Local History -> Show History. We can see that there are a total of 2 main changes.
a. The ConstraintLayout has been replaced by the MotionLayout.
b. The layout file additionally references another XML file. Thisactivity_main_sceneXML file contains the animation data, which we will discuss in the next section.
MotionScene
MotionLayout manages its own layout XML, but this XML only includes information for the child Views, and not animation data. Decoupling layout and animation code improves readability for your project. The XML containing the animation data is stored inside the activity_main_scene.xml file (for this tutorial) that Android Studio created earlier for us. If we look inside activity_main_scene.xml, we can see that there are quite a few tags inside.
- Transition: a nested class inside MotionScene that defines how the animations are triggered, the duration of the animations, and the animation trajectory.
- KeyFrameSet: all animations start with the starting constraint and end with the ending constraint. KeyFrameSet contains the key frames needed to modify the path of the animation. This is optional and is out of scope for this tutorial.
- ConstraintSet: specifies the constraints for Views inside a ConstraintLayout. The animation will start with the starting constraint and end with the ending constraint.
Motion Editor
If we open the activity_main.xml file now in the Design/Split surface, we can see that there is a new section called the Motion Editor. This tool allows us to modify the activity_main_scene.xml file with a graphical user interface and also to preview the animation.
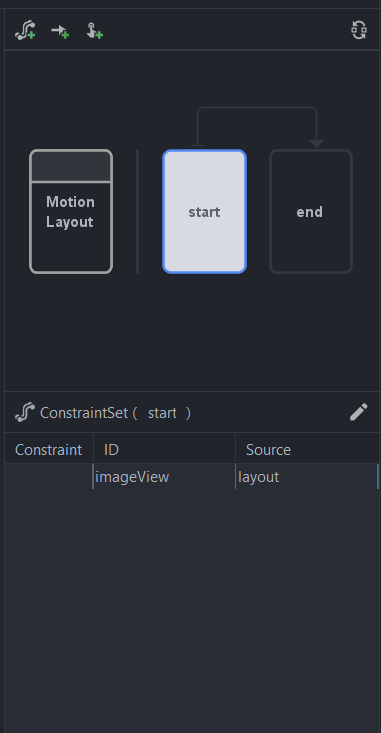
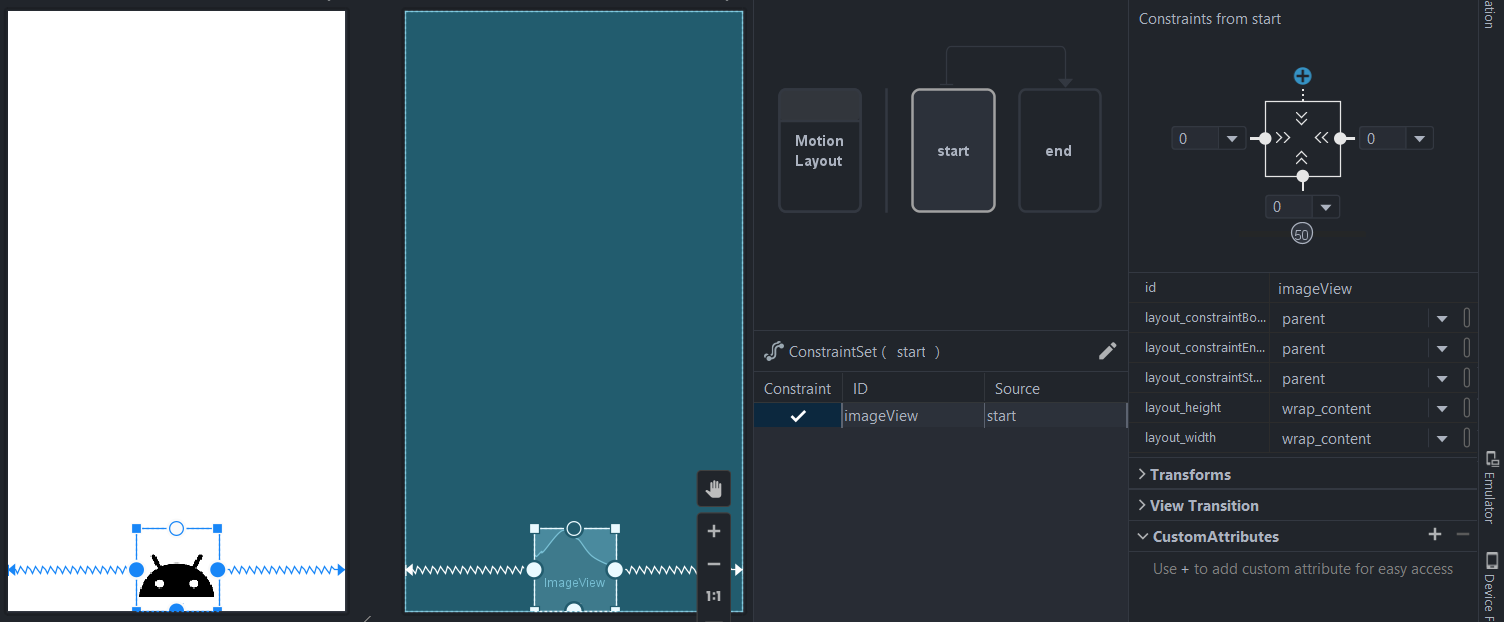
The starting Constraint
We need to create a starting constraint so that MotionLayout will know where the starting position would be. To do this with the Motion Editor, perform the following steps:
-
Select the
startconstraint set.
-
Currently the
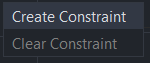
imageViewis still constrained to the Select Modify constraint set.

-
Create Constraint.
-
You will then see that the
imageViewis constrained to the starting constraint (withidofstart).
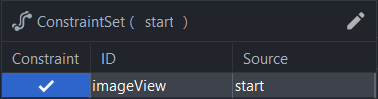
-
The ConstraintSet inside
activity_main_scene.xmlis also modified accordingly.<ConstraintSet android:id="@+id/start"> <Constraint android:id="@+id/imageView" android:layout_width="wrap_content" android:layout_height="wrap_content" /> </ConstraintSet> -
We will want our
imageView(android vector asset) to move from the bottom of the screen to the top of the screen, so add bottom, left and right constraints for it.
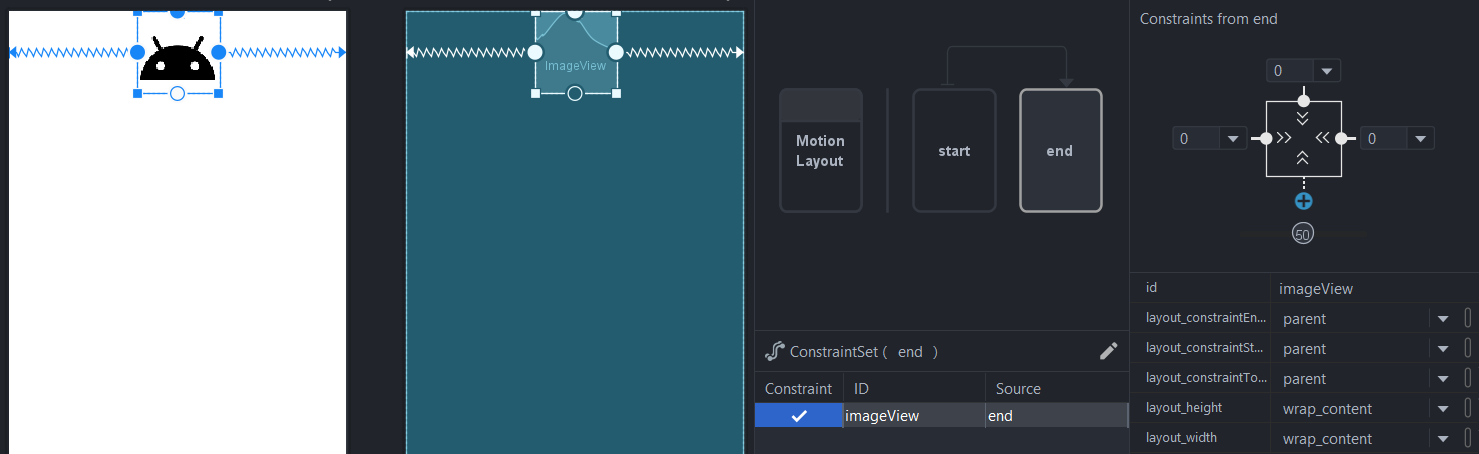
The ending Constraint
Now that the starting point has been set, we will need to add the ending constraint. The steps are very similar to how we added the starting constraint in the previous section.
- Select the
endConstraintSet in the Motion Editor. - Select the
imageViewin the Motion Editor. - Select Modify constraint set.
- Create Constraint.
- Add top, left and right constraints to imageView.
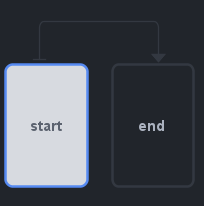
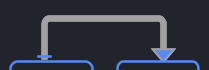
Animation Trigger
Since a Transition has already been defined for us in the activity_main_scene.xml file by Android Studio, we only need to add a trigger for our animation to start. We will use an onClick trigger for this part. To add a trigger, perform the steps below:
-
Select the U-shaped arrow in the Motion Editor that connects the starting and ending constraint sets.
-
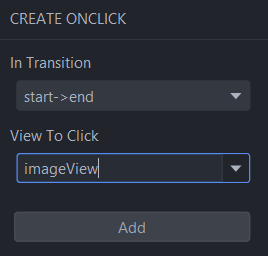
Select the Create click or swipe handler icon in the Motion Editor (highlited in yellow).
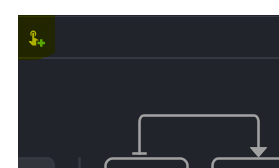
-
In
View To Click, changes the value toimageView. -
Click Add.
-
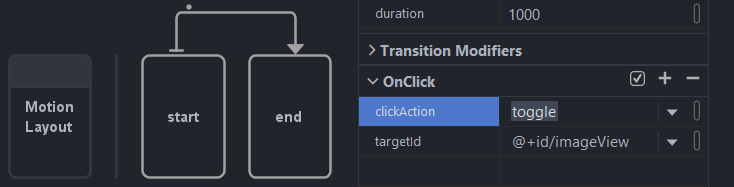
Add an attribute called
clickActionto theOnClicktag. The value for this attribute would betoggle. If you are confused about where this attribute came from. It is referenced here
-
The current XML definition for the
OnClicktag would be:<OnClick motion:targetId="@+id/imageView" motion:clickAction="toggle" />
Preview the animation
One of the great features of Motion Editor is that you can preview the animation.
- Select the Transition element in Motion Editor (U-shaped arrow)
- When the Transition section shows up, press the Play button.
Run the app
We have completed all of the steps required to animate the android icon. Go ahead and run the app. You will have to touch the icon once for the animation to start.
Solution Code
activity_main.xml
<?xml version="1.0" encoding="utf-8"?>
<androidx.constraintlayout.motion.widget.MotionLayout xmlns:android="http://schemas.android.com/apk/res/android"
xmlns:app="http://schemas.android.com/apk/res-auto"
xmlns:tools="http://schemas.android.com/tools"
android:layout_width="match_parent"
android:layout_height="match_parent"
app:layoutDescription="@xml/activity_main_scene"
tools:context=".MainActivity">
 <ImageView
    android:id="@+id/imageView"
    android:layout_width="wrap_content"
    android:layout_height="wrap_content"
    app:srcCompat="@drawable/ic_android_black_100dp" />
</androidx.constraintlayout.motion.widget.MotionLayout>activity_mail_scene.xml
<?xml version="1.0" encoding="utf-8"?>
<MotionScene
xmlns:android="http://schemas.android.com/apk/res/android"
xmlns:motion="http://schemas.android.com/apk/res-auto">
<Transition
motion:constraintSetEnd="@+id/end"
motion:constraintSetStart="@id/start"
motion:duration="1000">
<KeyFrameSet>
</KeyFrameSet>
 <OnClick motion:targetId="@+id/imageView"
    motion:clickAction="toggle" />
</Transition>
<ConstraintSet android:id="@+id/start">
<Constraint
android:id="@+id/imageView"
android:layout_width="wrap_content"
android:layout_height="wrap_content"
motion:layout_constraintStart_toStartOf="parent"
motion:layout_constraintBottom_toBottomOf="parent"
motion:layout_constraintEnd_toEndOf="parent" />
</ConstraintSet>
<ConstraintSet android:id="@+id/end">
<Constraint
android:id="@+id/imageView"
android:layout_width="wrap_content"
android:layout_height="wrap_content"
motion:layout_constraintStart_toStartOf="parent"
motion:layout_constraintTop_toTopOf="parent"
motion:layout_constraintEnd_toEndOf="parent" />
</ConstraintSet>
</MotionScene>Summary
Congratulations, you have learned how to use MotionLayout. The full project code can be found at https://github.com/dmitrilc/DaniwebMotionLayout/tree/main
