Introduction
In Android development, reusable layouts can be used to reduce duplicate code across XML files. In this tutorial, we will learn how to reuse layout files, especially with View Binding enabled.
Goals
At the end of the tutorial, you would have learned:
- How to reuse layouts.
- How to use View Binding with reusable layouts.
Tools Required
- Android Studio. The version used in this tutorial is Bumblebee 2021.1.1 Patch 1.
Prerequisite Knowledge
- Basic Android.
- Basic ViewBinding.
Project Setup
To follow along with the tutorial, perform the steps below:
-
Create a new Android project with the default Empty Activity.
-
Give the default “Hello World!” TextView an
android:idoftextView_default. -
Create another layout resource file called reusable_layout.xml. Copy and paste the code below to replace all of the content of this file. This code removes the default ConstraintLayout because it is not necessary for our use case. It also adds a TextView with an
id.<?xml version="1.0" encoding="utf-8"?> <TextView xmlns:android="http://schemas.android.com/apk/res/android" android:id="@+id/textView_reusable" android:layout_width="wrap_content" android:layout_height="wrap_content" android:text="TextView" /> -
Enable View Binding in the Module gradle.build file, inside of the
android {}tag. This will instruct the compiler to generate Binding classes at development time.buildFeatures { viewBinding true } -
Add the binding to activity_main.xml in MainActivity with the code below.
private lateinit var binding: ActivityMainBinding -
Replace the current
onCreate()call with the code below. We now inflate the layout using View Binding instead of R.id.override fun onCreate(savedInstanceState: Bundle?) { super.onCreate(savedInstanceState) binding = ActivityMainBinding.inflate(layoutInflater) setContentView(binding.root) }
Project Overview
Currently, our project is a simple app with a “Hello World!” TextView. The presentation of the app is not the focus of the tutorial though. At the end of the tutorial, we would be able to reuse the reusable_layout.xml in activitiy_main.xml and referencing it with View Binding as well.
Reusing Layouts
To reuse a layout, we only need to do two things:
- Create the reusable layout as an independent layout. The reusable layout root is not required to be a ViewGroup. We have already created this layout with reusable_layout.xml.
- In the parent layout that we watch to attach the reusable layout to, we need to add the
<include>tag where the reusable layout would normally be placed.
Let us do this now for our project.
-
Open activity_main.xml.
-
Add the
<include>tag below<TextView>.<include/> -
Give the
<include>tag alayoutattribute, with its value being the path to the reusable layout.<include layout="@layout/reusable_layout"/> -
The reusable layout would now show up in the Design surface as well.
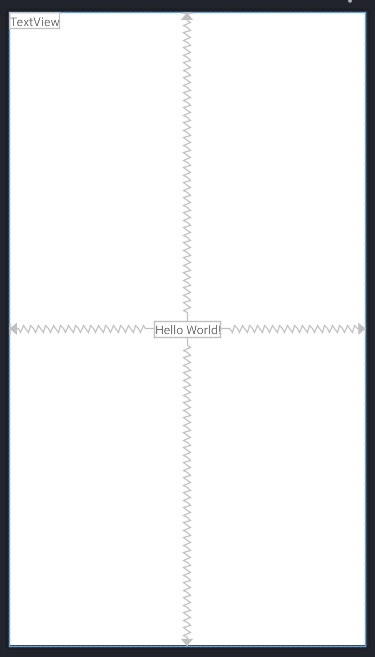
-
But there are two new problems: the included View is not constrained at all and the compiler does not provide any error. Normally, a child view of ConstraintLayout is required to have constraints. It seems like the compiler does not throw an error for missing constraints in child views added via
<include>, so there is nothing that we can do about it. Fortunately, if we select the<include>tag in the Component Tree and open its Attributes panel, we can at least see that the ConstraintLayout expects the child to have constraints, so at least we should add the constraints by ourselves.

-
Replace the current
<include>with the code below. This will add constraints to the included layout and situate it under the default TextView. Everytime that you override anylayout_xattribute of an<include>tag, you must also override both<layout_width>and<layout_height>attributes. Because we have overridden<layout_constraintX>attributes, we are required to override<layout_width>and<layout_height>as well, even if that means duplicating code already declared in the reusable layout.<include layout="@layout/reusable_layout" android:layout_width="wrap_content" android:layout_height="wrap_content" app:layout_constraintBottom_toBottomOf="parent" app:layout_constraintEnd_toEndOf="parent" app:layout_constraintStart_toStartOf="parent" app:layout_constraintTop_toBottomOf="@id/textView_default" /> -
Select the
<include>tag again with the Attributes panel opened and we should see the warnings cleared out.

Referencing the included View via View Binding
As of right now, our project is unable to reference the child textView_reusable from the parent View Binding.
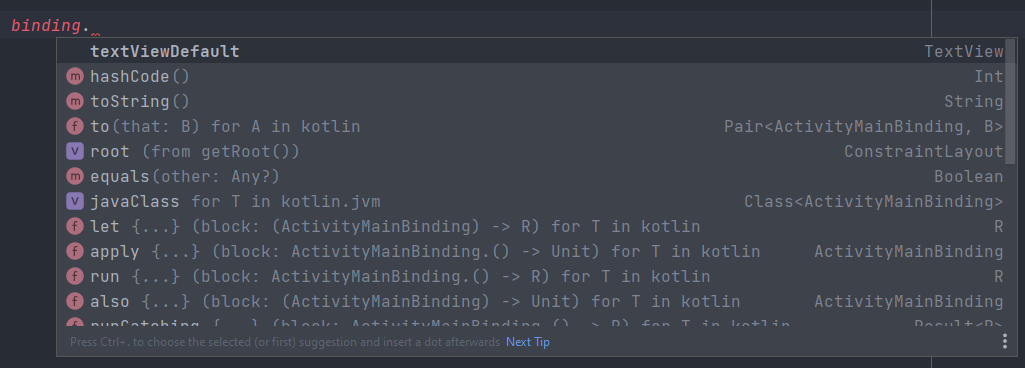
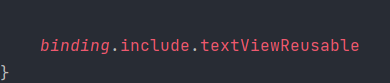
For the compiler to generate Binding classes, we simply provide <include> with an id of our choice.
android:id="@+id/include"We should be able to reference the child view immediately via include. If you do not see it showing up, you might need to clean and rebuild your project.
Our project depends on the compiler to generate Binding classes. If you do not see generated Binding classes after running Gradle tasks Clean and Rebuild, you should check whether you are running the latest version of Gradle and if it works with the AGP version. The AGP version used in this project is 7.1.1 and Gradle version is 7.3.3.
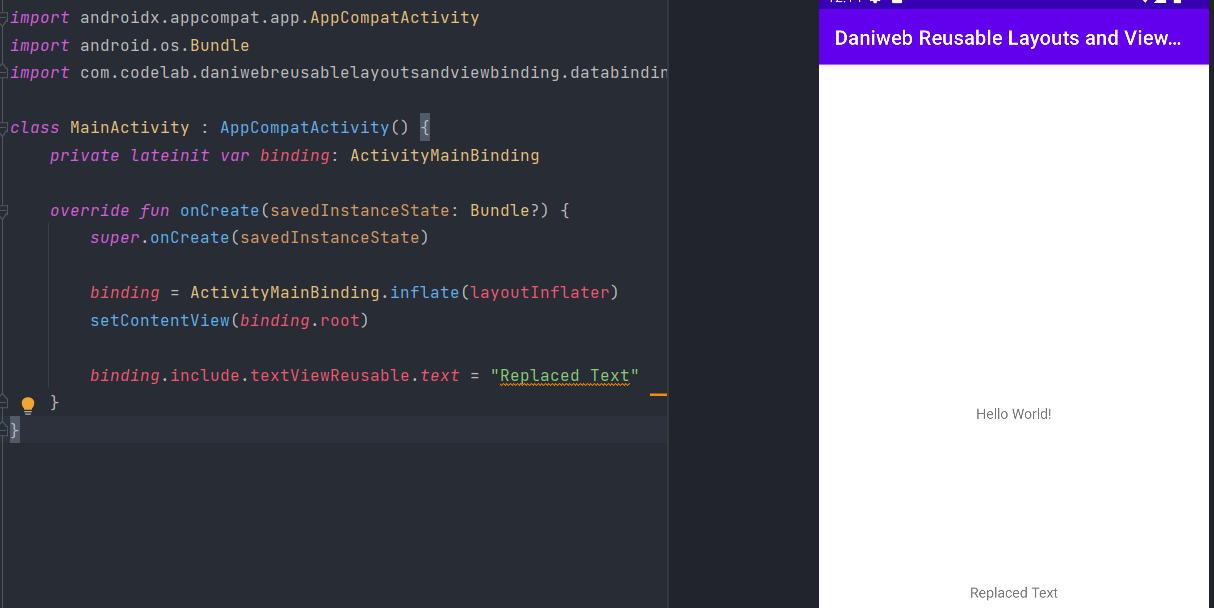
When running the app, we can see that it is working correctly.
Solution Code
MainActivity.kt
package com.codelab.daniwebreusablelayoutsandviewbinding
import androidx.appcompat.app.AppCompatActivity
import android.os.Bundle
import com.codelab.daniwebreusablelayoutsandviewbinding.databinding.ActivityMainBinding
class MainActivity : AppCompatActivity() {
private lateinit var binding: ActivityMainBinding
override fun onCreate(savedInstanceState: Bundle?) {
super.onCreate(savedInstanceState)
binding = ActivityMainBinding.inflate(layoutInflater)
setContentView(binding.root)
binding.include.textViewReusable.text = "Replaced Text"
}
}activitiy_main.xml
<?xml version="1.0" encoding="utf-8"?>
<androidx.constraintlayout.widget.ConstraintLayout xmlns:android="http://schemas.android.com/apk/res/android"
xmlns:app="http://schemas.android.com/apk/res-auto"
xmlns:tools="http://schemas.android.com/tools"
android:layout_width="match_parent"
android:layout_height="match_parent"
tools:context=".MainActivity">
<TextView
android:id="@+id/textView_default"
android:layout_width="wrap_content"
android:layout_height="wrap_content"
android:text="Hello World!"
app:layout_constraintBottom_toBottomOf="parent"
app:layout_constraintLeft_toLeftOf="parent"
app:layout_constraintRight_toRightOf="parent"
app:layout_constraintTop_toTopOf="parent" />
<include
android:id="@+id/include"
layout="@layout/reusable_layout"
android:layout_width="wrap_content"
android:layout_height="wrap_content"
app:layout_constraintBottom_toBottomOf="parent"
app:layout_constraintEnd_toEndOf="parent"
app:layout_constraintStart_toStartOf="parent"
app:layout_constraintTop_toBottomOf="@id/textView_default" />
</androidx.constraintlayout.widget.ConstraintLayout>reusable_layout.xml
 <?xml version="1.0" encoding="utf-8"?>
 <TextView xmlns:android="http://schemas.android.com/apk/res/android"
    android:id="@+id/textView_reusable"
    android:layout_width="wrap_content"
    android:layout_height="wrap_content"
android:text="TextView" />Module build.gradle
plugins {
id 'com.android.application'
id 'org.jetbrains.kotlin.android'
}
android {
compileSdk 32
 buildFeatures {
     viewBinding true
 }
defaultConfig {
applicationId "com.codelab.daniwebreusablelayoutsandviewbinding"
minSdk 21
targetSdk 32
versionCode 1
versionName "1.0"
testInstrumentationRunner "androidx.test.runner.AndroidJUnitRunner"
}
buildTypes {
release {
minifyEnabled false
proguardFiles getDefaultProguardFile('proguard-android-optimize.txt'), 'proguard-rules.pro'
}
}
compileOptions {
sourceCompatibility JavaVersion.VERSION_1_8
targetCompatibility JavaVersion.VERSION_1_8
}
kotlinOptions {
jvmTarget = '1.8'
}
}
dependencies {
implementation 'androidx.core:core-ktx:1.7.0'
implementation 'androidx.appcompat:appcompat:1.4.1'
implementation 'com.google.android.material:material:1.5.0'
implementation 'androidx.constraintlayout:constraintlayout:2.1.3'
testImplementation 'junit:junit:4.13.2'
androidTestImplementation 'androidx.test.ext:junit:1.1.3'
androidTestImplementation 'androidx.test.espresso:espresso-core:3.4.0'
}Summary
We have learned how to reuse layouts and referencing them via View Binding as well. The full project code can be found at https://github.com/dmitrilc/DaniwebReusableLayoutsAndViewBinding