Introduction
One of the best debugging tools in Android Studio is the live database inspector. It allows developers to peek at the current state of the database and even run queries against it.
In this tutorial, we will learn how to use it to debug a local SQLite database.
Goals
At the end of the tutorial, you would have learned:
- How to create a SQLite Database.
- How to debug a SQLite Database using the Database Inspector.
Prerequisite Knowledge
- Basic Android development knowledge.
- Basic SQL knowledge.
Tools Required
- Android Studio.
Project Setup
To follow along with the tutorial, perform the steps below:
- Create a new Android project with the default Empty Activity.
Creating the SQLite database
Before learning about the database inspector, we obviously must have a database to inspect. So we will need to create the database first.
The first thing that we need to do to create a SQLite database is to define a contract. A contract is a class that specifies your schema layout. We do not need to instantiate this contract, so Android prefers for developers to put these contracts inside a Kotlin Object (Singleton).
The database used in this tutorial comprises exactly one table called student. The student table would have two columns, name and age. Let us create a Kotlin Object called StudentContract from the code below (you will need to a create new Kotlin file).
package com.example.daniwedblivedebug

object StudentContract {
}
Next, we need to add another Object representing the table student inside of StudentContract.
object Student : BaseColumns {
   const val TABLE = "student"
   const val COLUMN_NAME = "name"
   const val COLUMN_AGE = "age"
}
The Student Object also extends BaseColumns because it is recommended by Android. BaseColumns provide inheritors with a primary key field called _ID, which allows our database to work well with other Android components.
Make sure that you add the import for BaseColumns as well.
import android.provider.BaseColumnsThe second step that we need to do is to create a SQL statement that will help us create our student table (DDL). Later on, we will pass this statement to a class called SQLiteOpenHelper.
Inside the StudentContract Object, add the constant below.
private const val SQL_CREATE_STUDENTS =
   "CREATE TABLE ${Student.TABLE} (" +
           "${BaseColumns._ID} INTEGER PRIMARY KEY," +
           "${Student.COLUMN_NAME} TEXT," +
           "${Student.COLUMN_AGE} INTEGER)"
Finally, the last step that we would need to do is to extend SQLiteOpenHelper. This class contains a method to create the database the first time we obtain a reference to the database through it.
Still inside the StudentContract object, add the StudentDbHelper class.
class StudentDbHelper(context: Context) : SQLiteOpenHelper(context, DATABASE_NAME, null, DATABASE_VERSION) {

   override fun onCreate(db: SQLiteDatabase) {
       db.execSQL(SQL_CREATE_STUDENTS)
   }

   override fun onUpgrade(p0: SQLiteDatabase?, p1: Int, p2: Int) {
       TODO("Not yet implemented")
   }

   companion object {
       const val DATABASE_VERSION = 1
       const val DATABASE_NAME = "Student.db"
   }
}
We are required to implement both onCreate() and onUpgrade(). Since upgrading is not in scope for this tutorial, we can just skip implementing it. In onCreate(), we told our database to execute the DDL statement we described previously to create the student table.
The companion object in StudentDbHelper contains constants for the superclass to consume. They are self-explanatory.
Trigger the table creation
As stated previously, the table creation won’t be triggered until we attempt to retrieve a reference to the underlying database once, so we must add a few lines into our MainActivity code.
First, instantiate StudentDbHelper and then save it as a constant in MainActivity.
Inside MainActivity, add the dbHelper property.
private val dbHelper = StudentContract.StudentDbHelper(this)Then, inside onCreate(), append this line of code to the method.
dbHelper.readableDatabaseBy obtaining a reference to the underlying database, we have triggered the table creation, which we will be able to see in the inspector later.
Optionally, we can also close the database when the main activity is destroyed. We can do that by calling the close() method on the dbHelper reference. Inside MainActivity, override onDestroy() with the code snippet below.
override fun onDestroy() {
   dbHelper.close()
   super.onDestroy()
}
Inspect the database
It is finally time to inspect the database. Run the app using the Debug option (Shift+F9). After “Hello World!” is printed on the screen, switch to the App Inspection tool.
You can find the App Inspection tool at the bottom of your IDE.
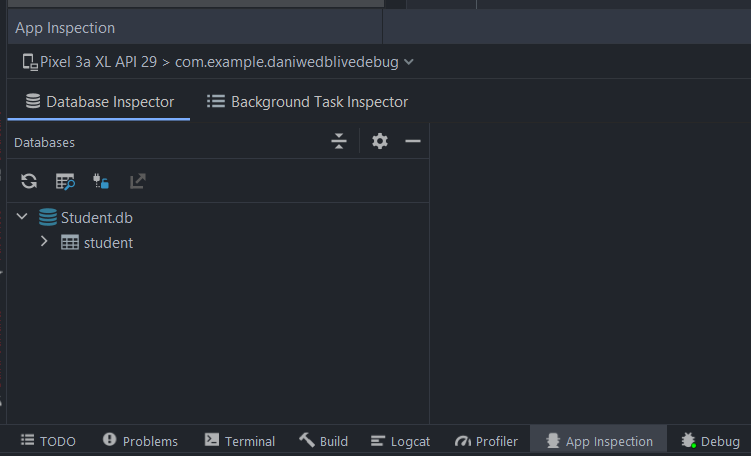
If it is missing, then you can just go to
View > Tool Windows > App Inspectionto bring it back.
The database might not load immediately after switching to the App Inspection tool. You might have to wait a couple of seconds for it to show. Once it is loaded, you will see the database and the student table like the screenshot below.

If you are familiar with other database management consoles such as MySQL Workbench, SSMS, DBeaver, etc, then the Database Inspector should be quite easy for you to use.
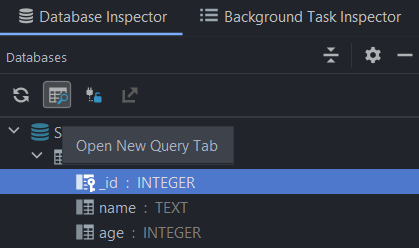
Running queries
To execute statements against the database, open a New Query Tab.
Our database currently does not have any row, so let us add one row. In the New Query tab, run the SQL statement below.
INSERT INTO student values(1, "John", 19);To check if a student named John with age 19 has been added to the database, you do not have to run any SELECT query. You can just double click on the student table, and the database will show current rows.
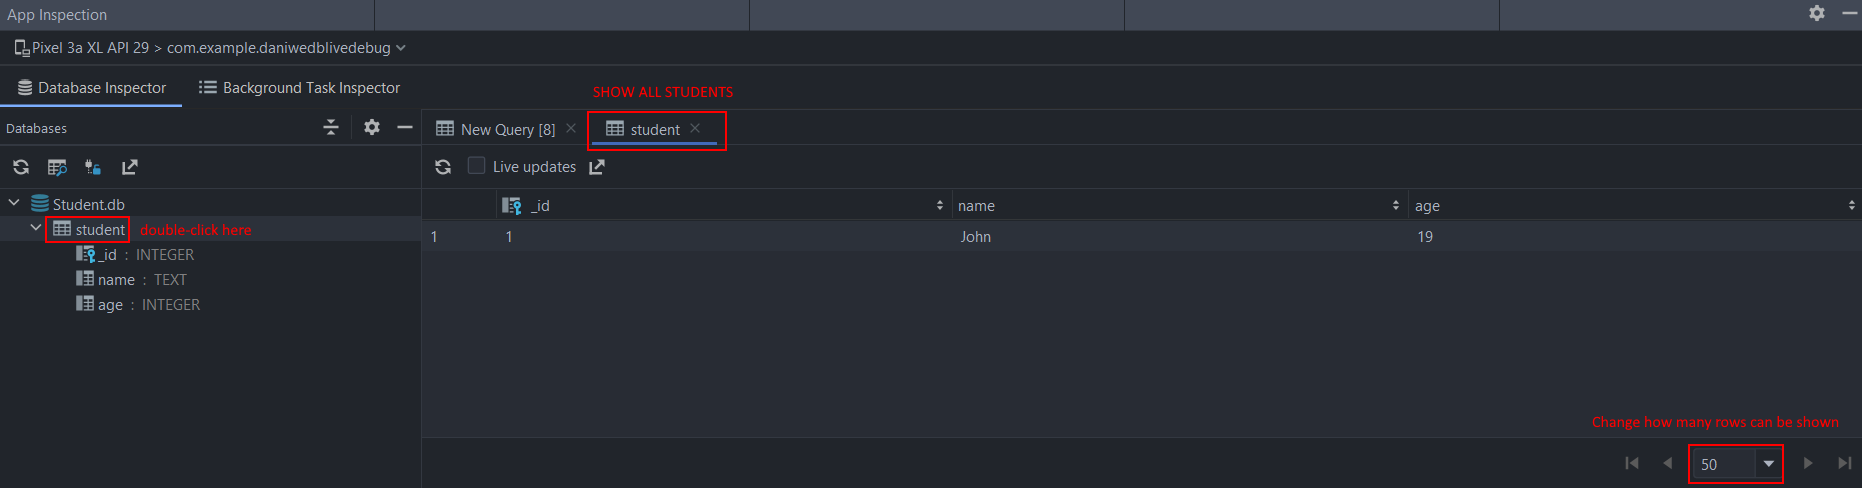
You can also change how many rows can be displayed. The default is 50.
The Database Inspector also allows us to modify values directly. Double-click on John’s name and change the value to Mary.
There is no option to delete a row directly using the Database Inspector, so we must run a DELETE statement to delete the row.
DELETE FROM student WHERE _id=1;The Database Inspector will advise that the statement was run successfully. If we refresh the student table view, we can see that the row has been deleted.
Solution Code
StudentContract.kt
package com.example.daniwedblivedebug

import android.content.Context
import android.database.sqlite.SQLiteDatabase
import android.database.sqlite.SQLiteOpenHelper
import android.provider.BaseColumns

object StudentContract {
   object Student : BaseColumns {
       const val TABLE = "student"
       const val COLUMN_NAME = "name"
       const val COLUMN_AGE = "age"
   }

   private const val SQL_CREATE_STUDENTS =
       "CREATE TABLE ${Student.TABLE} (" +
               "${BaseColumns._ID} INTEGER PRIMARY KEY," +
               "${Student.COLUMN_NAME} TEXT," +
               "${Student.COLUMN_AGE} INTEGER)"

   class StudentDbHelper(context: Context) : SQLiteOpenHelper(context, DATABASE_NAME, null, DATABASE_VERSION) {

       override fun onCreate(db: SQLiteDatabase) {
           db.execSQL(SQL_CREATE_STUDENTS)
       }

       override fun onUpgrade(p0: SQLiteDatabase?, p1: Int, p2: Int) {
           TODO("Not yet implemented")
       }

       companion object {
           const val DATABASE_VERSION = 1
           const val DATABASE_NAME = "Student.db"
       }
   }
}
MainActivity.kt
package com.example.daniwedblivedebug

import androidx.appcompat.app.AppCompatActivity
import android.os.Bundle

class MainActivity : AppCompatActivity() {

   private val dbHelper = StudentContract.StudentDbHelper(this)

   override fun onCreate(savedInstanceState: Bundle?) {
       super.onCreate(savedInstanceState)
       setContentView(R.layout.activity_main)
       dbHelper.readableDatabase
   }

   override fun onDestroy() {
       dbHelper.close()
       super.onDestroy()
   }
}
Summary
Congratulations, you have learned how to create a SQLite database and use the Database Inspector tool. The full project code can be found here: https://github.com/dmitrilc/DaniweDBLiveDebug/tree/master