This is the second part of a series. The first part can be found here.
Draw The Yin
Now that we have the Yang drawn, we will continue onto the Yin.
-
Add the Paint for the Yin into the YingYang class. We will use a stroke style initially to draw. When are happy with the drawing, we can comment it out to make the code draw with the fill style (default).
private val yinPaint = Paint().apply { color = Color.BLACK style = Paint.Style.STROKE strokeWidth = 10f } -
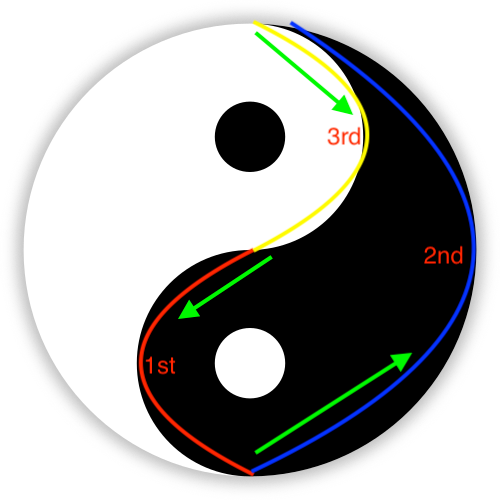
There are 3 arcs that we must draw in total for the teardrop-shaped Yin. The image below shows the arcs in order and different colors to make it easy to understand.
-
The green arrows show the flow of the contour.
-
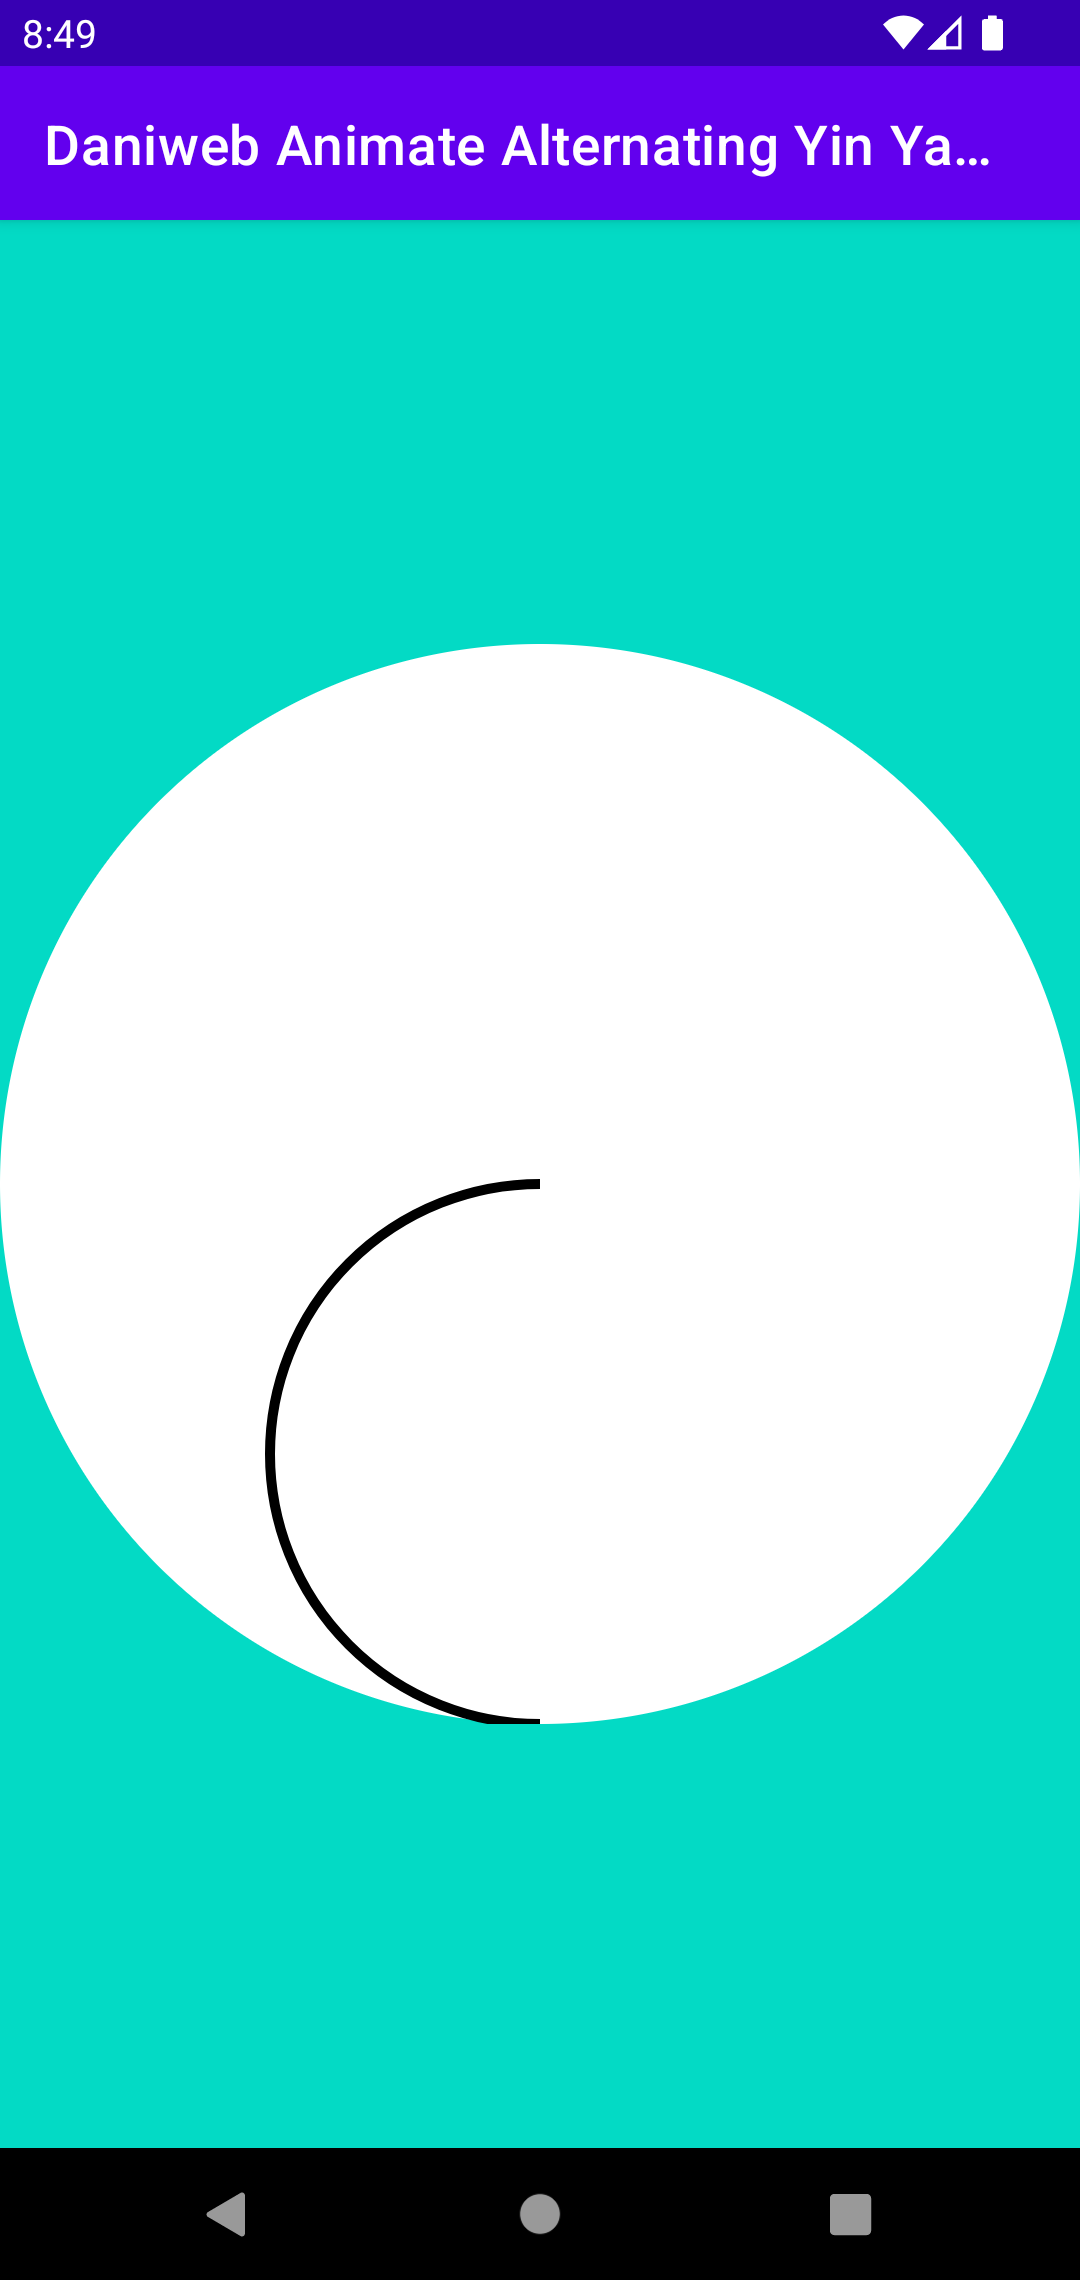
To draw the first arc, use the code below.
 private fun drawYin(canvas: Canvas){
    val yinPath = Path().apply {
        addArc(
            bounds.right * 0.25f, // 0.25 = full arc visible. 0.5 = arc invisible
            bounds.exactCenterY(),
            bounds.right * 0.75f, // 0.75 = full arc visible. 0.5 = arc invisible
            bounds.bottom.toFloat(),
            270f,
            -180f
        )
    }

    canvas.drawPath(yinPath, yinPaint)
 }
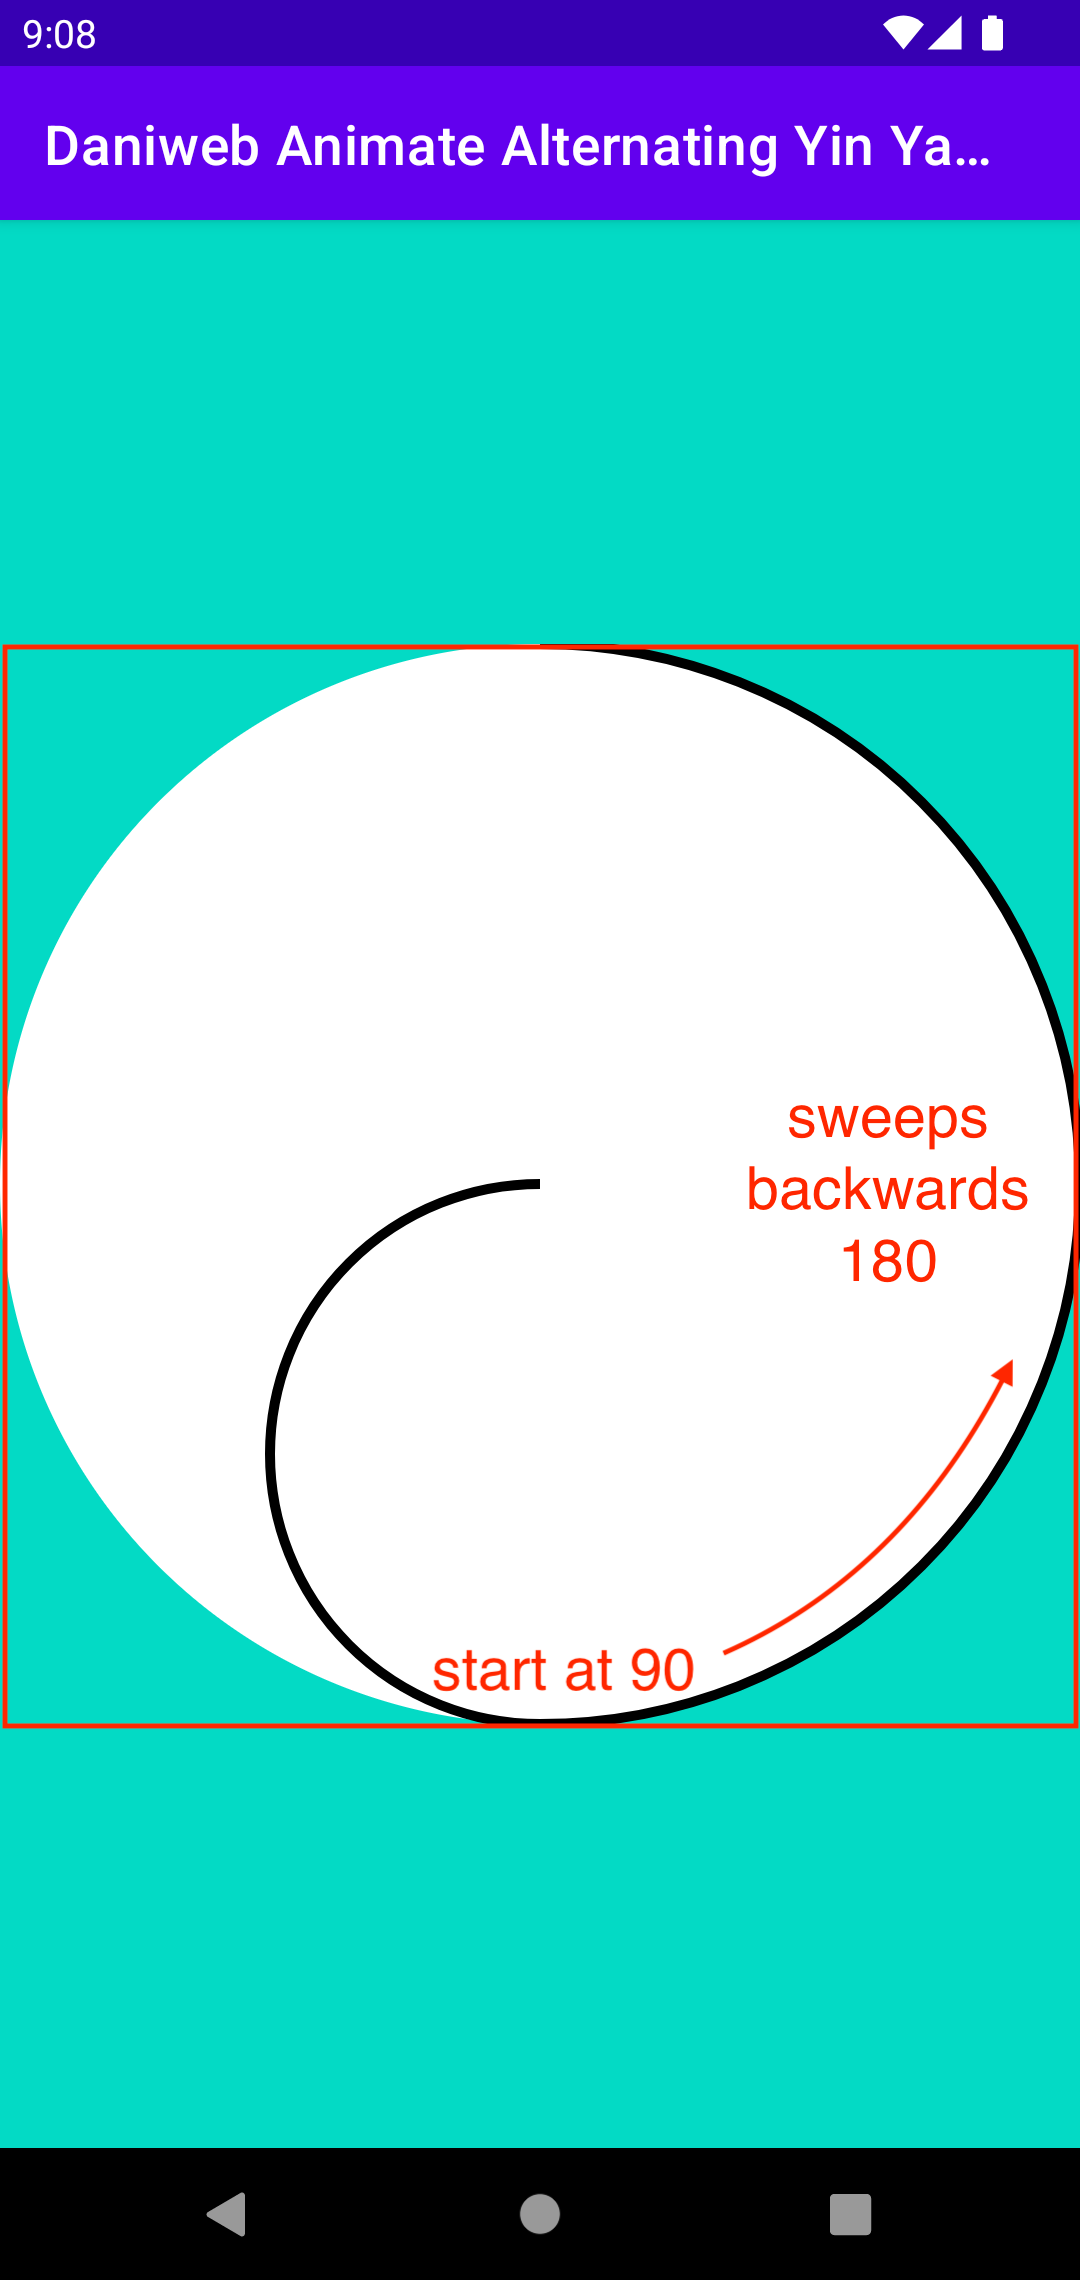
5. There might be too much going on here from a single arc. Though I expected that you already know how to draw custom shapes, the picture below attempts to describe it.
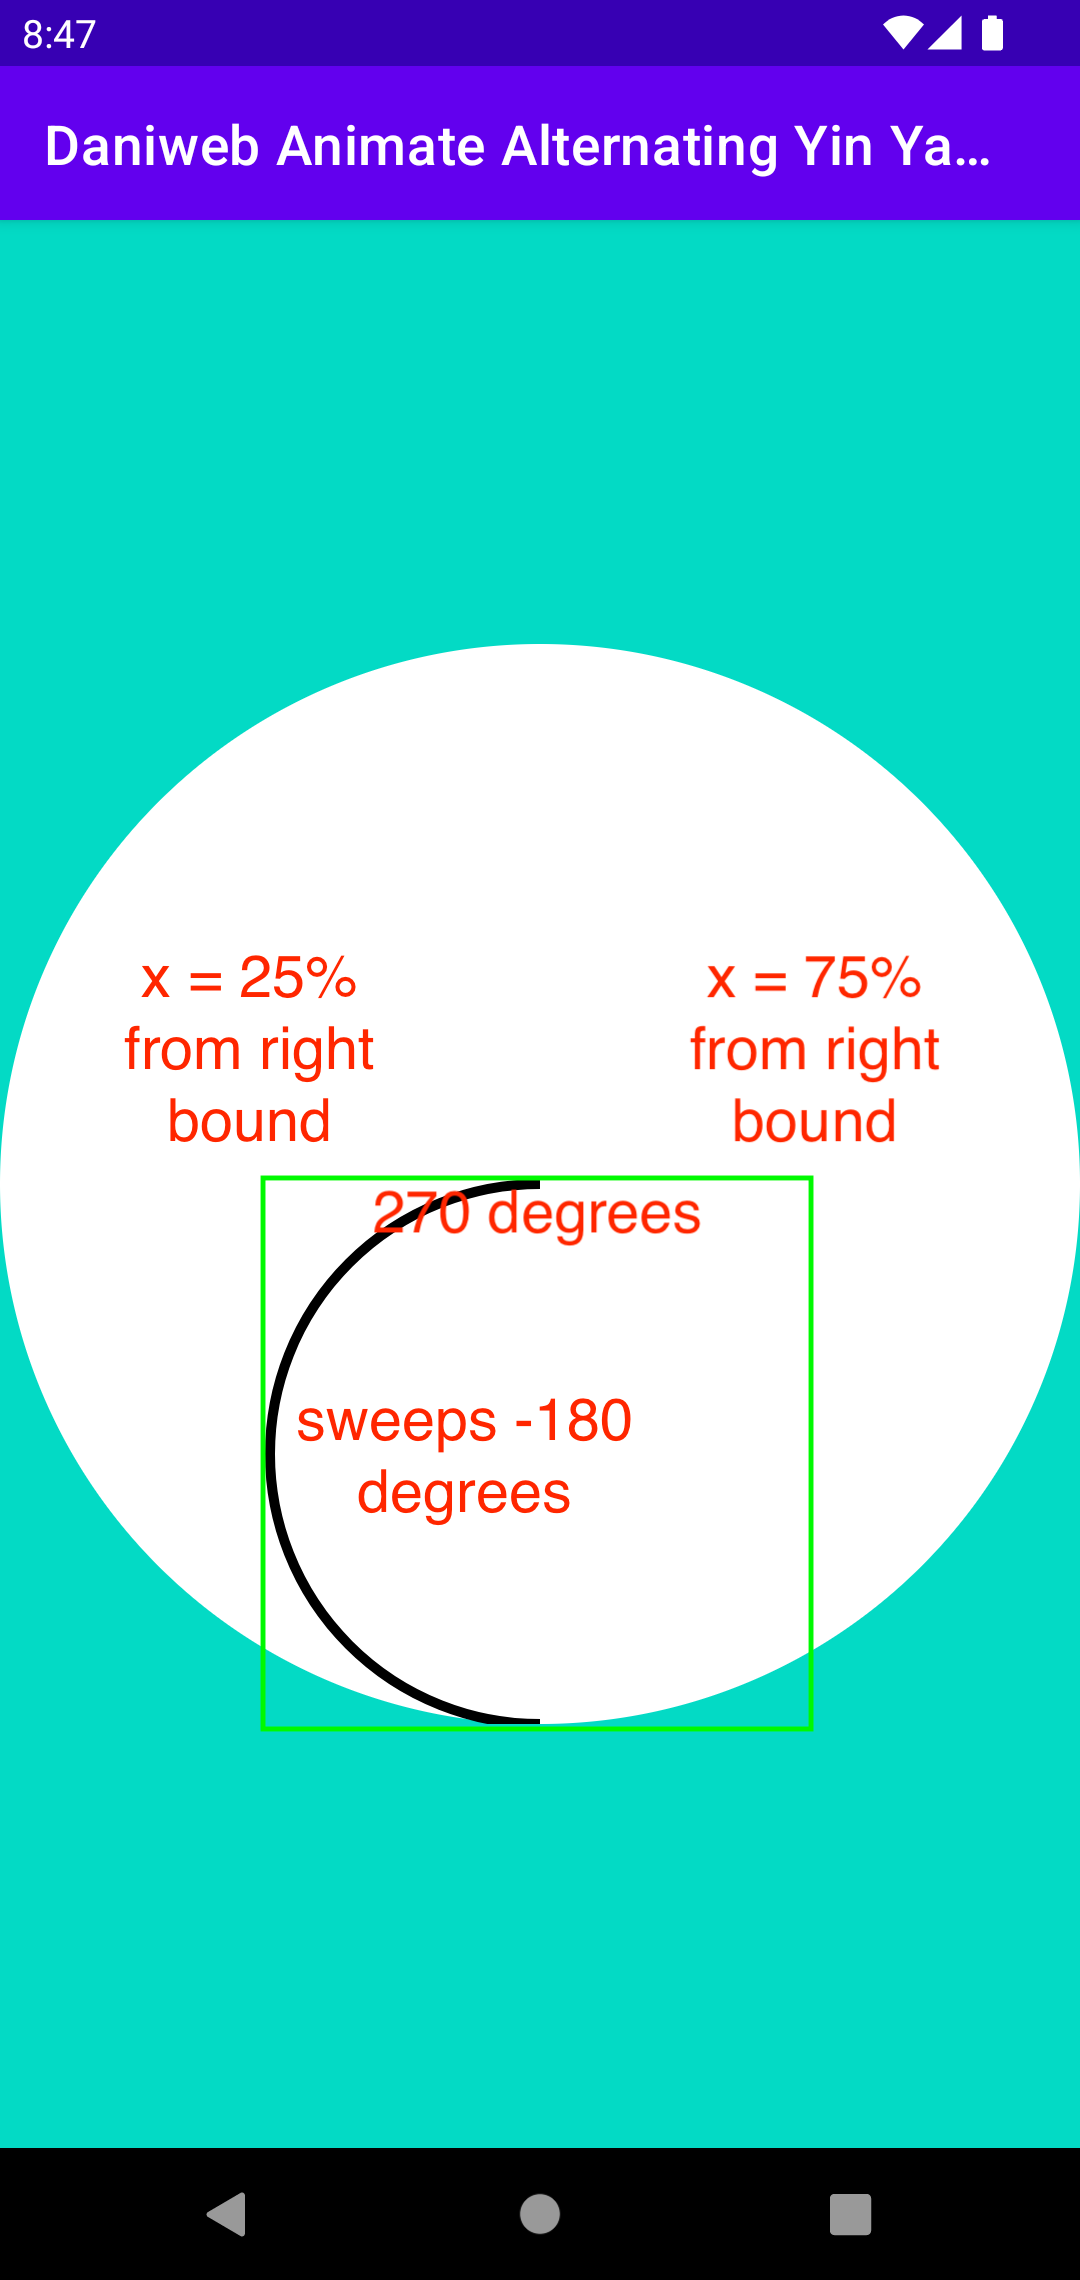
6. Whenever drawing an arc or a circle, it is best to visualize an invisible rectangle in mind. The green square does not actually appear in the app; it is only there to help with visualization. Using the bounds of the parent container, we calculate the coordinates for the rectangle.
7. The starting angle of the circle is 270 degrees and sweeps backwards 180 degrees, creating the arc in the picture. As far as the Path class is concerned, the location of the 0 (zero) degree on a circle is the 3 o'clock position on the wall clock. If the sweep angle is positive, the arc draws clock-wise; if the sweep angle is negative, the arc draws counter clock-wise. In our code snippet, we start at the 12 o’clock position and draws backwards to the 6 o’clock position.
8. Now let us move on to draw the second arc.
    private fun drawYin(canvas: Canvas){
       val yinPath = Path().apply {
           addArc(
               bounds.right * 0.25f, // 0.25 = full arc visible. 0.5 = arc invisible
               bounds.exactCenterY(),
               bounds.right * 0.75f, // 0.75 = full arc visible. 0.5 = arc invisible
               bounds.bottom.toFloat(),
               270f,
               -180f
           )

           arcTo(
               0f,
               0f,
               bounds.right.toFloat(),
               bounds.bottom.toFloat(),
               90f,
               -180f,
               false
           )
       }

       canvas.drawPath(yinPath, yinPaint)

    }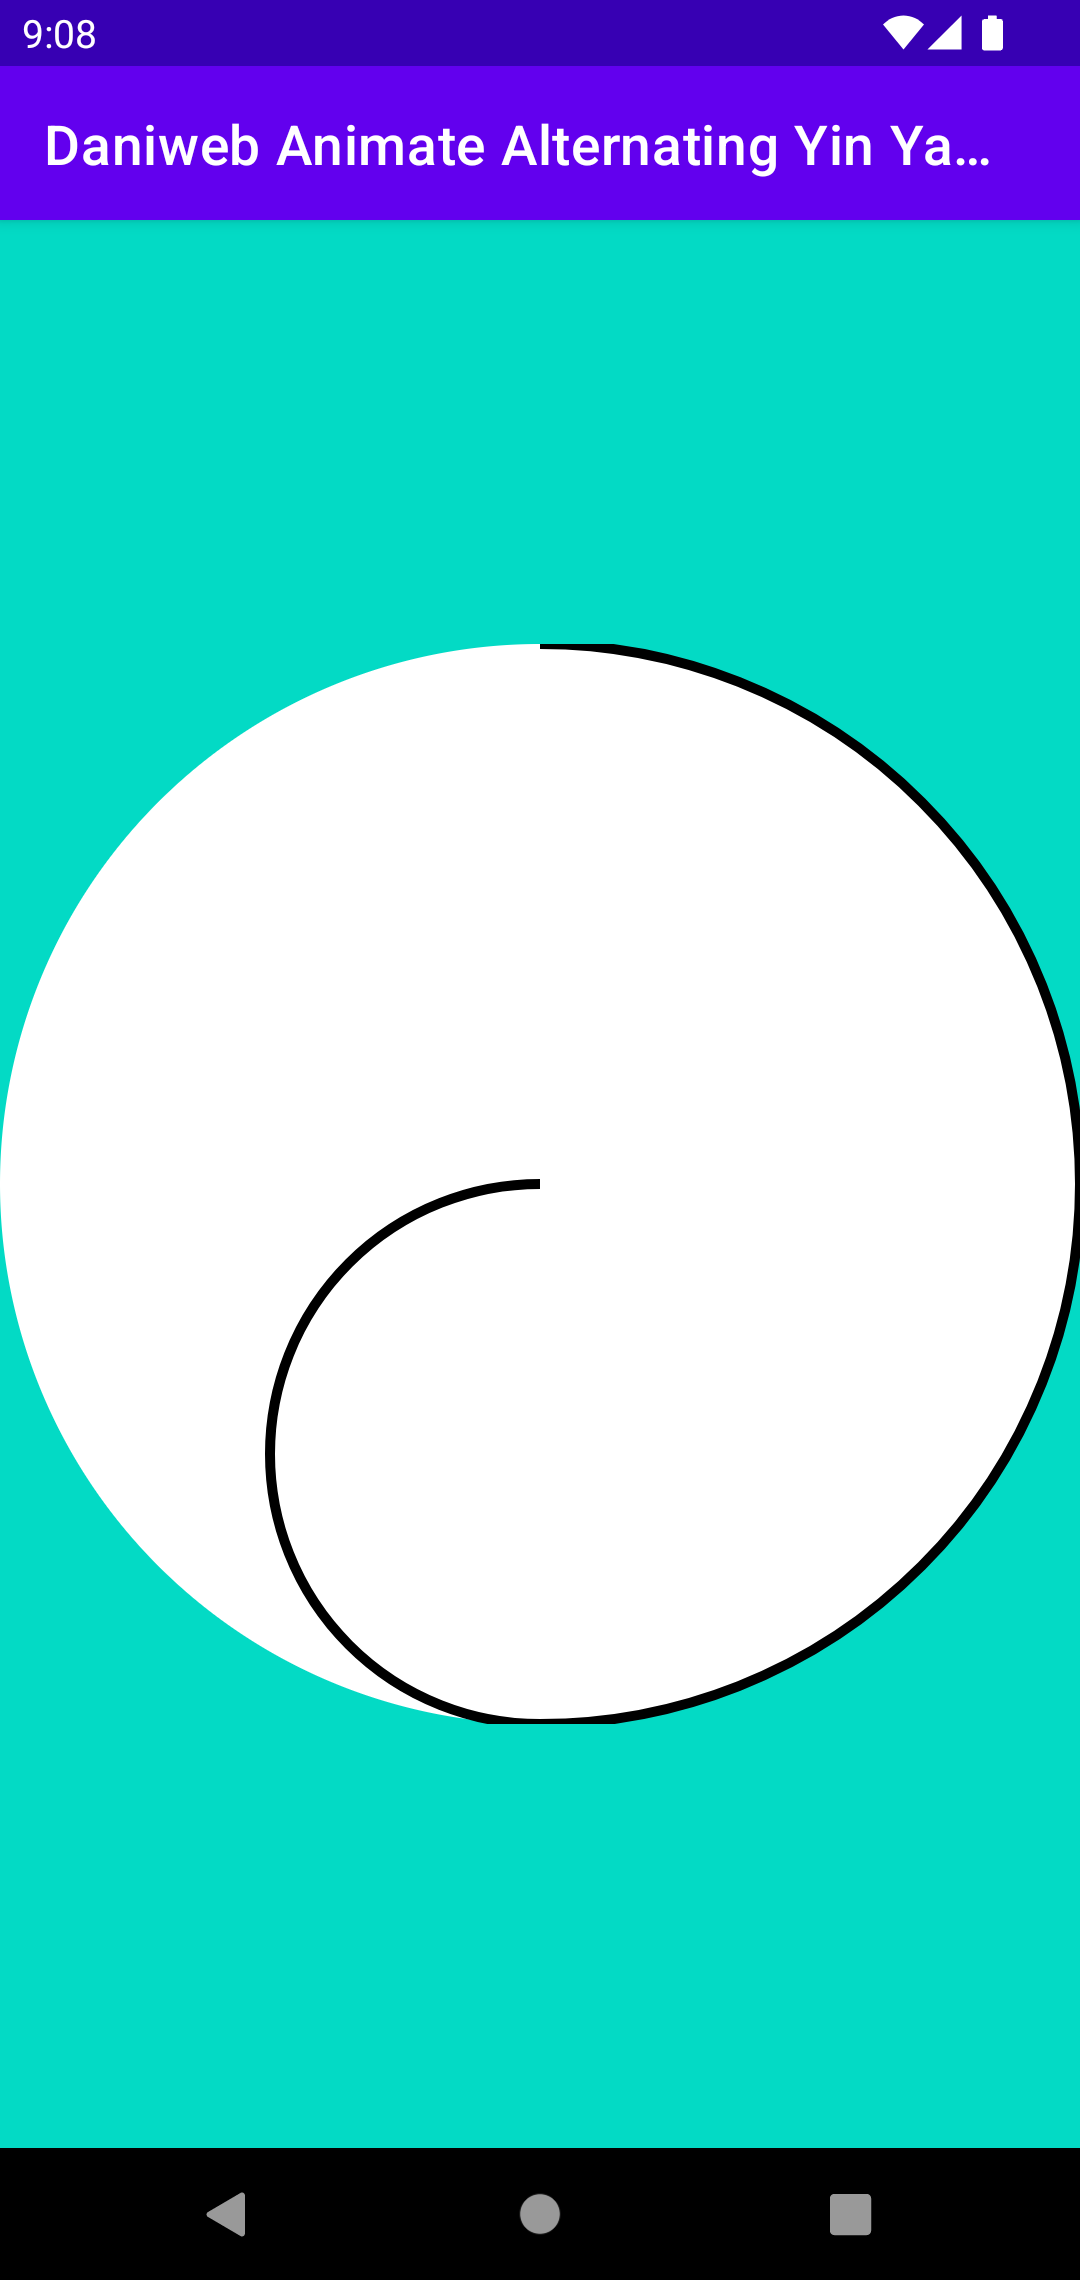
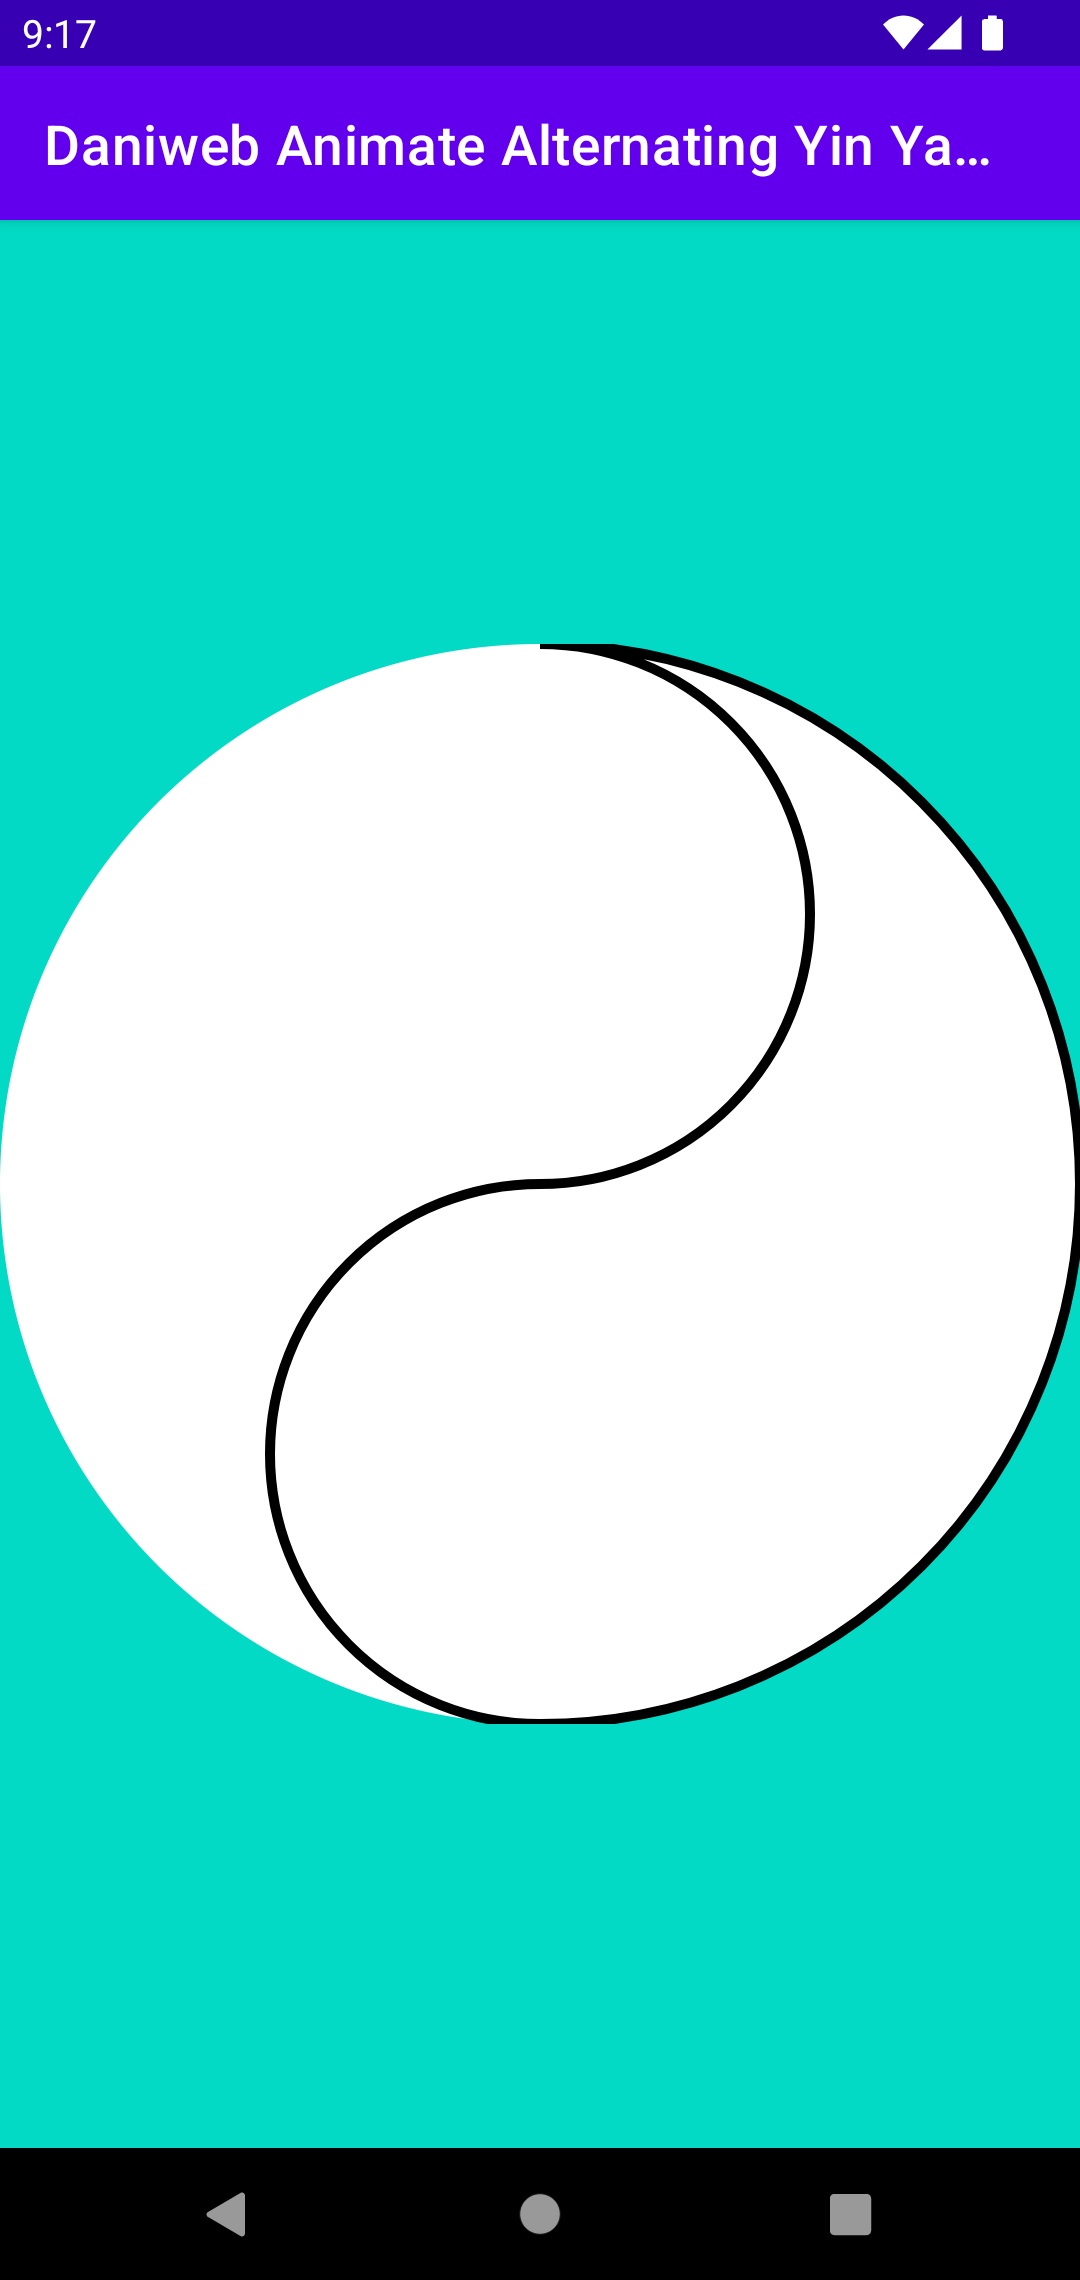
9. For the second arc, it continues the first arc, so it starts at 90 degrees and then sweep backwards 180 degrees.
10. Finally, we draw the third and last arc.
    private fun drawYin(canvas: Canvas){
       val yinPath = Path().apply {
           addArc(
               bounds.right * 0.25f, // 0.25 = full arc visible. 0.5 = arc invisible
               bounds.exactCenterY(),
               bounds.right * 0.75f, // 0.75 = full arc visible. 0.5 = arc invisible
               bounds.bottom.toFloat(),
               270f,
               -180f
           )

           arcTo(
               0f,
               0f,
               bounds.right.toFloat(),
               bounds.bottom.toFloat(),
               90f,
               -180f,
               false
           )

           arcTo(
               bounds.right * 0.25f,
               0f,
               bounds.right * 0.75f,
               bounds.exactCenterY(),
               270f,
               180f,
               false
           )
       }

       canvas.drawPath(yinPath, yinPaint)
    }
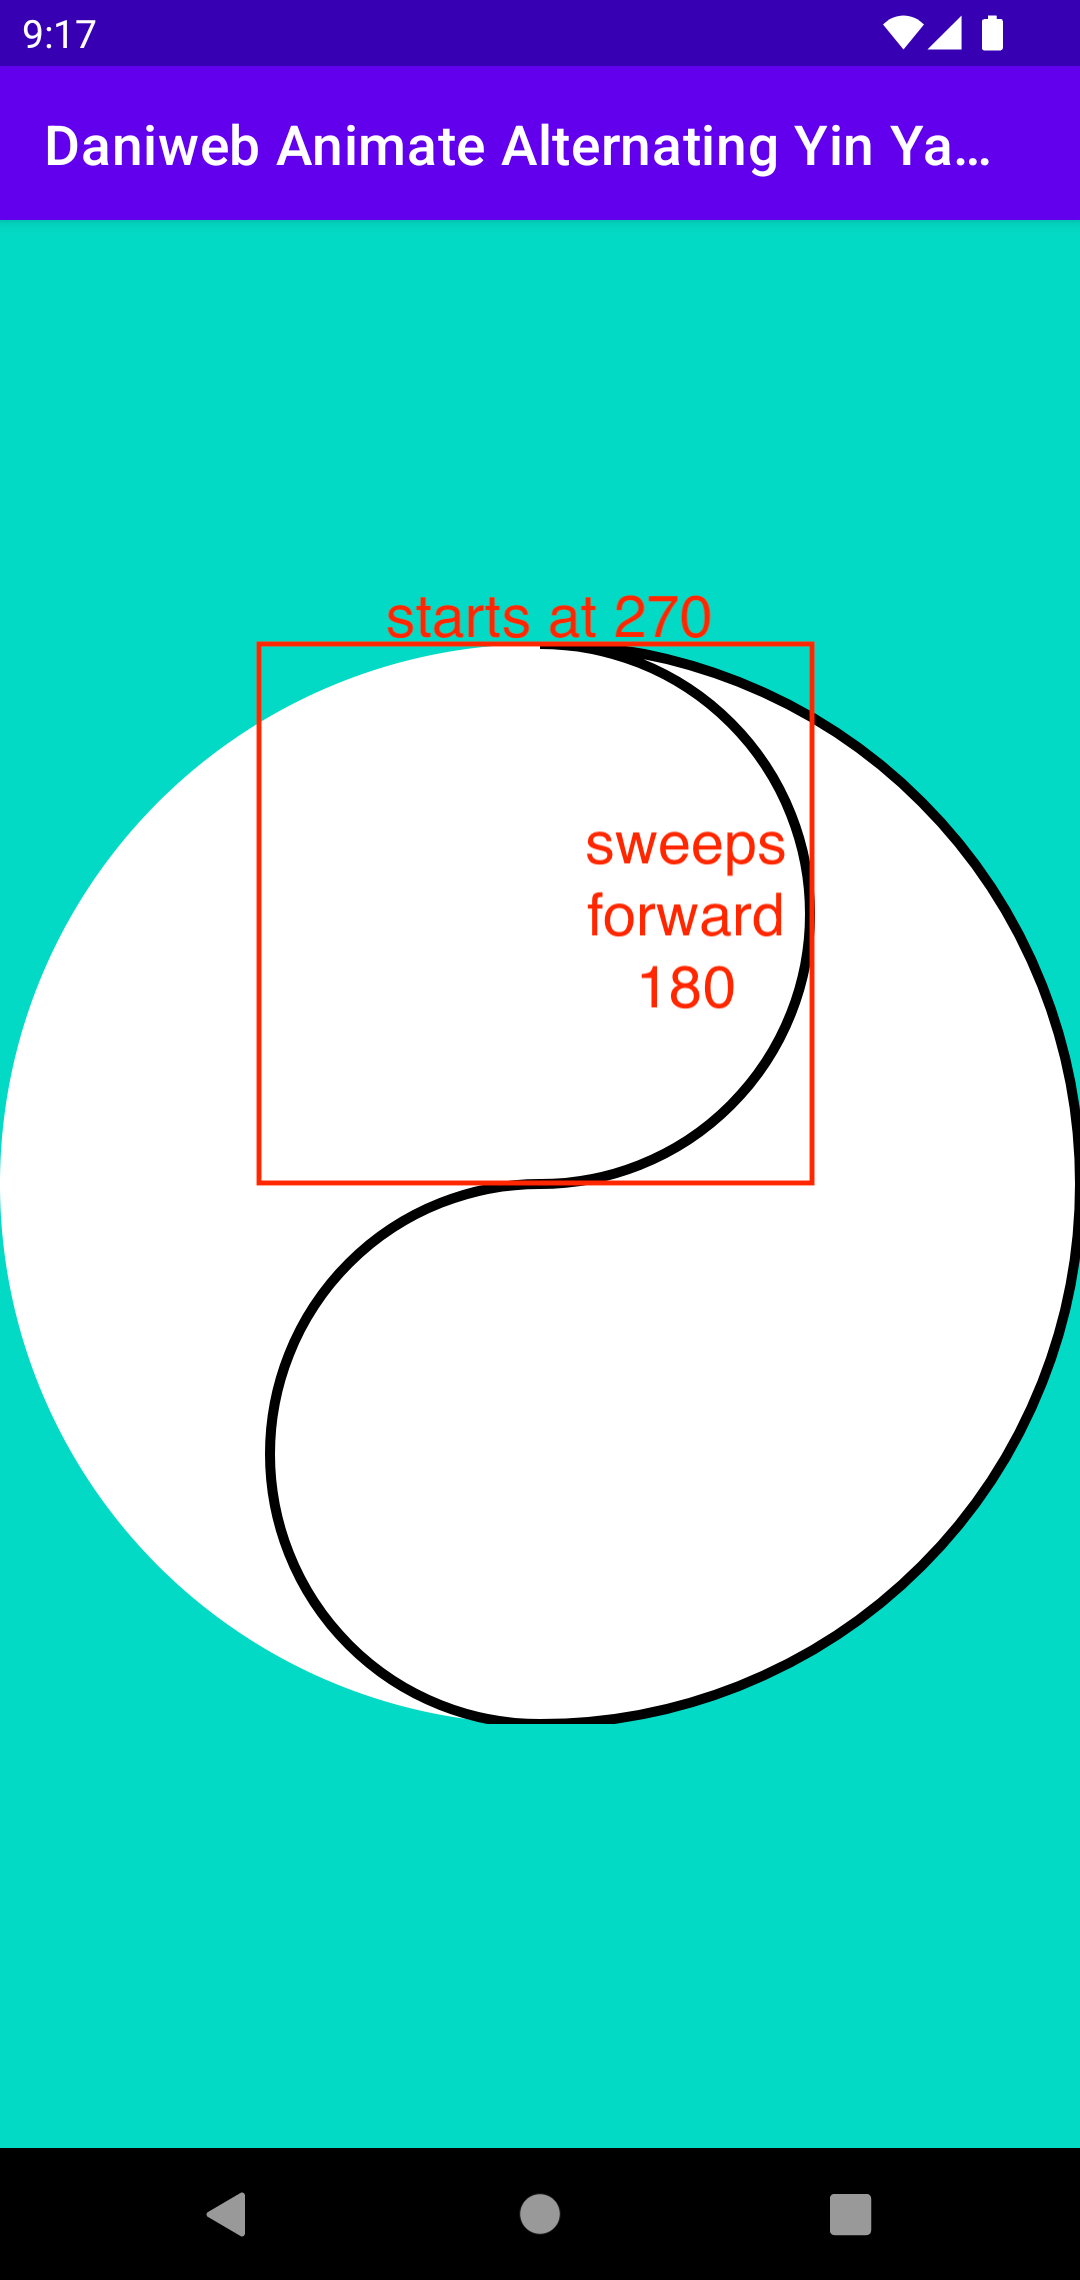
11. The third arc would continue where the second arc ended, which is at the top of the Yin Yang. It starts at 270 degrees and sweeps forward 180 degrees.
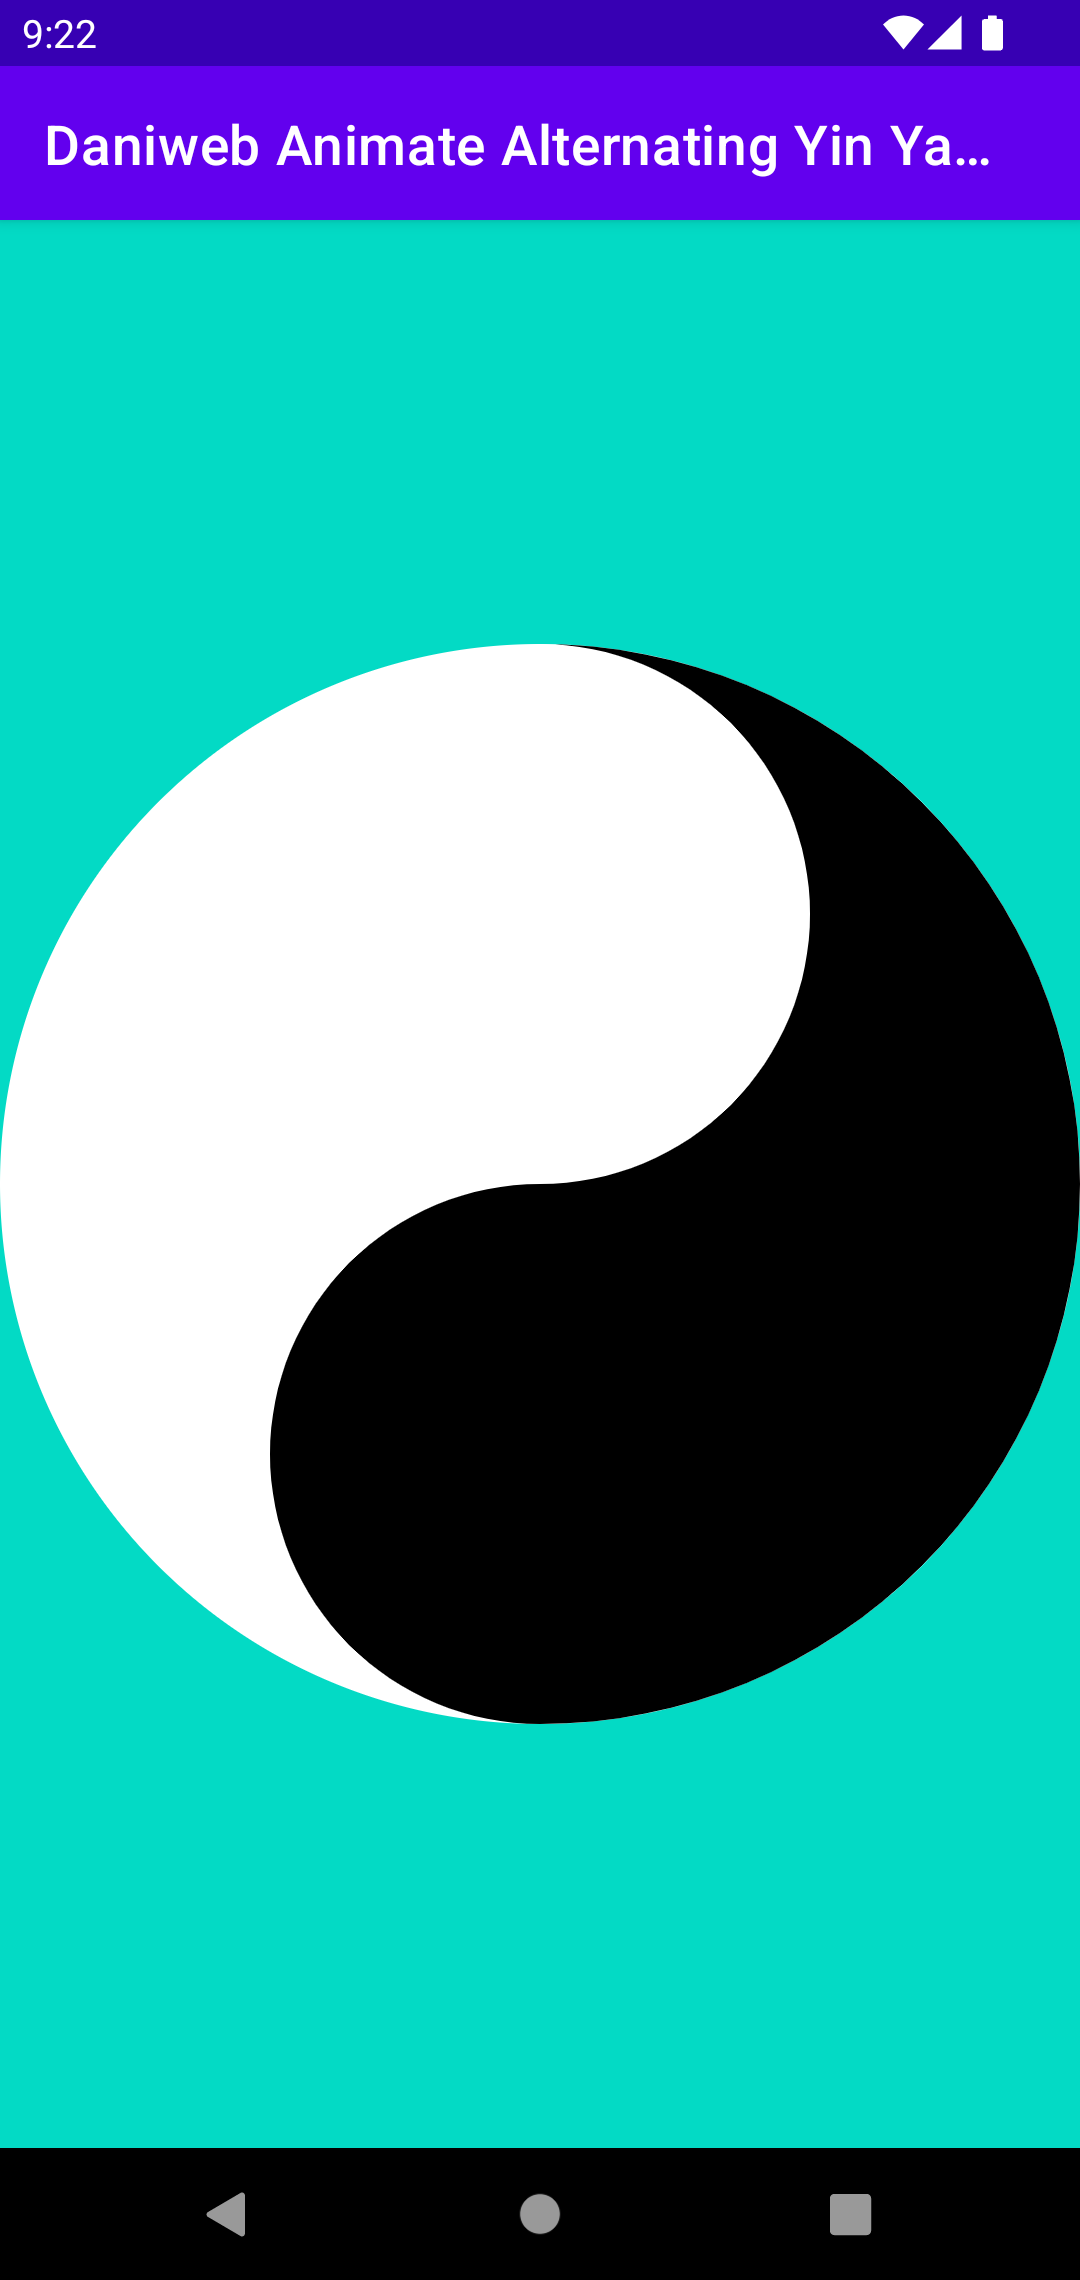
12. As the last step, comment out the stroke style and width for the yinPaint.
private val yinPaint = Paint().apply {
color = Color.BLACK
/* style = Paint.Style.STROKE
strokeWidth = 10f*/
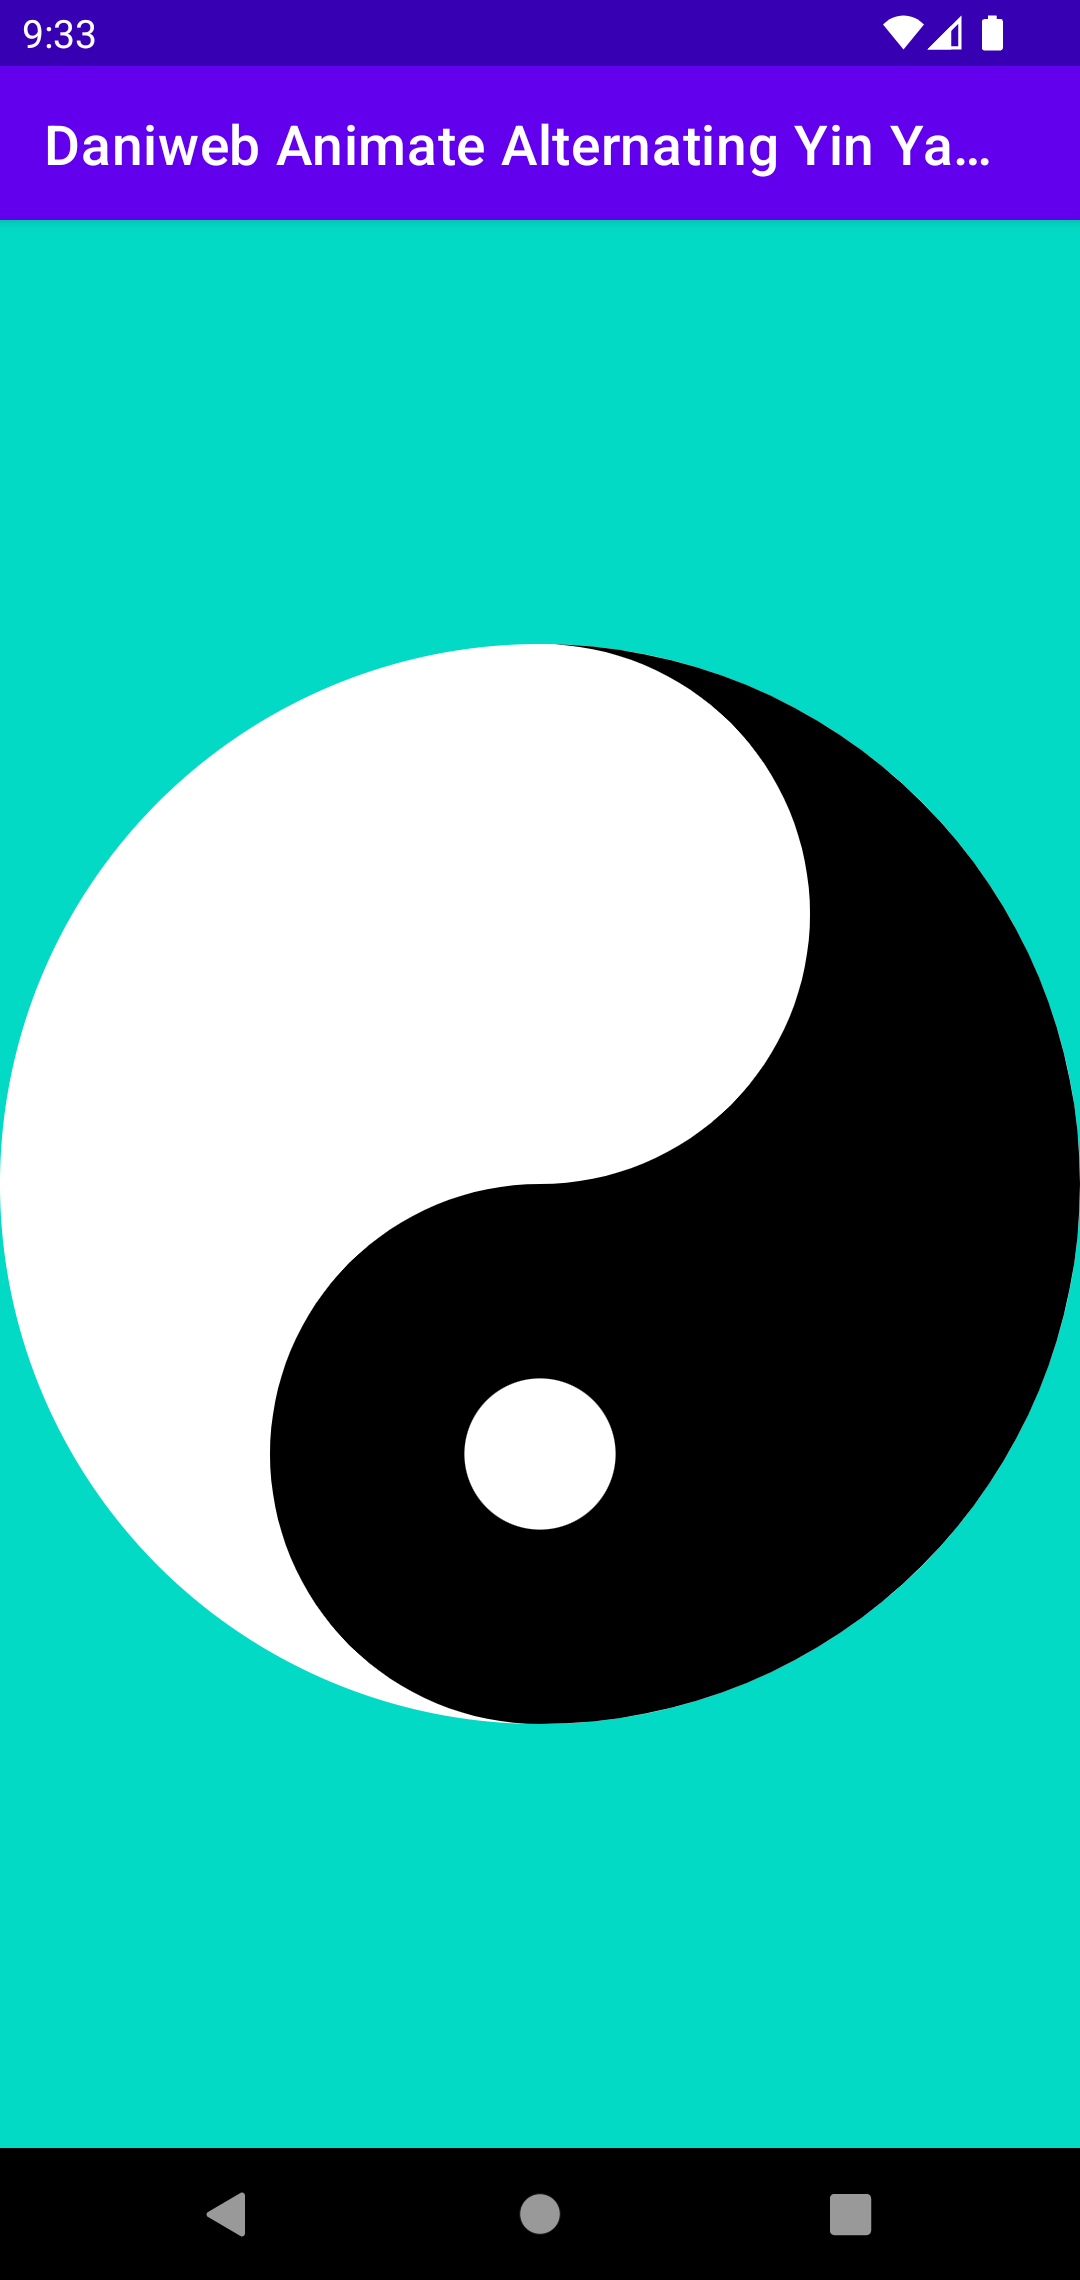
}Once the fill style takes effect, we have our Yin drawn like below. Since we do not have to draw the Yang teardrop, we are technically done with the Yin and the Yang.
Draw The Yang Dot
The Yang Dot is the white dot contained inside the Yin. When it does not need to be animated, it is quite simple to draw.
private fun drawYangDot(canvas: Canvas){
   canvas.drawCircle(
       bounds.exactCenterX(),
       bounds.bottom * 0.75f,
       bounds.right * 0.07f,
       yangPaint
   )
}
We can calculate the position of the Yang dot by using container bounds as well.
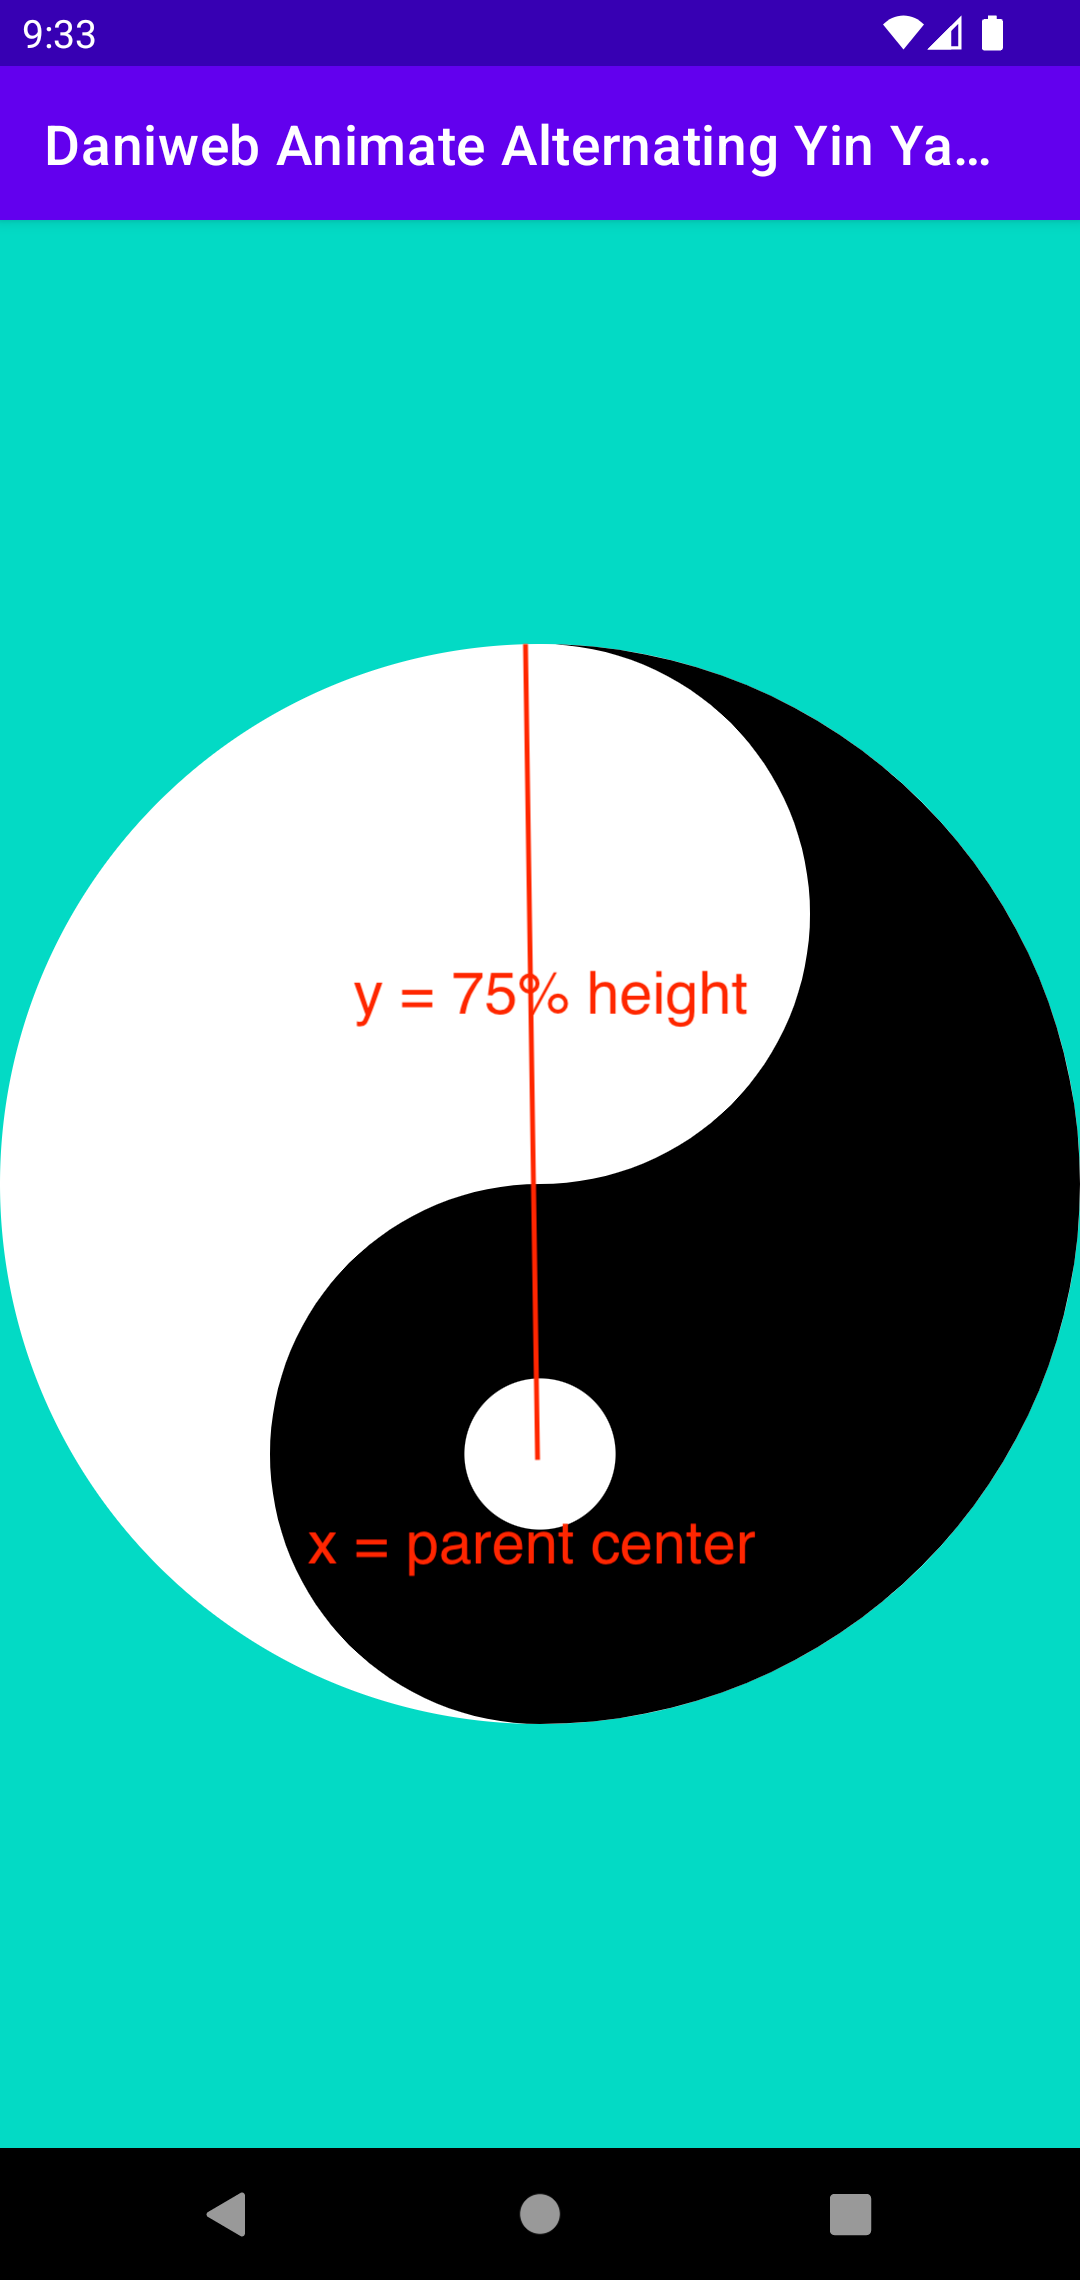
For the Yang Dot’s radius of bounds.right * 0.07f, I simply chose what feels right to me, not too big and not too small.
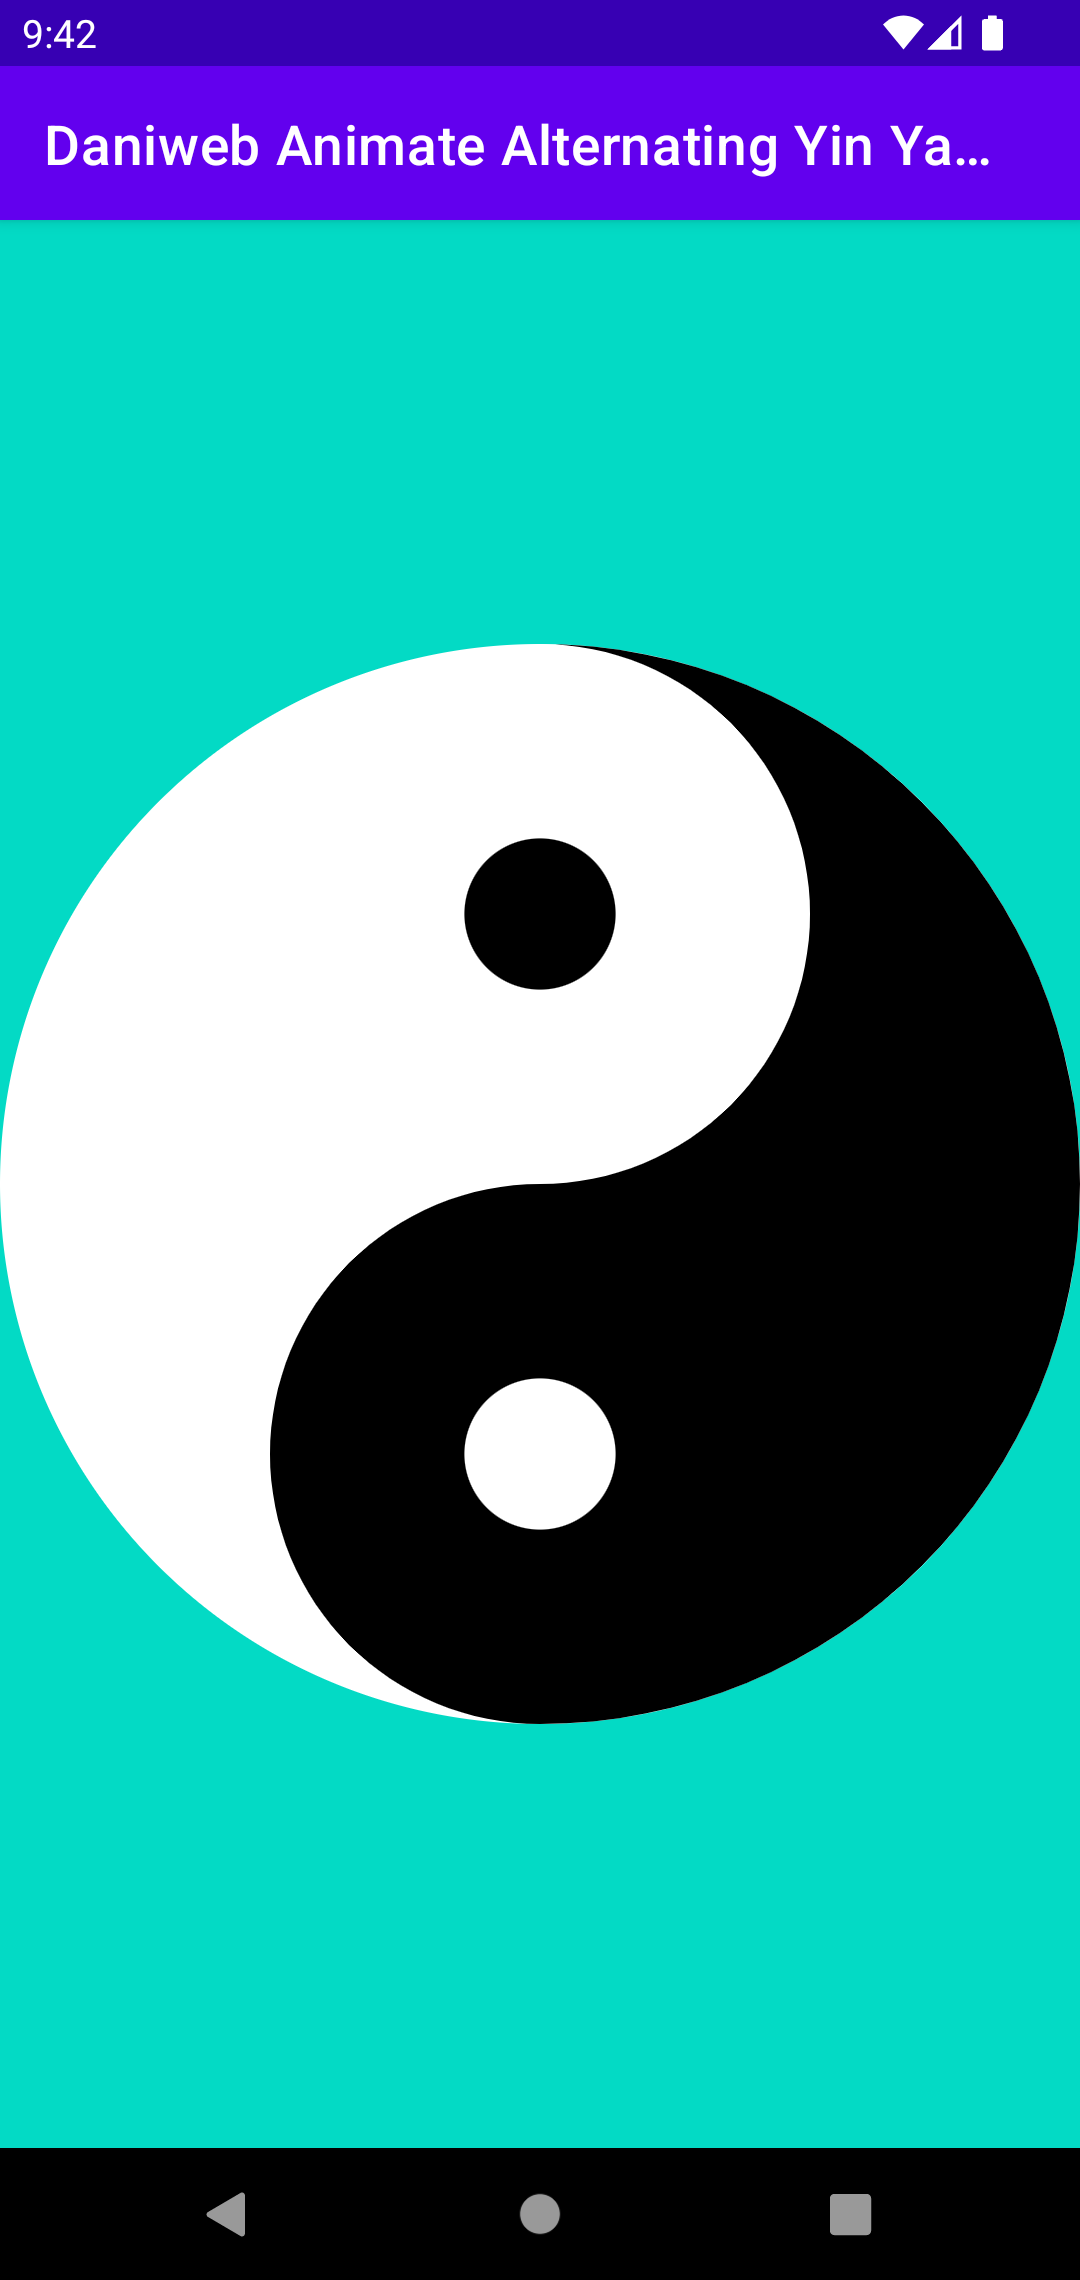
Draw The Yin Dot
Using a similar tactic to how we drew the Yang Dot, you can draw the Yin Dot using the code below.
private fun drawYinDot(canvas: Canvas){
   canvas.drawCircle(
       bounds.exactCenterX(),
       bounds.bottom * 0.25f,
       bounds.right * 0.07f,
       yinPaint
   )
}
Summary
We are completed with the second part of the tutorial and finished drawing the Yin Yang. If you are interested in animating it, please continue to part three here.