Introduction
Based on the latest report from Appbrain, Samsung has the highest market share(>35%) among all of the Android OEMs, therefore it is important that your apps are tested against Samsung phones.
In this tutorial, we will learn how to load Samsung Emulator skins onto our emulator devices.
Goals
At the end of the tutorial, you would have learned:
- How to load Samsung Emulator skins onto Android emulators with Android Studio.
- How custom AVD skins work.
Tools Required
- Android Studio. The version used in this tutorial is Arctic Fox 2020.3.1 Patch 4.
Prerequisite Knowledge
- Basic Android.
Project Setup
To follow along with the tutorial, perform the steps below:
- Create a new Android project with the default Empty Activity.
AVD Skins
Before learning how to add Samsung Emulator skins to our emulators, first, let us dig a little bit deeper into custom AVD (Android Virtual Device) skins.
For each emulator managed by the AVD Manager, there is an advanced option called Custom skin definition, which allows you to load a skin that is different from stock Android.
![]()
You can either get these skins directly from the OEMs or create them yourselves. Unfortunately, not all Android OEMs provide them to developers, but Samsung is one of the few OEMs that provides a collection of pre-made skins for their devices.
Custom Skin only applies to the emulator frame
Even though we can make our stock emulators look and feel like real Samsung devices, this approach does not replicate the functionalities of the Launcher and other System applications on Samsung phones, so you still need to test with real devices or cloud testing farms for more accurate results.
The emulator skin can only emulate volume buttons and camera/speaker/microphone cutouts. Refer to the picture below if you need further clarification.

Anatomy of AVD Skins
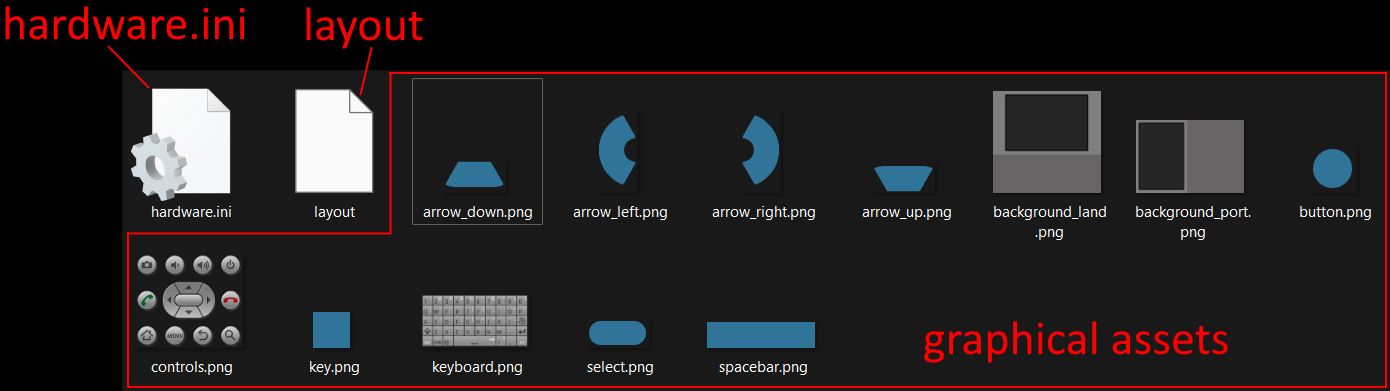
When you are loading a skin, you are simply loading a directory containing skin configuration files and graphic assets. A skin directory contains the files below:
- Configuration file named layout: this is the main configuration file, which defines the appearance of the skin. The format of this file looks similar to JSON, but its actual format must follow the rules described in ANDROID-CONFIG-FILES.TXT. Its supported key-value pairs are documented in ANDROID-SKIN-FILES.TXT.
- The image files for custom elements of the skin.
- Configuration file named hardware.ini: optional file containing custom hardware configurations for the emulator.
Besides OEM device skins that we can download from the internet, Android Studio already includes pre-made skins for us to inspect. On Windows, by default, they are located at the locations below:
%USERPROFILE%\AppData\Local\Android\Sdk%USERPROFILE%\AppData\Local\Android\Sdk\platforms\android-31\skins
You will need to modify the platform level in the path above if you do not have android-31 installed.
I have opened the HVGA skin (under android-31/skins), which includes the layout, hardware.ini, and graphical assets in the picture below.
Get Emulator Skins from Samsung
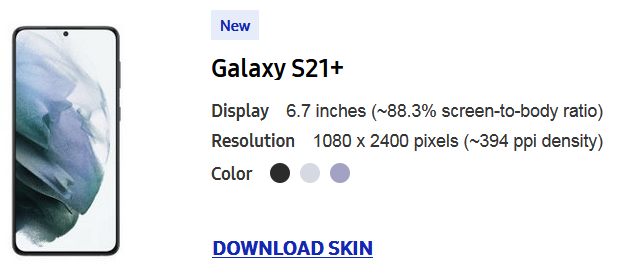
For this tutorial, we will learn how to load the emulator skin of a Galaxy S21+. To download this skin, follow the steps below:
- Go to this link to access all Galaxy S skins. A free Samsung account is required to access this page.
- Scroll download until you find Galaxy S21+, and then click DOWNLOAD SKIN.
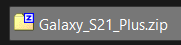
- Find the downloaded Galaxy_S21_Plus.zip file and extract the content.
Inspecting the Configuration Files
Using what we know so far about the layout configuration file, we will now try to understand the layout file included in the Galaxy S21+ skin.
- Inside the extracted Galaxy_S21_Plus directory, open up the layout file with a text editor. Under the
parts/portraitsection, we can easily see which configuration is referring to which graphic asset.
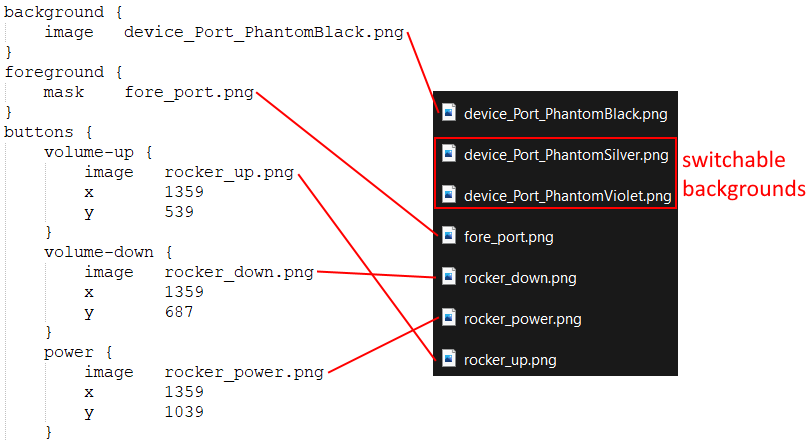
- There are three different colors of the Galaxy S21+, and the Black color is used by default, so that’s why device_Port_PhantomBlack.png is used in the configuration file. The Silver and Violet backgrounds are not used, but you are allowed to modify the configuration file as you wish.
- The foreground mask is applied on top of the background to give the skin the correct curves as well as the camera cutout.
volume_up,volume_down, andpowerassets emulate the volume rockers and the power button, including their X and Y coordinates.- Unfortunately, this skin from Samsung does not include the hardware.ini file, so we will have to apply the emulator hardware configurations by ourselves later.
Create the Galaxy S21+ Emulator
For the skin to apply properly, we will have to create an emulator with the same dimensions as the real device. The resolution of the Galaxy S21+ is 1080x2400, so our emulator must use the same resolution as well.
- In Android Studio, Open the AVD Manager from Tools > AVD Manager.
- At the bottom left, select Create Virtual Device.
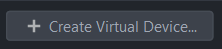
- On the next screen, select New Hardware Profile.

- For the Device Name, use
Mock Galaxy S21_Plus. - For the Device Type, use Phone/Tablet.
- The screen size must be
6.7. - The resolution would be 1080x2400.
- Leave Input, Supported device states, Camera, and Sensors as default.
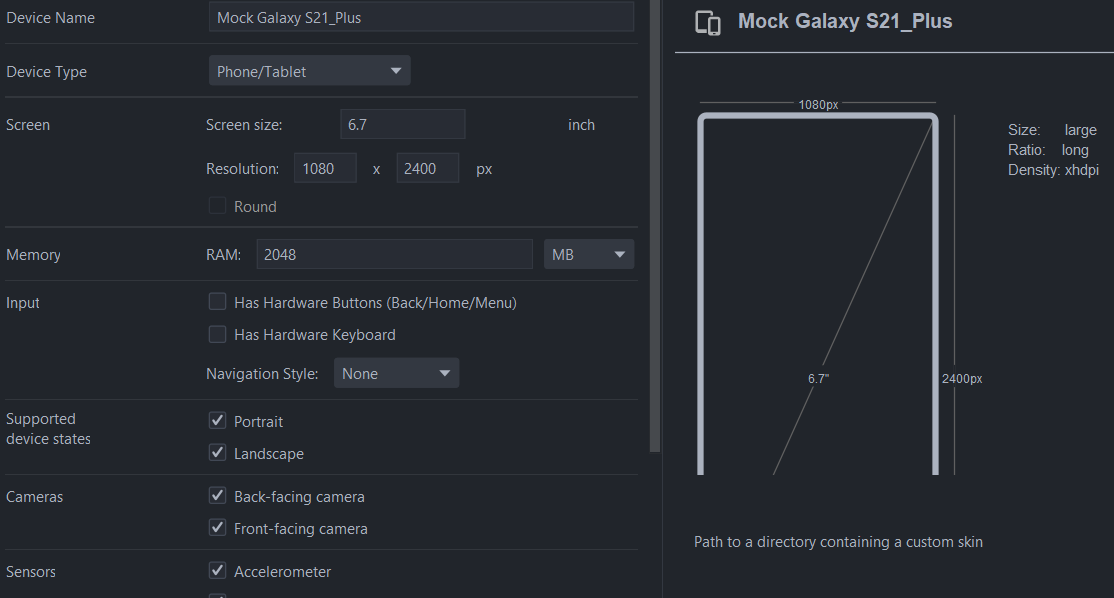
- Scroll all the way to the end where you will find the Default skin option. Select the 3 dots icon and then select the Galaxy_S21_Plus directory that you have extracted earlier.

- You will now see the Galaxy_S21_Plus skin set as the Default skin.

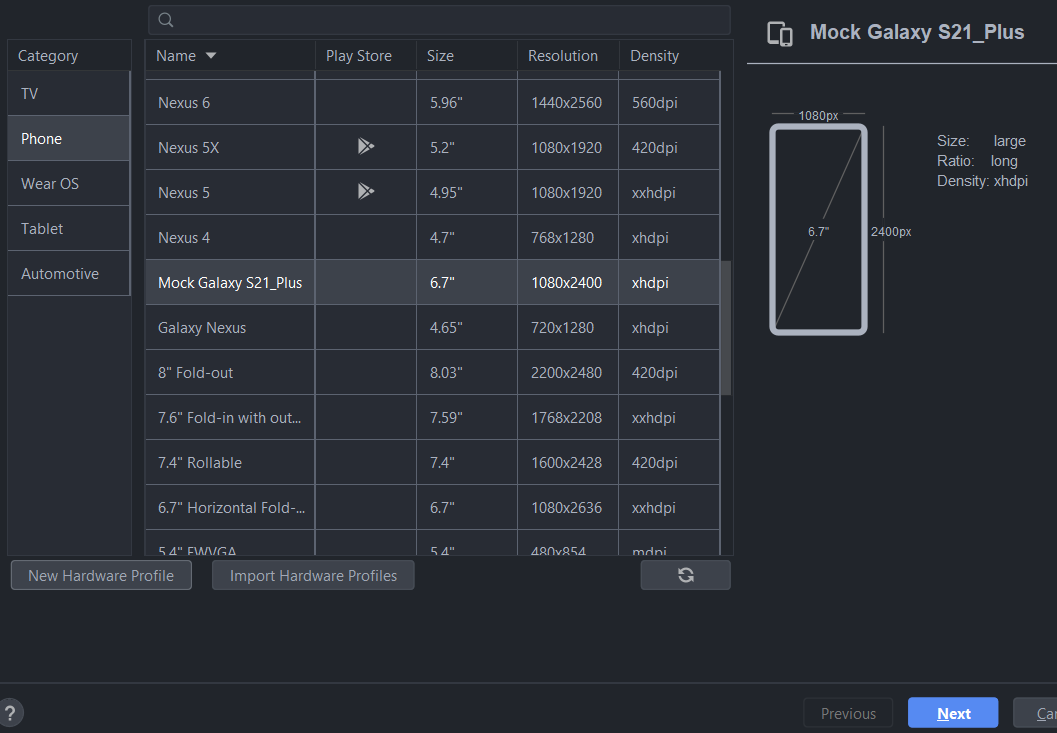
- Click Finish. The window will close and bring us back to the previous screen.
- With the Mock Galaxy S21_Plus selected, hit Next.
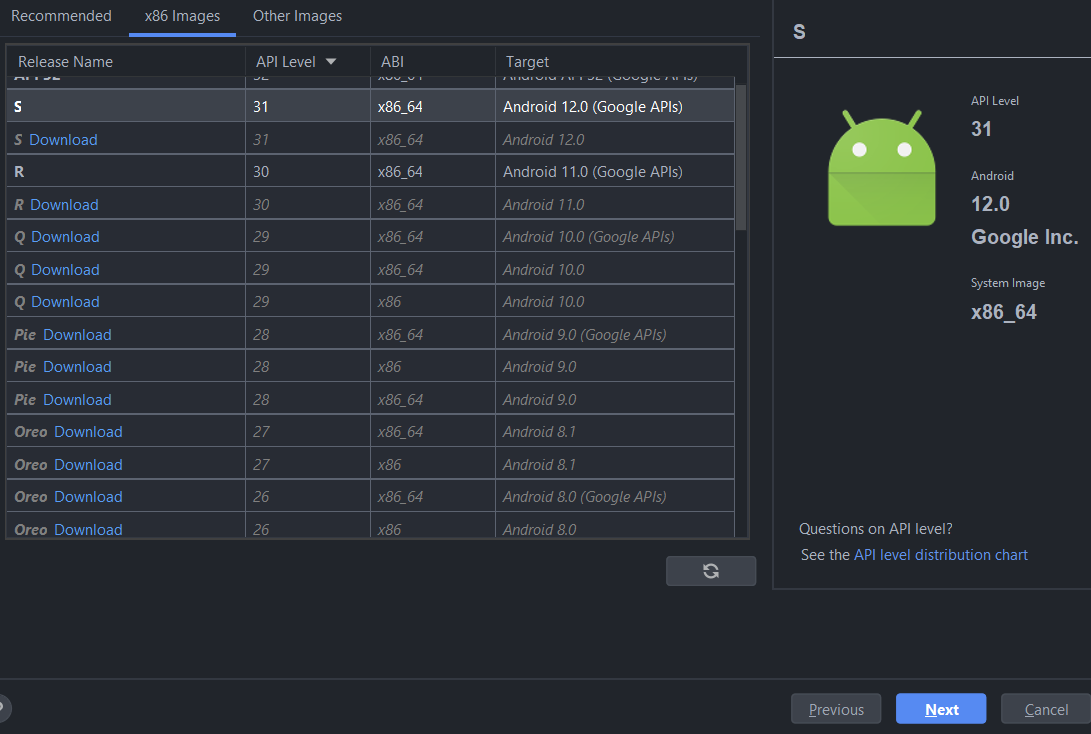
- Now select your System Image of choice and select Next. I am using the x86 API 31 Image, but you might have to select a different Image depending on your own system (ARM-based systems such as Qualcomm/Raspberry Pi/Apple ARM should use ARM images instead of x86).
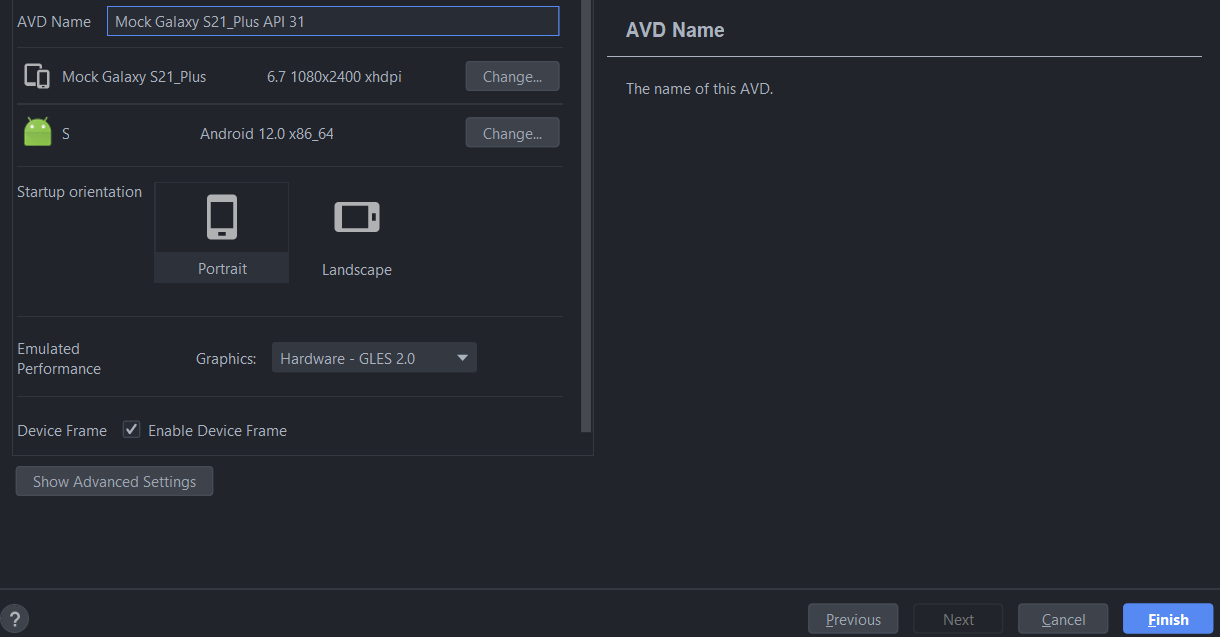
- On the last screen, make sure that Enable Device Frame is selected before hitting Finish.
- Back to AVD Manager, press the green Play button to start your emulator.

Your system might take a couple of minutes to start the emulator for the first time, but that should not affect the emulator skin from loading. You should see your emulator with a similar interface to the picture below.
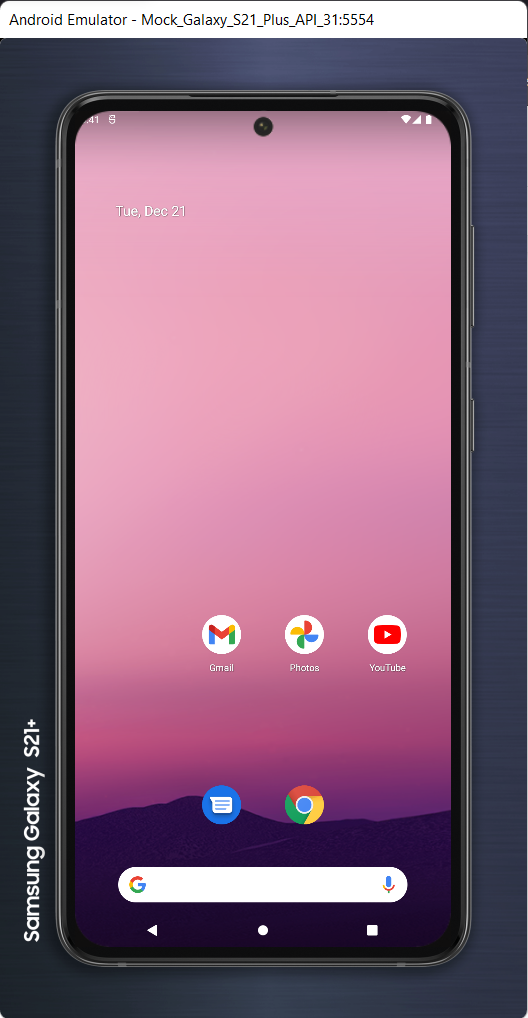
If we compare our emulator skin with the real stock images, then we can see that the antennas, camera cutout, volume rockers, and the power button are all at the right places.

Summary
We have learned how to load custom skins on Android emulators.
For this particular S21+ skin, I think the real benefits are to see where the camera cutout is as well as the volume/power rockers, especially if your app focuses on flagship galaxy devices. Maybe it will help you design your game controls better so they are not accidentally placed under the camera cutout; or maybe now that you know where the volume rockers and power buttons are, you would be able to avoid forcing your users to hold the device in an awkward position when using your app.