In this tutorial you will learn how to colorize or change hair color using Adobe Photoshop. To do that follows some steps.

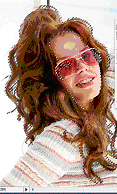
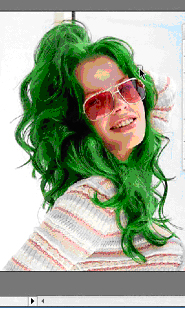
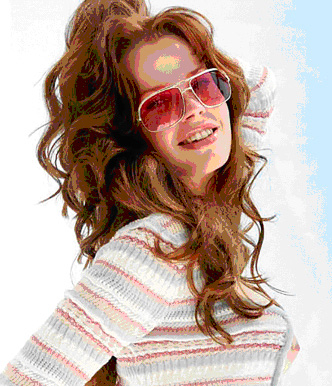
This is the image I'm gonna take use for this project.

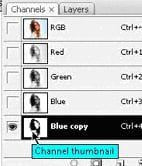
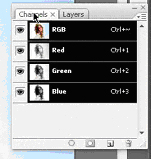
Open the image of which you want to colorize hair then click on the channels tab on the layers palette.

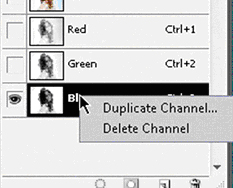
And duplicate the blue channel by right clicking and choosing duplicate channel on the channel.

Click o.k. in the duplicate channel dialogue box.


Turn the visibility off of the channels other than the blue copy channel by clicking on the eye icon on the channels palette and start working on the duplicated channel

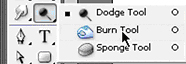
From tools palette select dodge tool

Set these options for this tool.

Now highlight the image other than the hair. You can also change the exposure of the tool as needed.

Now from tools palette again select burn tool.

Set the settings for the burn tool

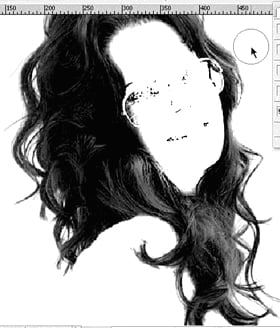
Now burn the image using this tool

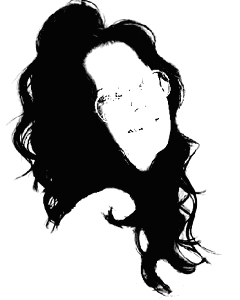
After burning the hair click on the Channel by holding down the Ctrl key.

It will make selection of the channel.

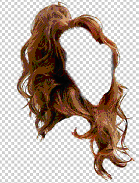
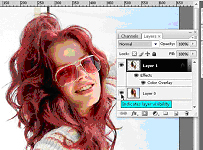
And turn the visibility on of the other channels and click on the layers tab. Press Ctrl J to make a new layer with selected area and turn the visibility off of the original image.

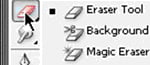
Now use eraser tool to erase the area other than the hair.

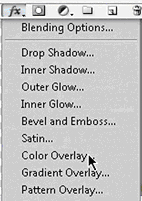
Now from the layers palette click on the effects button and choose color overlay from the drop down list.

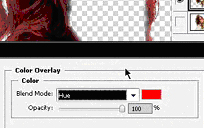
Set the blend mode to hue and click o.k. turn the visibility on of the original image

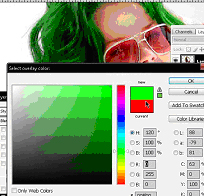
Click on the color box and select your own color for the hair.

And see the color of the hair has successfully changed to different color.

You can also change the hair color to any color you want by clicking on the color box and selecting color from the color picker.

Hope this has been helped to you. Send your comments.

To see the video of this tutorial click
Dani AI

Generated

Good, clear demo from and a nice green result noted by . The following notes do not repeat the step-by-step method already shown; they add practical refinements and alternatives that help keep results natural and fully reversible.

Prefer a non-destructive workflow: use fill/adjustment layers with masks instead of permanently erasing pixels. Keep the original image intact (or inside a Smart Object) so color choices and masks can be adjusted later. For soft, wispy edges, run a mask through the Select and Mask workspace (Smart Radius, edge smoothing) and refine manually with a low-flow soft brush on the mask.

Preserve highlights and hair texture by splitting tint work into layers: a subtle base tint at low opacity (color-targeting blend mode) and a separate layer for highlights set to a blending mode that keeps sheen (very low opacity). Alternatively, use the layer blending sliders ("Blend If") to protect specular highlights and deep shadows so natural shine remains. Avoid over-saturating—natural hair often needs moderate saturation and slight desaturation in bright specular zones.

Troubleshooting tips: convert to 16-bit if posterization appears, or add tiny noise before heavy color shifts. If color spills onto skin, paint the mask with a soft black brush or use a neutralizing adjustment on the skin area. For multi-tone or highlight work, paint strokes on clipped layers rather than altering the base mask. These approaches keep edits flexible, realistic, and easy to tweak for different lighting and hair types.

hey I like the green one..amazing colors.. more power!

Be a part of the DaniWeb community

We're a friendly, industry-focused community of developers, IT pros, digital marketers, and technology enthusiasts meeting, networking, learning, and sharing knowledge.