Introduction
Starting on API level 25, static Shortcuts can be used to quickly navigate to a specific point in your app. In this tutorial, we will learn how to create static shortcuts for an Android app.
Goals
At the end of the tutorial, you would have learned:
- How to create static shortcuts.
Tools Required
- Android Studio. The version used in this tutorial is Arctic Fox 2020.3.1 Patch 3.
Prerequisite Knowledge
- Basic Android.
Project Setup
To follow along with the tutorial, perform the steps below:
- Create a new Android project with the default Empty Activity.
Static Shortcuts
Static shortcuts are simply icons that allow your users to quickly go to a specific point in your app. For example, in the animation below, Search, Subscriptions, and Explore are all shortcuts.

In supported launchers, shortcuts are shown when the app icon is held down by the end user.
Static shortcuts should only be used to navigate to content that stays the same during the lifetime of your app. There are also two other types of shortcuts, dynamic shortcuts and pinned shortcuts, but they are out of scope for this tutorial.
Creating a static shortcut
The steps to create a static shortcut, at the minimum, include:
- Create an XML file to house the shortcut(s) declarations.
- Identifying the Intent for your shortcut.
- Bind shortcuts to their intents.
- Provide the meta-data key-value pair to the application entry point activity in the manifest file.
shortcuts.xml
To create the shortcuts resource for the static shortcuts, follow the steps below.
-
In the Android view, right-click on res > New > Android Resource Directory.
-
Both the Directory name and the Resource type should have the value
xml. -
Because static shortcuts were only added in API level 25, this new Resource Directory must contain the qualifier v25. Scroll all the way to the bottom of the Available qualifiers list, add the API 25 qualifier. You will see the Directory name changes automatically to
xml-v25.
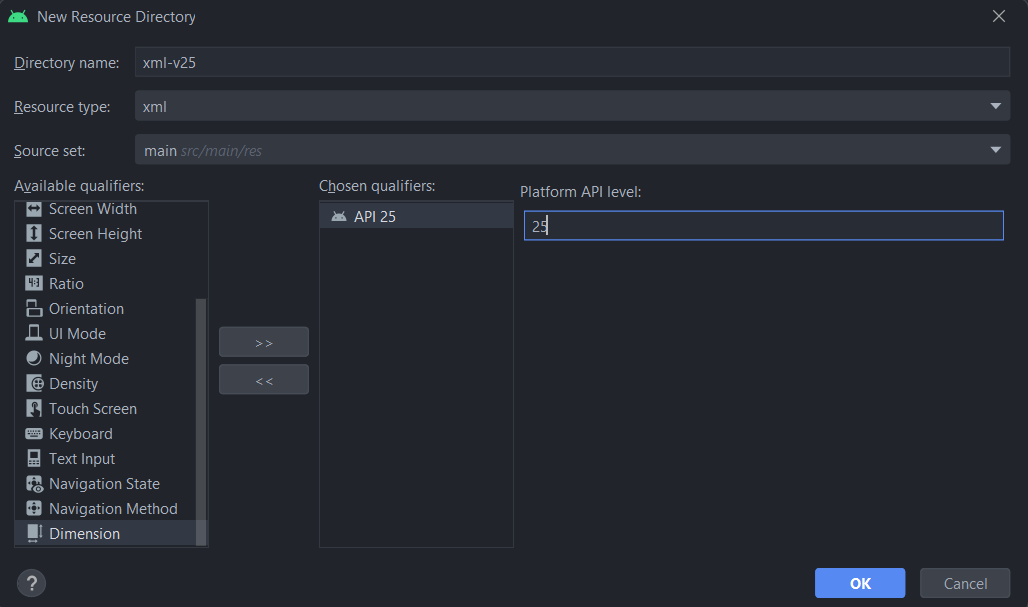
-
Select OK.
-
Right click on the xml resource directory > New > XML Resource File.
-
Set both the File name and the root element to
shortcuts.
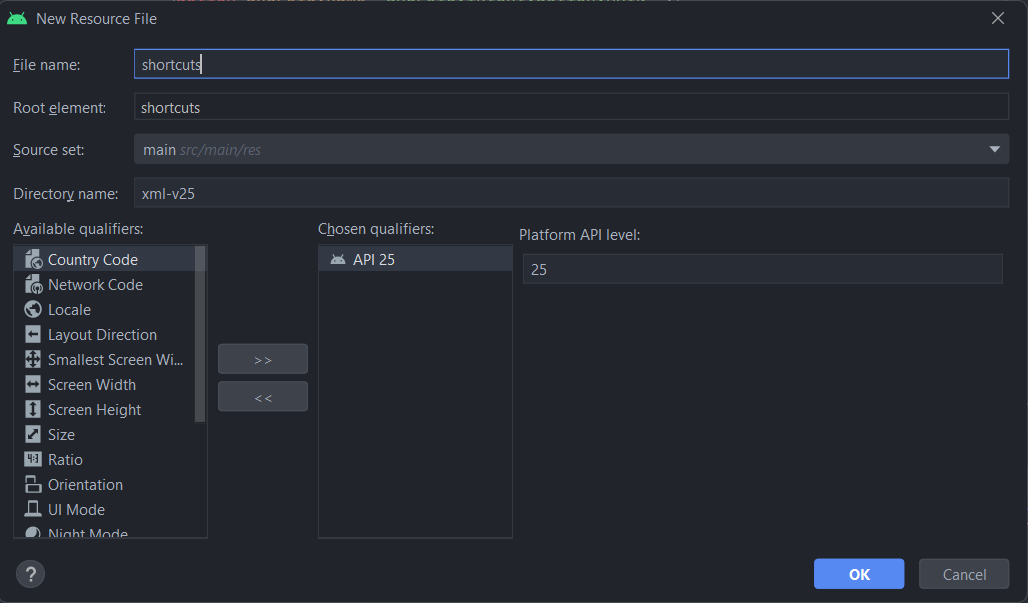
-
Select OK.
-
Open the file
shortcuts.xml (v25). -
Inside the shortcuts element is where we need to add our individual
<shortcut>tags. Copy and paste the code below inside<shortcuts>.<shortcut></shortcut> -
The
<shortcut>element is currently empty. For a static shortcut, we must add at least the two required attributes,android:shortcutIdandandroid:shortcutShortLabel. -
Add these two attributes to
<shortcut>. Please note thatandroid:shortcutIdcannot reference a String resource, whileandroid:shortcutShortLabelmust reference a String resource. Your code will not compile if these rules are not followed.android:shortcutId="Shortcut ID" android:shortcutShortLabel="@string/shortcut_label"> -
Open up the file
strings.xmland add the String resource used byandroid:shortcutShortLabelpreviously.<string name="shortcut_label">Example Shortcut Label</string>
The shortcut Intent
The <shortcut> element supports an inner element called the <intent> element. This element requires an android:action attribute at the minimum.
To keep the code simple, we can just have the action open up the Main activity of our app. To do that, add the <intent> below as an inner element of <shortcut>.
<intent
android:action="android.intent.action.VIEW"
android:targetPackage="com.example.daniwebstaticshortcut"
android:targetClass="com.example.daniwebstaticshortcut.MainActivity" />Add meta-data to the manifest
The very last step in our project would be to add the required shortcuts information to the App entry point in the manifest file. To do that, follow the steps below:
-
Open up the file app/manifests/
AndroidManifest.xml -
Find the
<activity>with the<intent-filter>below.<action android:name="android.intent.action.MAIN" /> <category android:name="android.intent.category.LAUNCHER" /> -
Add the
<meta-data>element below as an inner element of<activity>.<meta-data android:name="android.app.shortcuts" android:resource="@xml/shortcuts" />
Test the shortcut
We have completed all of the steps required to create a static shortcut. It is time to see if it works.
- Launch the app.
- Press Home to return to the home screen.
- If the app icon is not on the launcher screen, add it to the launcher screen.
- Hold down your cursor/finger on the icon until the static shortcut appears.
If your static shortcut is not showing, check the Solution Code section to verify that you are not missing anything.
Solution Code
shortcuts.xml (v25)
<?xml version="1.0" encoding="utf-8"?>
<shortcuts xmlns:android="http://schemas.android.com/apk/res/android">
<shortcut
 android:shortcutId="Shortcut ID"
 android:shortcutShortLabel="@string/shortcut_label">
<intent
   android:action="android.intent.action.VIEW"
   android:targetPackage="com.example.daniwebstaticshortcut"
   android:targetClass="com.example.daniwebstaticshortcut.MainActivity" />
</shortcut>
</shortcuts>strings.xml
<resources>
<string name="app_name">Daniweb Static Shortcut</string>
<string name="shortcut_label">Example Shortcut Label</string>
</resources>AndroidManifest.xml
<?xml version="1.0" encoding="utf-8"?>
<manifest xmlns:android="http://schemas.android.com/apk/res/android"
package="com.example.daniwebstaticshortcut">
<application
android:allowBackup="true"
android:icon="@mipmap/ic_launcher"
android:label="@string/app_name"
android:roundIcon="@mipmap/ic_launcher_round"
android:supportsRtl="true"
android:theme="@style/Theme.DaniwebStaticShortcut">
<activity
android:name=".MainActivity"
android:exported="true">
<intent-filter>
 <action android:name="android.intent.action.MAIN" />
 <category android:name="android.intent.category.LAUNCHER" />
</intent-filter>
 <meta-data android:name="android.app.shortcuts"
    android:resource="@xml/shortcuts" />
</activity>
</application>
</manifest>Summary
We have learned how to create static shortcuts. The project only uses required minimum attributes for shortcut elements. You can play around and add other things such as icons if you wish.
The full project code can be found here https://github.com/dmitrilc/DaniwebStaticShortcut