Introduction
Snackbars are great for displaying brief messages providing feedback to your users.
In this tutorial, we will learn how to create Snackbars.
Goals
At the end of the tutorial, you would have learned:
- How to create a Snackbar.
Tools Required
- Android Studio. The version used in this tutorial is Arctic Fox 2020.3.1 Patch 4.
Prerequisite Knowledge
- Basic Android.
Project Setup
To follow along with the tutorial, perform the steps below:
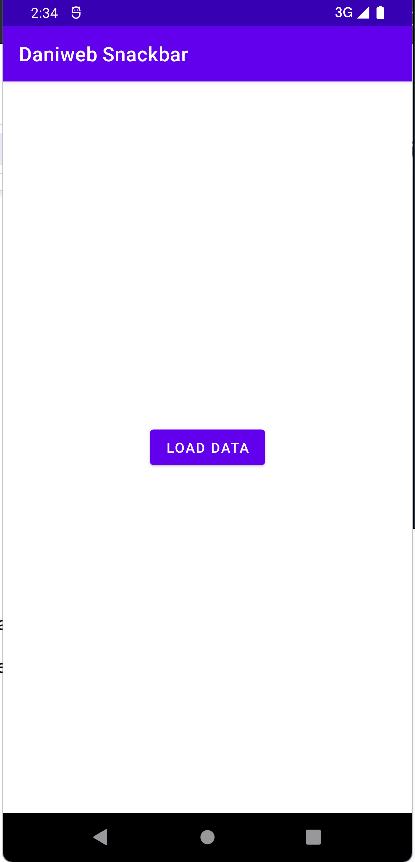
- Create a new Android project with the default Empty Activity.
- Remove the “Hello World!” TextView from
acitivity_main.xml. - Add a new Button to
activity_main.xml. - Constraint the Button to all 4 sides of the ConstraintLayout.
- Extract the hard-coded
android:text attributeof Button to a String resource and also change the value to “Load Data”. - Add the attribute
android:id="@+id/main"to the ConstraintLayout element inactivity_main.xml.
Your activity_main.xml file should look similar to the code below.
<?xml version="1.0" encoding="utf-8"?>
<androidx.constraintlayout.widget.ConstraintLayout xmlns:android="http://schemas.android.com/apk/res/android"
   xmlns:app="http://schemas.android.com/apk/res-auto"
   xmlns:tools="http://schemas.android.com/tools"
   android:layout_width="match_parent"
   android:layout_height="match_parent"
   tools:context=".MainActivity"
   android:id="@+id/main">

   <Button
       android:id="@+id/button"
       android:layout_width="wrap_content"
       android:layout_height="wrap_content"
       android:text="@string/button"
       app:layout_constraintBottom_toBottomOf="parent"
       app:layout_constraintEnd_toEndOf="parent"
       app:layout_constraintStart_toStartOf="parent"
       app:layout_constraintTop_toTopOf="parent" />
</androidx.constraintlayout.widget.ConstraintLayout>
Snackbars Overview
Snackbar (com.google.android.material.snackbar.Snackbar) is a class in the Material Android library. Snackbars can only be added programmatically.
Snackbars display a brief message at the bottom of the screen and should disappear by themselves without user intervention.
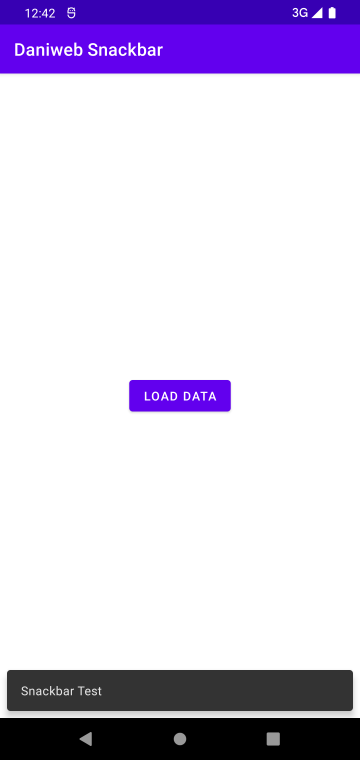
Snackbars should NOT be intrusive to your users, so you should follow Material Design guidelines here when using Snackbars.
Bind Button to Snackbar
Before getting into making the Snackbar, let us bind the Button to an action first. Our desired program will display a Snackbar stating that the Application is unable to load data right now, and advise the user to try again in a few seconds.
Loading data is out of scope for this tutorial, so our program will always show the Snackbar on button presses to only simulate the behavior of a Snackbar.
-
In
Main.Activity.kt, create a function calledbindButton()to bind the Button to an action. At this point, theonClickListeneris just empty.private fun bindButton(){ val button = findViewById<Button>(R.id.button) button.setOnClickListener { } } -
Next, call it in
onCreate().override fun onCreate(savedInstanceState: Bundle?) { super.onCreate(savedInstanceState) setContentView(R.layout.activity_main) bindButton() }
Creating Snackbar objects
To create Snackbars, we need to use the Snackbar.make() functions. The function that we will use in this tutorial is
public static Snackbar make (View view,
int resId,
int duration)The 3 arguments that we need to provide are the parent for the Snackbar to appear in, the resource ID for the Snackbar text, and the duration (in milliseconds) for the Snackbar to disappear.
For the duration argument, you can also use the predefined constants that Snackbar inherited from BaseTransientBottomBar, namely:
Snackbar.LENGTH_SHORTSnackbar.LENGTH_LONGSnackbar.ENGTH_INDEFINITE
Follow the steps below to create a Snackbar:
-
In
strings.xml, add the String resource below. This String resource will be used as the Snackbar text.<string name="snackbar_loading_fail">Can\'t load data. Retry in 5 seconds.</string> -
In the function
findButton(), add the lines of code below to create references to the ConstraintLayoutView as well as the Snackbar text.val mainView = findViewById<ConstraintLayout>(R.id.main) val error = getString(R.string.snackbar_loading_fail) -
In
findButton(), create the Snackbar object and assign it to thesnackbarvariable .val snackbar = Snackbar.make( mainView, error, Snackbar.LENGTH_SHORT) -
The Snackbar will not do anything unless we call the function
show()on it. Inside thesetOnClickListenerblock, callshow()on the snackbar reference.snackbar.show() -
Your
bindButton()function should now look like this:private fun bindButton(){ val button = findViewById<Button>(R.id.button) val mainView = findViewById<ConstraintLayout>(R.id.main) val error = getString(R.string.snackbar_loading_fail) val snackbar = Snackbar.make( mainView, error, Snackbar.LENGTH_SHORT) button.setOnClickListener { snackbar.show() } }
Run the App
We are now ready to run our App.
When you press the Load Data Button, you will see the Snackbar appears at the bottom of the screen and disappears after a few seconds.
Solution Code
MaintActivity.kt
package com.example.daniwebsnackbar
import androidx.appcompat.app.AppCompatActivity
import android.os.Bundle
import android.widget.Button
import androidx.constraintlayout.widget.ConstraintLayout
import com.google.android.material.snackbar.Snackbar
class MainActivity : AppCompatActivity() {
 override fun onCreate(savedInstanceState: Bundle?) {
    super.onCreate(savedInstanceState)
    setContentView(R.layout.activity_main)
    bindButton()
 }
private fun bindButton(){
val button = findViewById<Button>(R.id.button)
 val mainView = findViewById<ConstraintLayout>(R.id.main)
 val error = getString(R.string.snackbar_loading_fail)
 val snackbar = Snackbar.make(
    mainView,
    error,
    Snackbar.LENGTH_SHORT)
button.setOnClickListener {
snackbar.show()
}
}
}strings.xml
<resources>
   <string name="app_name">Daniweb Snackbar</string>
   <string name="button">Load Data</string>
   <string name="snackbar_loading_fail">Can\'t load data. Retry in 5 seconds.</string>
</resources>
activity_main.xml
<?xml version="1.0" encoding="utf-8"?>
<androidx.constraintlayout.widget.ConstraintLayout xmlns:android="http://schemas.android.com/apk/res/android"
   xmlns:app="http://schemas.android.com/apk/res-auto"
   xmlns:tools="http://schemas.android.com/tools"
   android:layout_width="match_parent"
   android:layout_height="match_parent"
   tools:context=".MainActivity"
   android:id="@+id/main">

   <Button
       android:id="@+id/button"
       android:layout_width="wrap_content"
       android:layout_height="wrap_content"
       android:text="@string/button"
       app:layout_constraintBottom_toBottomOf="parent"
       app:layout_constraintEnd_toEndOf="parent"
       app:layout_constraintStart_toStartOf="parent"
       app:layout_constraintTop_toTopOf="parent" />
</androidx.constraintlayout.widget.ConstraintLayout>
Summary
We have learned how to create Snackbars. The full project code can be found here https://github.com/dmitrilc/DaniwebSnackbar.