Introduction
Android provides many ways to perform background tasks, such as Services, WorkManager, or even threads. In this tutorial, we will learn how to create a Service for our Android app.
Goals
At the end of the tutorial, you would have learned:
- How to create a Service.
Tools Required
- Android Studio. The version used in this tutorial is Bumblebee 2021.1.1 Patch 2.
Prerequisite Knowledge
- Basic Android.
Project Setup
To follow along with the tutorial, perform the steps below:
-
Create a new Android project with the default Empty Activity.
-
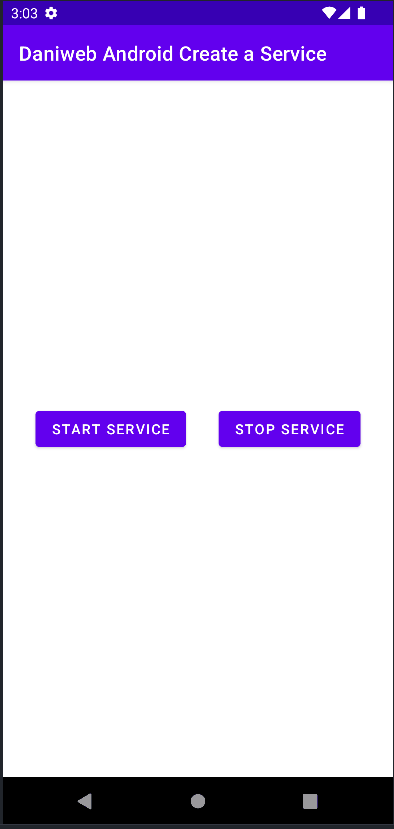
Replace activity_main.xml with the code below. This removes the default “Hello World!” Textview and adds two Buttons for starting and stopping the Service.
<?xml version="1.0" encoding="utf-8"?> <androidx.constraintlayout.widget.ConstraintLayout xmlns:android="http://schemas.android.com/apk/res/android" xmlns:app="http://schemas.android.com/apk/res-auto" xmlns:tools="http://schemas.android.com/tools" android:layout_width="match_parent" android:layout_height="match_parent" tools:context=".MainActivity"> <Button android:id="@+id/button_startService" android:layout_width="wrap_content" android:layout_height="wrap_content" android:text="@string/start_service" app:layout_constraintBottom_toBottomOf="parent" app:layout_constraintEnd_toStartOf="@+id/button_stopService" app:layout_constraintHorizontal_bias="0.5" app:layout_constraintStart_toStartOf="parent" app:layout_constraintTop_toTopOf="parent" /> <Button android:id="@+id/button_stopService" android:layout_width="wrap_content" android:layout_height="wrap_content" android:text="@string/stop_service" app:layout_constraintBottom_toBottomOf="parent" app:layout_constraintEnd_toEndOf="parent" app:layout_constraintHorizontal_bias="0.5" app:layout_constraintStart_toEndOf="@+id/button_startService" app:layout_constraintTop_toTopOf="parent" /> </androidx.constraintlayout.widget.ConstraintLayout> -
Add the
<string>resources below into strings.xml.<string name="start_service">Start Service</string> <string name="stop_service">Stop Service</string> -
In
MainActivity#onCreate(), obtain a reference tobutton_startService.val startServiceButton = findViewById<Button>(R.id.button_startService) -
Obtain a reference to
button_stopServiceas well.val stopServiceButton = findViewById<Button>(R.id.button_stopService)
Creating the Service class
A service is a class that extends Android.app.Service. From the Service class, the only required function that we must override is the onBind() function. There are other functions such as onStartCommand() or onDestroy() for us to override as well.
There are three different types of Service:
- Foreground Service: A service that the user is aware of.
- Background Service: A service that the user is not aware of.
- Bound Service: A service where the calling client binds to it. It can communicate with the client via IPC (interprocess communication). If the service is not a bound service, then we can just return
nullfrom theonBind()function.
To create a Service class, follow the steps below.
-
Create a new class called SampleService.
class SampleService { } -
Adds
Serviceas the parent class.class SampleService : Service() { } -
Implements
onBind()by simply returningnull.override fun onBind(p0: Intent?): IBinder? = null -
That is all that is needed for the Service to work, but let us add some basic functionality, such as displaying a Toast when it starts. To do that, we will override
onStartCommand().override fun onStartCommand(intent: Intent, flags: Int, startId: Int): Int { Toast.makeText( this, "Service Started", Toast.LENGTH_SHORT ).show() return START_NOT_STICKY } -
Also, override
onDestroy()to display another Toast when the Service is stopped.override fun onDestroy() { super.onDestroy() Toast.makeText( this, "Service Stopped", Toast.LENGTH_SHORT ).show() }
Declare the Service in the Manifest
Next, we will have to register the Service in the Manifest using <service>. In AndroidManifest.xml, inside of the <application> tag, add the <service> tag below.
<service android:name=".SampleService"
android:exported="false"/>android:exported=”false” is a flag that prevents other Apps from using our Service.
Start and Stop the Service
To start the service, we can call the startService() function from the Context object. It takes an Intent object. To enable starting and stopping the service, follow the steps below.
-
In
MainActivity#onCreate, create an Intent to start our SampleService. Here, we pass in the context object and the Class object of the Service.val serviceIntent = Intent( this, SampleService::class.java ) -
Now, bind
button_startServiceto thestartService()call.startServiceButton.setOnClickListener{ startService(serviceIntent) } -
Lastly, bind
button_stopServiceto thestopService()function.stopServiceButton.setOnClickListener { stopService(serviceIntent) }
Run the App
We are now ready to run the app. Pressing the “Start Service” Button should start SampleService, and pressing “Stop Service” Button should stop SampleService. Refer to the Gif below to check your App’s behavior.
Solution Code
SampleService.kt
package com.codelab.daniwebandroidcreateaservice
import android.app.Service
import android.content.Intent
import android.os.IBinder
import android.widget.Toast
class SampleService : Service() {
override fun onBind(p0: Intent?): IBinder? = null
override fun onStartCommand(intent: Intent, flags: Int, startId: Int): Int {
Toast.makeText(
this,
"Service Started",
Toast.LENGTH_SHORT
).show()
return START_NOT_STICKY
}
override fun onDestroy() {
super.onDestroy()
Toast.makeText(
this,
"Service Stopped",
Toast.LENGTH_SHORT
).show()
}
}strings.xml
<resources>
<string name="app_name">Daniweb Android Create a Service</string>
 <string name="start_service">Start Service</string>
 <string name="stop_service">Stop Service</string>
</resources>MainActivity.kt
package com.codelab.daniwebandroidcreateaservice
import android.content.Intent
import androidx.appcompat.app.AppCompatActivity
import android.os.Bundle
import android.widget.Button
class MainActivity : AppCompatActivity() {
override fun onCreate(savedInstanceState: Bundle?) {
super.onCreate(savedInstanceState)
setContentView(R.layout.activity_main)
val startServiceButton = findViewById<Button>(R.id.button_startService)
val stopServiceButton = findViewById<Button>(R.id.button_stopService)
val serviceIntent = Intent(
this,
SampleService::class.java
)
startServiceButton.setOnClickListener{
startService(serviceIntent)
}
stopServiceButton.setOnClickListener {
stopService(serviceIntent)
}
}
}activity_main.xml
<?xml version="1.0" encoding="utf-8"?>
<androidx.constraintlayout.widget.ConstraintLayout xmlns:android="http://schemas.android.com/apk/res/android"
xmlns:app="http://schemas.android.com/apk/res-auto"
xmlns:tools="http://schemas.android.com/tools"
android:layout_width="match_parent"
android:layout_height="match_parent"
tools:context=".MainActivity">
<Button
android:id="@+id/button_startService"
android:layout_width="wrap_content"
android:layout_height="wrap_content"
android:text="@string/start_service"
app:layout_constraintBottom_toBottomOf="parent"
app:layout_constraintEnd_toStartOf="@+id/button_stopService"
app:layout_constraintHorizontal_bias="0.5"
app:layout_constraintStart_toStartOf="parent"
app:layout_constraintTop_toTopOf="parent" />
<Button
android:id="@+id/button_stopService"
android:layout_width="wrap_content"
android:layout_height="wrap_content"
android:text="@string/stop_service"
app:layout_constraintBottom_toBottomOf="parent"
app:layout_constraintEnd_toEndOf="parent"
app:layout_constraintHorizontal_bias="0.5"
app:layout_constraintStart_toEndOf="@+id/button_startService"
app:layout_constraintTop_toTopOf="parent" />
</androidx.constraintlayout.widget.ConstraintLayout>AndroidManifest.xml
<?xml version="1.0" encoding="utf-8"?>
<manifest xmlns:android="http://schemas.android.com/apk/res/android"
package="com.codelab.daniwebandroidcreateaservice">
<application
android:allowBackup="true"
android:icon="@mipmap/ic_launcher"
android:label="@string/app_name"
android:roundIcon="@mipmap/ic_launcher_round"
android:supportsRtl="true"
android:theme="@style/Theme.DaniwebAndroidCreateAService">
<activity
android:name=".MainActivity"
android:exported="true">
<intent-filter>
<action android:name="android.intent.action.MAIN" />
<category android:name="android.intent.category.LAUNCHER" />
</intent-filter>
</activity>
<service android:name=".SampleService"
   android:exported="false"/>
</application>
</manifest>Summary
We have learned how to create a Service in this tutorial. The full project code can be found at https://github.com/dmitrilc/DaniwebAndroidCreateService
